Installing ssd macbook pro 13. Replacing SSD in MacBook Air: instructions. Step-by-step instructions "Replacing a hard drive in a MacBook Pro"
Fair, not too high or too low. There should be prices on the Service website. Necessarily! without "asterisks", clear and detailed, where it is technically possible - the most accurate, final.
If spare parts are available, up to 85% percent of complex repairs can be completed in 1-2 days. Modular repairs take much less time. The site indicates the approximate duration of any repair.
Warranty and Liability
A warranty should be given for any repair. Everything is described on the site and in the documents. A guarantee is self-confidence and respect for you. A 3-6 month warranty is good and enough. It is needed to check the quality and hidden defects that cannot be detected immediately. You see honest and realistic terms (not 3 years), you can be sure that you will be helped.
Half the success in Apple repair is the quality and reliability of spare parts, so a good service works directly with suppliers, there are always several reliable channels and a warehouse with proven spare parts for current models so that you do not have to waste extra time.
Free diagnostics
This is very important and has already become a rule of good form for the service center. Diagnosis is the most difficult and important part of the repair, but you should not pay a dime for it, even if you do not repair the device after it.
Service repair and delivery
Good service appreciates your time, therefore offers free shipping. And for the same reason, repairs are carried out only in the workshop of the service center: it can be done correctly and according to technology only at a prepared place.
Convenient schedule
If the Service works for you, and not for itself, then it is always open! absolutely. The schedule should be convenient in order to be in time before and after work. Good service works on weekends and holidays. We are waiting for you and working on your devices every day: 9:00 - 21:00
The reputation of professionals consists of several points
Age and experience of the company
Reliable and experienced service is known for a long time.
If a company has been on the market for many years, and it has managed to establish itself as an expert, they turn to it, write about it, recommend it. We know what we are talking about, since 98% of incoming devices in the SC are restored.
We are trusted and passed on complex cases to other service centers.
How many masters in the directions
If you are always waiting for several engineers for each type of equipment, you can be sure:
1. there will be no queue (or it will be minimal) - your device will be taken care of immediately.
2. You give Macbook repair to an expert specifically in the field of Mac repairs. He knows all the secrets of these devices
technical literacy
If you ask a question, the specialist must answer it as accurately as possible.
To give you an idea of what you need.
Will try to solve the problem. In most cases, from the description, you can understand what happened and how to fix the problem.
This page provides a step-by-step instruction that details how to replace the old HDD MacBook Pro for a new one.
First you need to prepare the necessary tools: a small Phillips screwdriver and a size 6 asterisk screwdriver. When choosing a hard drive in the cabin, check that it has a sata interface and a 2.5 form factor.
Step-by-step instructions "Replacing a hard drive in a MacBook Pro"
Stage preparatory
The first step is to turn off the laptop, pull out MagSafe and remove the battery. The battery needs to be removed not only because you want to turn off the laptop, but also because you need to remove the screws in the battery compartment.
At the 1st stage, you need to unscrew 3 screws with a Phillips screwdriver that hold the cover of the compartment with slats random access memory MacBook. The bar is easy to remove - put it aside.
At stage 3, the most entertaining procedure is ahead - unscrewing the screws in the outer part of the case. There are 18 of them in total: 4 - at the bottom, 4 - at the end on the right, 4 - at the end on the left and 2 - near the display hinge.
Now it has reached the most difficult stage. After you have unscrewed all the screws and screws, the keyboard cover can be detached. But problems may arise. On the opposite side of the display, the cover is held by several latches. Try to move the cover, if it does not come out - pry with a thin flat screwdriver.
Be extremely careful at this stage, as there is a high risk of breaking the latches, bending the aluminum bottom, or warping the plastic of the cover.
As soon as the lid comes off, do not rush to throw it away from the almost disassembled MacBook. The point is that the lid motherboard connects a thin ribbon wire to be disconnected. It is very simple to do this: you need to lift the cover with the keyboard up, as far as the length of the cable allows. You will immediately see it and understand how to disconnect the wire.
Step 6 is to remove the old hard drive. It is located on the bottom left. First, carefully unscrew and remove the thin bar that secures the hard drive, pressing the screw by the silicone "lugs" to the computer case. After the bar is removed, you can pull out the screw, disconnecting from the sata from above. Silicone "ears" need to be unscrewed from the old disk and screwed to the new one. The screw seems to hang on them, and during a fall or impact, the rubber suspension softens the mechanical force.
Finally, you need to install a new drive, doing everything in reverse order.
As you can see, the replacement procedure hard drive in Macbook Pro it is quite possible to do at home! If you don’t succeed or don’t have the skills and time, contact our service center, you can familiarize yourself with the price list.
(early 2011) at home.
There is a crisis in the yard, and dreams of buying a new Macbook are dissipating like smoke. In this harsh time, when a kilogram of ordinary cucumbers costs like a kilogram of Israeli apples, it's time to get a screwdriver and upgrade your faithful aluminum comrade with your own hands.
If there is no screwdriver, hands, or lack of courage, if you please, turn to the professionals of modding and repair. Proven masters live in the company modmac who, with unwavering hands, will ruthlessly dismantle any gadget, fix it and assemble it back without unnecessary remaining parts.
On a winter Saturday morning, by the pattern of clouds in the sky, I realized - it's time! Having made a backup, my MacBook Pro and I went to workshop for rejuvenation surgery. The plans included replacing the native HDD cable with a new one, as well as replacing the optical drive with a super-fast SSD drive using a special Optibay tray.
Few people know, but if you put an SSD drive instead of a native HDD, and install a native HDD as a second hard drive instead of a CD drive, then in this situation the system will work a little slower. Better SSD stick the disk in place of the optical drive, and leave the native HDD in its place. Performance will be higher.

Upon arrival, my laptop immediately passed into the hands of the master, and I got the small role of an impassive extra, who recorded on camera every movement of the specialist’s hands.
Training
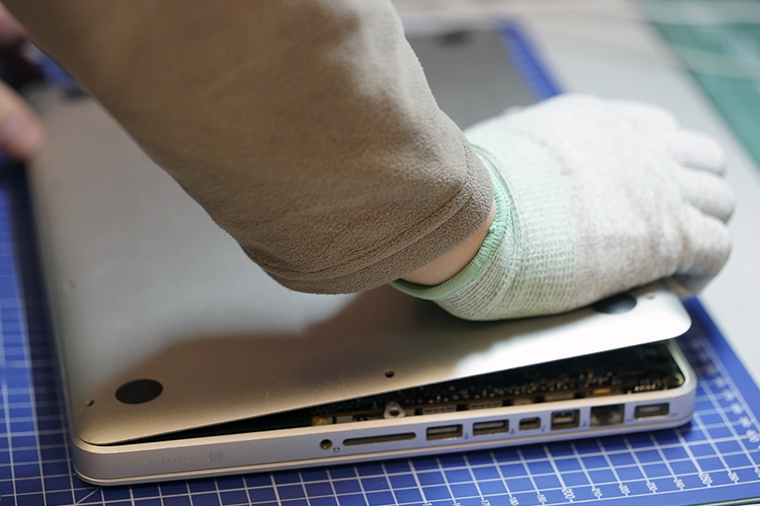
So, the MacBook Pro is located on the table, turned upside down, revealing its defenseless belly to our eyes. With deft movements of a Phillips screwdriver, 10 screws were unscrewed along the perimeter of the back cover. And then, with little effort, the lid was removed and carefully set aside.


Once again, I marveled at the ergonomic arrangement of all components inside the brainchild of Steve Jobs. How fascinating all the stuffing is fitted to each other!

The first stage is successfully completed, we move on to the next level.
HDD cable replacement
In my MacBook, the hard drive is removed quite simply. In some models, for example, to pull out the HDD, you must first remove the battery, but this is not our case. So here's what you need to do, point by point:
1) Disconnect the cable leading from the battery to the board;


2) unscrew the two screws and pull out the clamping bar;


3) gently pull the hard drive by the special tab and with your fingers (pick, special plastic spatula) disconnect the cable from the hard drive.


The hard drive cable is very fragile, it is not recommended to pull, tear and twist it strongly.

Why you need to change the cable to a new one: sometimes (rarely, but still) after replacing an ordinary HDD with an SSD, the MacBook drive starts to behave strangely. It seems that disk utility sees the new SSD, formats it and does not find any errors; The operating system is downloaded, but all installation attempts are interrupted by a gray screen with a flashing folder icon or a question mark.

In this case, replacing the hard drive cable helps. The operation is very jewelry and requires confident movements and some skill in such actions. Here is how the HDD cable is replaced:
1) Carefully disconnect the cable connector from the board, unscrew the two screws that fix the cable in the case and the two screws that fix the black bar on the front inner wall of the case.


With your fingers, carefully pull out the black bar to which the HDD cable is glued and be horrified by the miniature size of the connector, which must be carefully removed.

At this stage, you need to gather all your concentration into a fist and disconnect the connector from the HDD cable with tweezers. You can’t swear at your mother, it’s desirable to breathe every other time.


After this dangerous procedure, you can exhale and relax, the HDD cable is completely removed.

So, at this stage, we have removed the native hard drive and completely disconnected its cable. To install a new cable, all the above steps must be repeated in reverse order. Again, the hardest part is connecting the small connector to the connector on the new HDD cable.
Replacing an optical drive with an SSD drive


Carefully disconnect the cable responsible for Airport/Bluetooth and the camera cable from the board. These cables (like most others) are very fragile and brittle.


Then carefully remove the cable around the perimeter of the CD drive and disconnect the antenna connector.


The easiest thing left is to unscrew the three screws holding the optical drive, carefully remove it, and disconnect the cable connector. Everything, half the work is done, now you need to insert an SSD drive into the resulting void.
SSD and Optibay


Everything is simple here. An Optibay tray is taken, a new SSD drive is inserted into it, two fixing screws need to be tightened on the side, a short cable from the CD drive, which was removed in the previous step, is inserted into the tray, and the entire resulting structure is inserted into place. In conclusion, repeat all the above manipulations to remove the drive in reverse order.

At the very end, the main thing is not to forget to reconnect the battery cable, which was disconnected at the very beginning of this instruction article.
Note to the owner

After “pumping” the MacBook wizard from modmac can set up something like Fusion Drive.
Fusion Drive is a technology that combines a conventional hard disk drive (HDD) and solid state drive (SSD) with 128 GB of flash memory into a single logical volume. Mac OS X automatically manages its contents, so frequently used files such as applications, documents, photos (and so on) are dynamically moved to flash memory for faster access. For example, if a program is used frequently, it will automatically be moved to an SSD drive to speed up access to it. As a result, startup time is reduced, and as the system accumulates information about the computer usage profile, programs start up and access files faster.
– Wikipedia
Through cunning manipulations with terminal commands, the guys from modmac can configure the MacBook so that the system will see one shared drive, with a capacity of 768 gigabytes (total capacity SSD and HDD drives) as if it were a single SSD drive.
Productivity grows, nerves are protected, the owner is happy. I highly recommend. The only caveat is that during the operation of the laptop, you need to avoid emergency shutdowns, the Fusion Drive may “crumble”, and you will have to restore all the information again ( so you should always remember about backup!).

We all know that a computer or laptop consists of many parts and one of the most important is a hard drive, or as it is also called HDD. Of course, in a MacBook, all the details are important, but if the speaker or microphone breaks, then this can still be experienced, and the loss of a hard drive is unlikely. The Mac simply won't boot up or will run very slowly. In addition, HDDs are subject to wear and tear, so one of the most popular reasons for calling for services is macbook hard drive replacement.
Macbook Air and Pro Retina use solid state drives, I will write a separate article about them - replacing ssd macbook.
The second reason for dealing with HDD replacement is an upgrade. In this case, clients either do not have enough memory, or they need a faster disk - ssd. In this article, we will look at both reasons and talk about some of the nuances of replacing a hard drive on a MacBook.
Replacing a failed hard drive on a MacBook pro 13 or 15.
We are approached daily by people whose MacBook fails for various reasons, and not infrequently this is due to the hard drive. The HDD in any MacBook Pro or Air model is one of the most vulnerable and fragile parts. There are many factors that negatively affect the performance of the MacBook HDD, and we will highlight the main ones:
- Power surges and, as a result, incorrect shutdown of the disk;
- Operation of the MacBook pro in extreme conditions (vibrations, falls, etc.);
- Wear or, more simply, normal aging;
- Factory marriage (this problem is rare).
Advice: To extend the life of the hdd, turn off the macbook before transportation. In this case, no power is supplied and the mechanical parts of the disk will remain at rest.
Malfunction symptoms are usually:
- Macbook won't boot up or takes a very long time to boot up;
- The system freezes and runs slowly, the Mac slows down;
- Some files and folders cannot be opened, file system errors.
What to do if at least one symptom is familiar to you? If the computer is still booting and working, then first of all try to copy all the important data to external media or a USB flash drive as soon as possible. When the data is safe, you can try to check the HDD using the SMART Utility utility. If it shows errors in the "bad sector" section, then you can prepare to replace the hard drive on your MacBook. If there are no errors, then try reinstalling the system, it should help.
Replacing hdd with ssd in macbook.
Quite often ssd change to increase the speed of the laptop. If the Mac slows down and works slowly, then an upgrade can be a salvation. Judge for yourself - the speed of reading and writing a conventional hard drive in various tests reaches from 50 to 150 Mb / s. For ssd, these parameters reach up to 500 mb / s. Thus, an SSD drive is 3 to 10 times faster than a hard drive.
In practice, if in Macbook Pro 13 or 15 (a1278 and a1286) you put ssd instead of hdd, then booting the system from the off state will take about 23 seconds. Agree, the result is very good. Loading programs will also be much faster. If earlier you had time to read all the names of the creators of Photoshop, now you are unlikely to be able to do this;)
Also, in addition to installing an SSD instead of an HDD, you can install an additional disk instead of a CD drive in a MacBook. This is done using an adapter called Optibay. The most optimal option in terms of finances and space is installation as the main SSD drive on 120-240Gb, and in place of the CD drive, install a 500 Gb-1 Tb HDD, while you can use the old disk if it is working. Replacing hdd with ssd in macbook pro will give your old mac a second life.
Replacing a disk in iMac (Aimak)
Despite the fact that Aimak 21”, 24” or 27” (models a1311, a1312 of 2009-2011 and a1418, a1419 of 2012-2015) is still in place, disk wear is also not alien to him, but there is one important nuance. If any 2.5 ″ laptop drives are suitable for Macbook, then replacing the iMac drive is possible only with a special “native” drive. It's all about the temperature sensor. If you install a regular hard drive, then after replacing the HDD, the fans will start to work at maximum and make unpleasant noise. Upgrading an iMac with an SSD is also possible, just the order is slightly different. Due to the temperature sensor, the ssd is installed in the iMac instead of the CD drive (or in the mini-PCIe slot for models from 2012) and not vice versa, as is the case with the MacBook. Otherwise, the technology and speed are similar.
Replacing a disk in Mac mini (Mac mini)
Replacing a drive on a Mac mini is the same as on a Macbook. Any 2.5" drive will do just fine. Installing an SSD is similar to a CD drive via Optibay.
How to replace hdd or ssd on Macbook
As a rule, the main condition when replacing a hard drive on a MacBook is to save data, because information is often valued more than the laptop itself, or at least on a par with it. There are 2 options here - you can transfer data in folders to an external drive or flash drive, or make a copy of the system using TimeMachine. In the second case, all system settings along with programs will be copied in the same way. When all the data is securely saved, you can start repairing.
We assemble in the reverse order. There should be no extra bolts left;) When the replacement of the Mac HDD is completed, you will have to install operating system and you can use Mac and enjoy life.
If you are too lazy, have no time or just don’t want to bother, then we can do it all for you, starting with saving data (if possible) and ending with installation or upgrade hard disk or SSD. In terms of time, all procedures usually take from several hours to one working day. You can see the cost in the table below. If you have any questions, please call or email us, we will try to help you;)
Let's see if it's possible to upgrade Macbook Air at home, increasing his memory.
This is not difficult. But there are a few very important points to be aware of. Otherwise, you will lose money.
Which MacBook Air models can replace the SSD?
AT MacBook Air before 2010 you can replace the drive with a 1.8-inch SATA SSD. We won’t talk about them today, since computers are outdated, and SSDs of this form factor themselves are publicly available and do not differ in any features that are critical for a Mac. Just bought and installed.
AT MacBook Air models since 2010 year, you can also replace the SSD drive. But there is its rare form, hence the need for this article.
Apple in their repertoire. SSD drives in all modern MacBook Airs have a rather specific connector. 28pin. Thank you for at least not soldering the drive on the motherboard.
Publication from website (@site) Dec 6 2017 at 11:53 PST
Because of this, replacing an SSD is much more complicated, and the following options remain:
1. Purchase an original MacBook SSD. You will have to look for such components, and the price for them is frankly not encouraging.
2. Find a similar 3rd party SSD. Again, everything depends on the price, as they say, the game is not worth the candle.
3. Use a special adapter. A small adapter for $13 from Amazon or $9.5 from AliExpress allows you to install almost any modern M.2 drive instead of the standard one.
A suitable 256 GB SSD will cost 7-10 thousand rubles. For 15-17 thousand rubles. (difference between MacBook Air models) you can find a 512 GB model.
After the upgrade, there will be another 128 GB of stock disk on hand, which can be sold.
Important: it's not enough just to buy a "flat" SSD
Not every SSD is suitable for use with an adapter.
Firstly, The SSD must override the Serial ATA interface and the AHCI (Advanced Host Controller Interface) mechanism. This is usually indicated in the specifications of the device.Secondly, the drive must have a connection key M or universal B&M, but not key B.
Thirdly, the length of the SSD board must not exceed 80mm, otherwise it will not fit. If the drive is too short or an adapter board is used, you will most likely not be able to get into the mounting hole and will have to use double-sided tape to secure the drive.
How to replace an SSD on a MacBook Air
Attention! Replacing computer components yourself will void your warranty. All actions you carry out at your own peril and risk.
To replace, you need a couple of screwdrivers: T5 Torx and P5 Pentalobe.
1. Using P5 Pentalobe unscrew 10 screws on back cover laptop.
2. Gently pry off the cover near the display hinge.
3. To power off the laptop and prevent accidental switching on, it is recommended to disconnect the battery. To do this, you need to find the power connector and pull the plastic tab.
4. Using a T9 Torx screwdriver, disconnect the fastening screw SSD drive.
5. Install a new drive and repeat the operations in reverse order.
That's not all, you need to set up macOS
After replacing the disk, you can clean install macOS or roll backup. In any case, after starting the system, you will need to perform one more operation.
When using a third-party SSD with macOS, the TRIM command must be enabled. Otherwise, the performance of the drive will degrade over time, and write operations will be slower.
Starting from version OS X 10.11 El Capitan You can enable TRIM on all SSDs using the terminal command:
After confirming with an administrator password and restarting the Mac, TRIM will be activated.


