Tutorial for PAINT. Editing photos with standard Microsoft tools_Let's make a photo lighter in a couple of clicks Step-by-step instructions in Paint: how to make a transparent background
Unfortunately, amateur photographs are far from always pleasing to the eye, but you really want to capture unforgettable moments of life on them. However, often such pictures are either too dark, or vice versa - too light. Or the colors on them turn out to be completely unnatural (this happens especially often when using cheap color film): trees become poisonous green, gray asphalt for some reason casts an intense blue color, the sky turns blue from blue to a greenish tint, slightly tanned skin turns red, as if the shooting was carried out in a sauna, and not in a cozy cafe, etc. It is no less disappointing when an interesting frame turns out to be blurry and blurry and does not make the proper impression, or the most beautiful architectural structures in the picture acquire a lot of geometric and optical distortions, or due to an unsuccessful angle when shooting, most of the photo is occupied by irrelevant details, and the main subject is somewhere on the side. In addition, many cameras use flashes to produce red-eye, and scanned images often become darker and blurry. A special conversation is old or not quite old, but already faded photographs, which I would also like to “revive”. In addition, there may be dust and scratches, peeling of the emulsion, developing and printing defects, etc. The reasons for all this are both a lack of professionalism, bad shooting time and inappropriate weather conditions, as well as the use of cheap and low-quality cameras and appropriate film.
As a result, in most cases, pictures have to be edited, so photo correction functions are provided in almost all modern graphics packages. We will devote our today's lesson to the Paint Shop Pro package, whose automatic correction tools can significantly improve pictures even for non-professionals. Nevertheless, in the arsenal of the possibilities of this package there are also tools designed for professional photographers and designers, which allow you to achieve phenomenal results. And within the framework of this article, we will focus on the means of correction that are available to the general public and do not require any additional professional knowledge.
To correct photos in Paint Shop Pro, use the toolbar photo(Photo) opened by the team View=>Toolbars=>Photo(View => Toolbars => Photo), - here are collected all the main options for improving images, designed for amateurs. In addition, in the command menu there is a command Adjust(Adjustment) allowing access to both commands from the panel photo(Photo), and to a whole range of more complex, but no less useful methods of correction. Equally necessary are the tools straighten(Straightening) and Perspective Correction(Perspective Correction) from the Tools toolbar.
Each of the customizable correction options has a preview mode so that any changes you make are immediately visible on the corrected image or on the selected area. In addition, in many dialog boxes you can use the button Save Preset(Save Settings) to save the adjustment settings so that they can be applied to other images later.
Elimination of geometric distortions
Geometric distortions can be divided into perspective and optical, created by the lens due to its imperfection.
Optical distortion, or distortion, is introduced to one degree or another by all lenses. Distortion is manifested in the fact that the scale of the image in the center and along the edges is not the same. Professional photographers, keeping this in mind, resort to various tricks, however, they also end up having to eliminate optical defects from pictures, since they cannot be completely prevented when shooting.
As for perspective defects, the most easily corrected defect of this kind is the tilt of the camera during shooting, which manifests itself in the fact that the objects in the photograph are located at some angle. This is a problem for many inexperienced hobbyists, and in Paint Shop Pro it is extremely easy to solve thanks to the presence of a special tool.
Much more effort is needed to correct perspective distortion in large panoramic and architectural shots. The fact is that in the absence of special equipment, in order to shoot the entire building, you will have to use the widest possible lens and tilt the camera up (otherwise half the frame will be occupied by asphalt) - as a result, there will be a sharp convergence of vertical lines in the pictures. To eliminate this phenomenon, perspective correction is necessary.
Distortion Correction
There are two main distortion options: Barrel Distortion(Barrel distortion), in which the objects in the picture look like they are swollen (Fig. 1), and Pincushion Distortion(Pillow-shaped distortion), when the extreme verticals and horizontals are concave inward (Fig. 2).


It should be noted that Paint Shop Pro is the only graphic package where distortion correction is implemented in an extremely simple way (in Adobe Photoshop this is achieved in a much more complicated way). Here are the commands for this purpose Barrel Distortion Correction(Barrel distortion correction) and Pincushion Distortion Correction(Pincushion distortion correction). They can be called both from the command menu Adjust=>Lens Correction(Adjust => Lens Correction), and from the toolbar photo(The photo).
For an example, open Fig. 3 with pronounced barrel distortion, click the button Barrel Distortion Correction(Barrel distortion correction) and set the parameter values Strength(Strength of impact) - in this example a value of 85 was taken (Fig. 4).


Image straightening
If, due to the inexperience of a novice photographer, the objects in the photo turned out to be located at a certain angle, then it is easy to straighten them with a tool straighten(Straightening). In fact, this will be a normal turn, but unlike it straighten(Straightening) provides maximum convenience when straightening an image, since everything is displayed on the screen, takes place within a second, and guarantees a 100% result.
For example, take a suitable image - in this case, rice is taken. 5 with a clear tilt of the captured objects to the right. Select a tool from the toolbar straighten(Straightening) - the result will be the appearance of a horizontal segment in the photo, limited by markers (Fig. 6). Move and slightly rotate the segment so that it stretches parallel to some part of the image, which should be located strictly horizontally (Fig. 7), and click on the button apply(Apply) - the image will be rotated to the angle you specified (Fig. 8). Now it remains to take the tool Crop (Cropping) and crop the extra background parts of the image that appeared as a result of straightening the photo (Fig. 9 and 10).


Rice. 8. The result of straightening a photo with the Straighten tool


Perspective Correction
Earlier, we have already talked about optical distortions that are possible when shooting. And now let's dwell on the distortions of perspective that occur when photographing architectural structures. Thanks to the perspective correction capabilities of Paint Shop Pro, this operation is no longer a difficult task and even a non-professional can handle it. For horizontal and vertical correction, you can use the commands Effects=>Geometric Effects=>Perspective-Horizontal(Effects=>Geometric Effects=>Perspective Horizontal and Effects=>Geometric Effects=>Perspective-Vertical(Effects=>Geometric Effects=>Vertical Perspective). And in more complex cases, you should turn to the tool Perspective Correction(Perspective Correction), which provides the user with the functions of keystone and other perspective distortion of an image area.
Let's try to correct the image shown in Fig. 11, where both perspective distortion and a clear tilt of the image take place. Therefore, first straighten the image with the tool straighten(Straightening) (Fig. 12 and 13).


Now let's move on to the prospective correction. First, we will carry out a vertical correction with approximately the same parameters as in Fig. 14, since in some cases this is enough to correct the perspective. The result obtained is shown in Fig. 15. Next, you just need to crop the photo, but in our case, unfortunately, one vertical perspective correction will not be enough - you will have to use the tool Perspective Correction(Perspective Correction) and perform keystone perspective correction. Activate the tool Perspective Correction and limit the contours of the perspective in accordance with fig. 16 - the result is shown in fig. 17. Crop the image with the Crop tool (Cropping) (Fig. 18), and then enhance its contrast by using the command Enhance Photo=>(Photo enhancement => Automatic contrast enhancement) from the Photo toolbar with the parameters shown in fig. 19. The result of the correction is shown in fig. twenty.


Now let's look at a more complex example (Fig. 21), which requires both optical and geometric correction, as well as image straightening. In such situations, distortion is always corrected first - in this example, you need to use the command Barrel Distortion(Barrel distortion) at the parameters shown in Fig. 22. Then you should use the tool straighten(Straightening) to straighten the image (fig. 23 and 24) and only after that go to the perspective correction tool Perspective Correction(Perspective Correction) according to Fig. 25 (Fig. 26) and crop the image (Fig. 27).


Removing red-eye
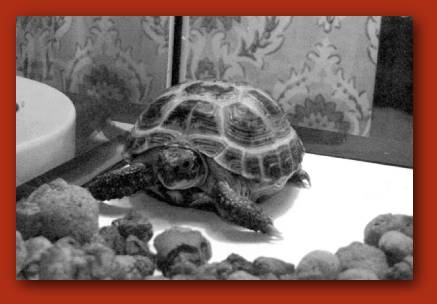
As a rule, when shooting with a flash, an undesirable effect of light reflection from the retina of an animal or human eye occurs - the so-called red-eye effect (in practice, this is similar to the eyes of a cat glowing in the dark, only here the eyes glow not green, but red). It is impossible to avoid such a situation one hundred percent, although modern camera models make it possible to minimize this effect.
Therefore, the ability to eliminate red-eye is available in a variety of graphics packages, and in Paint Shop Pro it is implemented extremely simply and is carried out almost instantly, allowing you to get rid of red-eye in both humans and animals. For this purpose, the command Red Eye Removal(Red-eye Removal). It can be called from the command menu Adjust(Adjustment), and from the pop-up list Enhance Photo(Photo enhancement). Note that the command Red Eye Removal can also help in the case when it is simply necessary to change the color of the eyes of a person in the picture.
Let's try to use this possibility on the example of Fig. 28. After opening the Red-Eye Removal window, you first need to select one of the four methods for forming the pupil and iris of the eye: Auto Human Eye(Automatic eye formation for human), Auto Animal Eye(Automatic eye formation for the animal), Freehand Pupil Outline(Drawing the outline of the eye freehand based on a rectangular area) and Point-to-Point Pupil Outline(Drawing the contour of the eye by points in the form of a closed broken line). The last two options can be used to remove red-eye for both humans and animals, but in general the first two methods are more convenient because they remove red-eye more quickly and have more options. The last two options are designed for non-standard situations, when the shape of a red-colored pupil is very different from a round one, and therefore the first two methods cannot successfully eliminate the red color.
In this case, the situation is simple, so let's focus on the method Auto Animal Eye(Fig. 29). Listed color(Color) determine the appropriate eye color, form a contour around the first eye - for this, simply draw a rectangular contour in the usual way, adjust its size and position, trying to make the contour perfectly match the iris. Then, if necessary, configure other parameters: Pupil lightness(pupil brightness), Glint lightness(flash intensity), Glint size(Flash size), etc. We will carry out a similar procedure with the second eye (Fig. 30). The result obtained is shown in Fig. 31.


Rice. 31. Ultimate appearance images after red-eye removal
And now let's try to eliminate the red-eye effect using the example of a photograph of a child (Fig. 32). From the menu Adjust(Adjustment) select command Red Eye Removal(Removing red-eye), in the window that opens, set the option Auto Human Eye(Automatic eye formation for human), in the list Hue(Hue) define the color of the eyes, in the list color(Color) select the desired shade of the iris. Then, as in the previous case, we will form the desired contour around the first eye, seeking to eliminate the red-eye effect. Here, if necessary, we will adjust the shade and size of the eye and pupil. Let's perform a similar operation for the second eye (Fig. 33) - the result is shown in fig. 34.


Rice. 34. Final appearance of the image after red-eye removal
Color correction, brightness, contrast, saturation and sharpness adjustment
As we have already noted, the photographs that fall into our hands are not always ideal in color - due to unsuccessful shooting, the colors are often unnatural. When shooting in the dark, individual fragments of a photo may appear indistinctly or not be visible at all, an interesting frame will be blurry or not sharp enough, or will have excessively blurred contours of objects. In addition, images are often washed out during scanning, colors in photographs may fade with time, etc. And Paint Shop Pro provides the ability to quickly automatically correct many of these defects found in photographs of this kind.
Photo correction in one step
The easiest and fastest way to correct an image is to use the command One Step Photo Fix from the popup list Enhance Photo(Photo enhancement). As a result, the color balance, brightness, contrast and saturation will be adjusted automatically and simultaneously. This option doesn't give good results for every image, but it never hurts to try.
As an example, let's take Fig. 35, where one-step photo-correction helped us significantly improve the appearance of the image (Figure 36).


Rice. 36. Appearance of the image after automatic photo correction in one step
Adjusting Contrast and Saturation
Since the lack of contrast and saturation of the image is one of the most common defects, and in Paint Shop Pro both can be corrected automatically in a matter of seconds, this topic requires more detailed consideration.
Pay attention to the photo shown in Fig. 37, where the contrast is clearly insufficient. To correct the situation, open from the menu Adjust=>Brightness and Contrast(Adjust=>Brightness and Saturation) command Automatic Contrast Enhancement(Auto Contrast Enhancement) or select a command Automatic Contrast Enhancement(Auto Contrast Enhancement) from the pop-up list Enhance Photo(Photo Enhancement) with the settings shown in fig. 38. As a result, the contrast will clearly increase, and the photograph will take the form shown in fig. 39.


Rice. 39. Appearance of the image after automatic contrast adjustment
Now let's look at a specific example, what results can be achieved just by automatically increasing saturation and contrast. The original image (Fig. 40) was taken in a cave with clearly insufficient lighting - as a result, many spectacular natural elements are simply indistinguishable. Try to use the command (Automatic increase in saturation), setting the parameters in accordance with Fig. 41. The command can be selected both from the command menu Adjust=>Hue and Saturation(Adjust => Hue and Saturation), and from the pop-up list Enhance Photo(Photo enhancement). The picture will look like in Fig. 42.


Rice. 42. Appearance of the image after automatic saturation correction
Increasing the contrast with the parameters shown in Fig. 43. The result obtained is shown in fig. 44.


Tone and color correction of unsuccessfully taken pictures
Before proceeding with the color and tone correction of the image, it is necessary to determine which colors are present in it in excess, and which are clearly not enough. It is not at all easy for a non-professional to do this, so we will focus on the simplest color correction options.
Auto color balance is the easiest and fastest way to correct yellow or blue flare in an image that occurs when photographs were taken under artificial lighting. It is also useful, if necessary, to increase the balance of these colors, for example, when shooting unsuccessfully at night. And sometimes this feature is beneficial in photomontage, when you have to adjust the shooting time.
Pay attention to the photograph of Nicole Kidman (Fig. 45), which clearly shows the imbalance of yellow. Let's try to correct the situation a little, at least partially eliminating the yellow flare of the image. Use the team Adjust=>Color Balance=>Automatic Color Balance(Adjust=>Color balance=>Auto color balance) or select command Automatic Color Balance from the popup list Enhance Photo(Photo Enhancement) and adjust it according to fig. 46. The resulting image will be as in fig. 47.


Rice. 47. Appearance of the image after automatic color balance correction
Consider the third of these situations and try to change the color balance for the photo in fig. 48, where I would like to emphasize the pink tint of the mountains visible in the distance in the rays of the setting sun (in fact, the sun had already almost disappeared, and the picture was taken a little later than I wanted). Let's select the Automatic Color Balance command from the Enhance Photo pop-up list and adjust its parameters as shown in Fig. 49. The result will be fig. fifty.


Rice. 50. Appearance of the image after automatic color balance correction
In more complex cases, you have to resort to correcting all color shades, which is possible using the command color balance(Color balance) - command Adjust=>Color Balance=>Color Balance(Adjust => Color Balance => Color Balance). Let's try to use it on the example of Fig. 51, where we would like to restore the white on the church gables and reduce the amount of blue throughout the image. Open command window color balance(Color balance) and sequentially adjust the color balance for the light areas of the photo - Highlights(Fig. 52), medium tones - Midtones(Fig. 53) and dark areas - Shadows(Fig. 54). Don't forget to check the box Preserve Luminosity(Keep Brightness) to save the photo's brightness values. The result of the transformations is shown in fig. 55. To improve the image, it is also a good idea to increase the saturation with the command Automatic Saturation Enhancement(Auto Saturation) from the pop-up list Enhance Photo(Photo Enhancement) with the settings shown in Fig. 56. The resulting image is shown in fig. 57.


It happens that in the pictures taken, especially when shooting with flash, all or some of the colors look unnatural. And automatic color correction in such cases usually does not give the desired effect. In this case, manual color correction can help out - Manual Color Correction, which provides a more powerful alternative to automatic color correction. It makes it easy to enhance even the most complex images while maintaining the accuracy of any critical colors.
Let's take Fig. 58 - in this case, the skin tone of the face looks clearly unnatural (too much red), which is most likely due to the fact that the flash was taken from too close a distance. Let's try to fix this shortcoming. To do this, carefully select the contours of the face with the tool free hand selection(Freehand selection) by setting it to Edge Seeker with the following settings: Feather 0, Smoothing(Smoothing) - 0, checkbox Antialias enabled, checkbox Sample Merged off (Fig. 59). Let's take a tool dropper(Pipette) and remember (or rather write on paper) the parameters of an unnatural dark reddish skin tone as the initial color (Fig. 60).


Then click on the button Manual Color Correction(Manual Color Correction) Toolbars photo(The photo). In the opened window Manual Color Correction click on color Source(Source) and enter the parameters of the memorized color. Illuminate the switch Preset Target Color(Specified color), choose an option Skintones(Skin tones), open the color block with a list of shades and select the option Indian Skin Light(The skin of an Indian is light) (Fig. 61). Enable checkbox Preserve Saturation(Original Saturation) and leave the box unchecked Preserve Lightness(Initial brightness) (Fig. 62). Rejecting team selection Selections=>Select None(Highlight=>Nothing is selected). We get the result shown in Fig. 63.


Rice. 62. The final option for setting the parameters of Manual Color Correction

Rice. 63. Appearance of the image after the end of manual color correction
Manual color correction is good not only for removing photographic defects - it can also be used simply to give one or another element of the image the desired shade. For example, let's open Fig. 64, which shows a unique white gold pearl ring from Gruosi. Let's try, using the manual color correction mode, to turn the white gold of the jewelry into yellow. Select the ring (Fig. 65), click on the button Manual Color Correction(Manual color correction) and adjust the color correction according to Fig. 66 (note that the list Preset Target Color(Set color) options selected Metals and Gold). The result is shown in fig. 67.


Enhance darkened photos
If you have ever scanned photographs, then you probably had to repeat this procedure more than once due to the fact that the photo turned out lighter and darker. Another situation is also possible, when due to unfortunate shooting conditions, for example, when shooting in the dark, the photos are too dark. Printing such pictures is useless, since most of the objects on them simply will not be visible.
In principle, any of these photographs can be corrected and given an acceptable look. There are many ways to work with such photos in Paint Shop Pro and it is quite difficult to offer any single solution.
Let's take a look at the simpler of these methods.
If you need to greatly lighten the photo in order to see hidden details, then the simplest thing is to use the command Histogram Equalize(Equalization histogram). It redistributes the brightness levels of the active layer and can improve an image that lacks contrast or is too dark. Let's try to apply this in the example of Fig. 68. Open the menu Adjust=>Brightness and Contrast(Adjust => Brightness and contrast) and select the command Histogram Equalize(Equalization histogram). The result obtained is shown in fig. 69.

Rice. Fig. 69. Appearance of the photo after exposure with the Histogram Equalize command
but this way does not always provide the desired result, as the colors in the photo may become unnatural. You can try to go the other way. For example, let's open the original image (Fig. 70) and, to begin with, we will perform automatic photo correction in one step by selecting the command One Step Photo Fix from the popup list Enhance Photo(Photo enhancement). As a result, hidden dark fragments of the image will appear, but it will be clear that the overall tone of the photo is unsuccessful, since it has a clear overshoot of blue - this especially affects the girl's skin color (Fig. 71). To correct the situation, use the automatic color balance correction mode by selecting the command Automatic Color Balance(Auto Color Balance) from the pop-up list Enhance Photo(Photo Enhancement) toolbar photo(Photo) and decrease the amount of blue, as shown in Fig. 72. As a result, the photo will become not so dark, and the color shades on it will look more natural (Fig. 73).


Rice. 71. Appearance of the image after automatic photo correction in one step


Now let's see how much progress can be made using the histogram correction feature, which allows you to adjust the full range of available color intensities for use in a single image, controlling the balance between shadows and highlights in the image. The unique advantage of this option is the ability to balance the location of intermediate tones on the scale between dark and light. For example, let's open the image shown in Fig. 74. Click on the button Histogram adjustment(Histogram Correction) toolbar photo(Photo) or call the command Adjust=>Brightness and Contrast=>Histogram Adjustment(Adjust => Brightness and Contrast => Histogram Correction). Let's adjust the parameters of the histogram in accordance with fig. 75. The main thing here is not to overdo it, since for most images a real improvement in quality is possible only if the gamma correction is increased by no more than 30% - at higher values, the pictures will look faded. As a result, the photograph will become noticeably lighter and many originally hidden details of the image will appear on it (Fig. 76).


There is another way - adjusting the levels. Usually, this option is resorted to when the above methods are ineffective, but only lead to an unnatural brightening of the image, without showing temporarily hidden dark details. This situation also occurs in the photograph shown in Fig. 77. In particular, attempts to correct her histogram do not give the desired effect, and we, for example, absolutely need to highlight the contours of a girl for photomontage. So let's use the command Adjust=>Brightness and Contrast=>Levels(Adjust => Brightness and Contrast => Levels). Let's adjust the level parameters roughly in accordance with Fig. 78 - the essence of the actions when lightening a photo is that it is necessary at the level input levels(Input Levels) move the gray slider to the left. After that, the photograph will also become noticeably lighter, and many of the initially hidden details of the image will also appear on it (Fig. 79).


Approximately the same result can be obtained by simply using the command Brightness/Contrast(Brightness and contrast). Let us take as the initial image the same photograph as shown in Fig. 77 and use the command Adjust=>Brightness and Contrast=>Brightness/Contrast(Adjust => Brightness and Contrast => Brightness/Contrast) by adjusting the parameters according to fig. 80. The result obtained is shown in fig. 81.


Restoring old and faded photos
Over time, photos age, fade and become faded. To restore the color gamut and optimize it in faded photographs, the mode Fade correction(Fade Correction), which is the easiest way to restore the lost look of photos: it restores, corrects and balances the colors of images, and also automatically corrects brightness and contrast.
For example, let's open a rather faded photograph (Fig. 82), click on the button Fade correction(Fading Correction) in the Toolbar photo(Photo) and experimentally set the correction value (for example, as in Fig. 83). The colors will be restored, and the image will probably become the same as in Fig. 84.


When restoring old photographs, which often have folds, cracks, scratches and other similar defects, everything is much more complicated. In the presence of these defects, it is necessary to painstakingly retouch the photo using the cloning method, which we learned in one of the previous lessons. But the techniques we have considered in this lesson can significantly speed up the work and provide a better result. True, there are no standard techniques here, and for each old snapshot you will have to choose your own ways to restore it.
Quite often, in such situations, one-step photo correction can help at the first stage, allowing you to quickly restore color balance, brightness, contrast and saturation. As an example, let's open Fig. 85 and use the command One Step Photo Fix(One Step Photo Correction) from the pop-up list Enhance Photo(Photo enhancement). The result obtained makes an impression (Fig. 86). To some extent, the situation can be improved by adjusting the levels. To do this, use the command Adjust=>Brightness and Contrast=>Levels(Adjust => Brightness and Contrast => Levels) and adjust the level parameters approximately in accordance with fig. 87 - as a result, the picture will be slightly brightened and it will be possible to make out part of the inscription in its lower part (Fig. 88). Now we need to sharpen the image. The easiest way to do this is with the command Clarifi(Clearing) - Adjust=>Brightness and Contrast=>Clarifi(Adjust => Brightness and Contrast => Clear), which allows you to improve photographs without the usual for sharpening effects, the appearance of contrasting details (Fig. 89 and 90). This command is very handy when restoring both old blurry photos and photos taken in poor or diffused lighting. And then you have to act manually and remove scratches and traces of dust and dirt.


Rice. 86. Appearance of the image after automatic photo correction in one step


And now consider another situation (Fig. 91) - here we have to go a slightly different way. At the beginning, if possible, we will also restore the color balance, brightness, contrast and saturation with the command One Step Photo Fix(Fig. 92). And then, in order to somehow clarify the individual details of the image, we will increase its contrast using the command Automatic Contrast Enhancement(Auto Contrast Enhancement) from the pop-up list Enhance Photo(Photo Enhancement) with the settings shown in fig. 93. The result obtained is shown in fig. 94. If after that you reapply One Step Photo Fix, then the clarity of the lines will increase even more and individual fragments of the icon will become more distinct (Fig. 95). The only thing that can improve the situation and make the image of the icon more legible is to sharpen the image. Three commands can be used for this purpose in Paint Shop Pro: Sharpen(sharpen) Sharpen More(sharpen harder) and unsharp mask(Sharpness Mask) from the menu Adjust=>Sharpness(Adjust => Sharpness). In this case, after using the command Adjust=>Sharpness=>Sharpen(Adjust => Sharpen => Sharpen) the picture took the form shown in fig. 96.


Rice. 92. Appearance of the image after the first automatic photo correction in one step


Rice. 94. Appearance of the image after automatic contrast enhancement

Rice. 95. Appearance of the image after the second automatic photo correction in one step
Correction
Auto levelingallows you to bring colors to the average value, that is, very light colors will become darker, dark colors will become lighter.
Invert Colorsallows for each color instead of the color that is there, to put an additional color. If there is an original drawing, as shown below.
Then after the execution of this mode, the next one will appear.

Curves allows you to lighten or darken the drawing according to the schedule. The following window will then appear on the screen.

Here is a curve (in the figure - a straight line), which corresponds to the color, that is, light will correspond to light, dark - dark. Now let's change the shape of the curve. To do this, move the cursor to the line, press the left mouse button and, without releasing the button, move the cursor to another location. Let's assume that the curve shape becomes as shown in the figure below.

Then the original drawing (shown in the previous mode) becomes the next one.

If you change the curve as shown in the figure below.
The drawing will be next.

Moreover, the curve can have an intricate form.

And the drawing too. The option to change the brightness was considered above, but you can change it according to RGB scheme.

Moreover, according to this scheme, you can change the primary colors separately from each other.

In order to do this, check the box Red and remove the checkmarks in other colors. Then move the red curve to the right place. Then we will do the same for green and separately for blue. We get different curves for different colors (and the figure shown below).

Note that the starting point can be moved from bottom to top (for this, when moving, the cursor should be slightly to the left of the graph border). Accordingly, the right point can be set lower.
Coarseness allows you to make the color more or less saturated. Uncheck the option Synchronization and change the position of the sliders.

As a result, the original drawing
Will be next.

Hue and saturationallows you to change the hue, saturation, and lightness of the picture.

Make black and whiteallows you to remove colors, as shown in the figure below.
Sepia allows you to overlay tints on a black and white image. If you apply this mode to the black and white picture shown in the figure above, you will get the following pattern.

Levels allows you to set color levels. When you enter this mode, a window with histograms will appear on the screen. You can change the level for all primary colors (check the boxes to the left of the color name, where R - red - red, G - green - green, B - blue - blue). But you can set the level for an individual color (leaving a tick only near its name, and uncheck the others).
often see nice photos, informative, clear, beautiful, but ..... with a gray background! Those. I understand that they photographed on white, but the photo is gray! The white background shows the work much better. So I decided to make MK for people like me - people who are not capable of mastering Photoshop, but want to upload beautiful photos.
(No Photoshop tutorials needed, please! For the 3rd year I have been periodically trying to learn how to work with it, but it turns out that I can do something only by constantly looking at the MK and online FS manuals, and when you need to process 10-20-30 photos, this is unrealistic - you will have to sit for a week, because if I don't look into the step-by-step MK for FS, I start to get lost )
So, I photograph 50/50: under the light from the window at the brightest time or under the lamp, which I adjust so that it gives a uniform light on the photographed surface. In 90% of cases, for photo processing, I have enough of those techniques that are shown in this MK.
This tutorial shows how to improve photographs where objects are located on a white background or the photographed objects themselves have large "spots" of white.
On each computer where the package is installed office programs Microsoft Office, there is a photo editing program Microsoft office picture manager. (Note - in the version for Win. 7 the program is called "Picture Manager")
1) Open the photo by right-clicking on the photo through Microsoft program Office Picture Manager.
2) In the window that appears with the photo at the top, click on the button that says "change picture"
3) A menu with photo editing options appears on the left
4) in this menu, click on the inscription "color"
5) in the opened submenu there is a button "improve colors" - just press it
6) After pressing this button, when you hover the mouse over the photo, instead of an arrow, we see a "sight". This is the whole salt of processing!
7) On the background (or on the product itself - on its white part), select the brightest place - i.e. the point where visually the light source gives the most of this very light. Point our "sight" to this area and click. The program automatically equalizes the white balance so that at this point inside the sight the color becomes pure white and, accordingly, automatically equalizes the colors on the entire photo, adjusting them to new conditions - this is the most "lightened" area.
8) If we don't have enough lightening and want to lighten up some more, select the area next to the whitest one (ie, slightly noticeably off-white) and click on it with the crosshair. The photo is brightened up a little more.
8) If you aimed the sight somewhere in the wrong place and the result did not suit you, you can always press either the "back" arrow (signed "1" in the photo) or select Edit - Cancel in the top menu.
For 5-6, maximum 8 "pokes" I always manage to get quite decent White background. This process takes about 3-4 minutes at most. If everything suits us in the resulting clarified photo, press the return button in the left menu (marked "2" in the photo)
10) After cropping, click "ok". If you cropped too much or just want to "re-crop" - the "back" arrow or Edit - Undo will return the photo to the "uncropped" view.
Here, for example, how the photo looks before and after such processing, which took me 3 minutes of time:
I hope this MK will help to make photos of their work for those who do not own FS more pleasing to the eye of our customers.
P.S. - the rest of the photo editing features in this program are pretty bad, so besides the features shown in MK, the rest is not even worth trying.
For full-fledged work with pictures in Microsoft Word 2010, you need to learn how to work with image color settings. It will be useful to know how to apply artistic effects to a drawing, which can significantly improve the appearance of the image. This is described in this article with illustrative examples.
Adjusting Image Brightness and Contrast
Adjusting the brightness of an image means lightening or darkening the image. When you use these adjustment tools, Word 2010 automatically makes changes to the color range. That is, adjusting the brightness for shadows, highlights and midtones is not available. Simply put, the setting is used using special patterns that have different degrees of exposure. Exposure, in turn, determines the degree of lightening/darkening.
Contrast is the ratio of the lightest areas of an image to the darkest. In color contrast, this is the difference in color shades. In Word 2010, brightness and contrast are controlled by the same patterns. In turn, templates can have zero brightness or contrast values, which allows you to separately adjust the level of their values. In the case of fine-tuning (the "Format Picture" window), the situation is similar.
To adjust the brightness and contrast of an image, do the following:
1st way.
- Select the image in your Word 2010 document and go to the "Format" tab.
- In the "Edit" group, click on the "Correction" button and in the window that opens, select the desired brightness value from the collection of samples. If you need more fine-tuning, click the Picture Correction Options button. The Format window opens on the Picture Setup tab.
- In the Brightness area, set the desired value (as a percentage) and click Close.
2nd way.
- Click on the image in the Word 2010 window and select Picture Format from the context menu.
- Go to the "Picture Adjustment" tab and set the desired brightness values.
Sharpness is changed in the same way. Decreasing sharpness results in blurry images, while sharpening, on the contrary, sharpens the image. However, the smooth transitions in the image are lost and graininess increases.
Figure 1. Correction of sharpness, brightness and contrast
Image Color Adjustment
Image color adjustment allows Word 2010 to adjust the color in terms of brightness, contrast, sharpness and saturation. By simple manipulations, you can set the image to look appropriate for the tasks.
Change color saturation
Color saturation is the strength, the intensity of the sensation of a color tone. In other words, it is how strongly a certain color is represented in the palette, and how “pure” it is. "Pure" color means the minimum presence of pixels of other colors, their shades, as well as shades of the main color. Saturation refers to how a particular color looks under different levels of light. Saturation, or the intensity of a color, varies with the intensity of the light. That is, the brighter the picture, the brighter and more saturated the colors in it - and this rule applies even to black and its shades. Without going into the details of color theory, we note that by changing the color saturation, you can drastically change the appearance of the entire image. Since with a change in the saturation of colors, the composition of the color palette of the image completely changes.
To color adjust an image, follow these steps:
- Select the picture you want in your Word 2010 document.
- Click the Format tab and in the Modify group, click the Color button
- In the window that opens, in the "Color Saturation" group, select the appropriate sample.
For finer tuning, follow these steps:
1st way.
- Right-click on the desired picture and select Picture Format from the context menu.
- Click on the "Picture Settings" tab in the "Picture Format" window that opens, go to the "Color Saturation" group.
2nd way.
- Click the Color button, and in the window that opens, click Picture Color Options.
- Use the Presets and Saturation areas in the Color Saturation group to set the options you want.
Figure 2. Image color settings
Color shade
Changing the color hue allows you to lower or increase the "temperature" of the image. Simply put, reduce or increase the saturation of warm or cold shades of color. An example of warm colors are shades of red, yellow, orange, and cool colors are shades of blue, turquoise and gray.
To change the color hue of a picture, do the following:
- Click the Format tab, and in the Modify group, click the Color button.
- In the window that opens, go to the Color Tone group and select one of the swatches.
For more fine-tuning, go to the "Picture Format" window and in the "Color Tone" group, set the desired values.
Image recoloring
If you want to completely recolor an image, i.e. give it a specific color (color scheme), follow these steps:
1st way.
- On the Format tab, in the Modify group, click the Color button.
- In the window that opens, go to the Recolor group and select one of the swatches.
2nd way.
- In the Picture Format window, click the Picture Color tab.
- In the "Recolor" group, click the "Recolor" button in the "Presets" area, and in the window that opens, select the appropriate swatch.
Artistic drawing effects
With the help of artistic effects, you can significantly improve the appearance of the image without resorting to special graphic editors. A total of 23 Effect Patterns are available. Unfortunately, working with layers is not available.
To give the drawing an artistic effect, do the following:
1st way.
- In the open document window, click on the desired image.
- Go to the "Format" tab in the "Edit" group and click on the "Artistic Effects" button.
- In the window that opens, select the appropriate sample.
2nd way.
- Right-click on the picture and select Format Picture from the context menu.
- In the window that opens, open the "Artistic Effects" tab, then click on the "Artistic Effects" button to select the appropriate swatch.
Figure 3. Artistic effects
For finer adjustments, use the Opacity and Size options for the Artistic Effects.
- "Transparency" - allows you to adjust the level of transparency of the applied effect. The greater the transparency, the less changes made to the picture when applying the effect will be reflected and vice versa.
- "Size" - determines the "density" of the applied effect. So for the "Watercolor" effect, this is the size of the brush, for the "Light Screen" effect, this is the size of the grid, etc. The smaller the value, the more accurate the changes made and vice versa - it all depends on what kind of picture you want to set.
Please note that setting options is available only after applying the effect to the picture.
Transparency of individual color pixels
To give an image a special effect, you can "desaturate" pixels of a certain color. A similar approach can be used, for example, if you want to see part of the text through the picture.
To set the transparency of pixels of a specific color:
- Click "Set transparent color" in the window for changing the color of the picture - the cursor will take the form of a pencil with an arrow.
- Select a section of the image with the desired color and left-click - the pixels of the specified color will become completely transparent.
Figure 4. The final version of the picture after adjustments
Conclusion
At this stage in the development of Word 2010, you need to be able to change the image in terms of color saturation, contrast brightness, etc. This will allow you to quickly and accurately adjust the image without resorting to specialized graphic editors. Fortunately, there are more than enough options for working with images in Word 2010, which can be compared in scale with separate graphic editors. But, even if you are not faced with the task of becoming a graphics processing specialist, you need to know the basic concepts. Actually, the main ways to customize images were outlined in this article.
The Adjustments menu in Paint.NET contains various commands for adjusting the color content of an image. There may be more commands in this menu depending on the number of external Paint.NET plugins connected. The image below shows a minimal view of the Adjustments menu as it appears in a freshly installed Paint.NET editor.
To illustrate the effect of each command from the "Correction" menu item, we will use the image below. This is the original image. In the description of most of the commands on this page, an example will be given - a picture obtained from the original one by applying one or another Paint.NET command from the "Correction" menu.

Auto-align color levels in Paint.NET
Menu item "Auto leveling" in the "Correction" menu graphic editor Paint.NET is designed to color-align an image. Too dark or, conversely, too bright parts of the image will be displayed in the normal range. This command has no parameters. The result after applying level alignment to the original image can be seen in the figure below. This command is equivalent to the Levels adjustment with default settings and the Auto Level button pressed.

Adjusting Image Brightness and Contrast in Paint.NET
Menu item "Brightness and Contrast" is designed to make the colors in the picture darker or lighter, or to make them more contrasting. The dialog box of this function has two parameters: "brightness" and "contrast", respectively.
This is what the original image will look like if we make it brighter.

This is what the original image will look like if we make it more contrast.

And this is how the original image will look like if you make it brighter and more contrast at the same time.

Image size to fit window in Paint.NET
Command "Fit to window" scales the image so that it fits completely into the workspace. This is useful for large images to see the entire picture. At the same time, the execution of this command does not increase the scale of the picture by more than 100%, which can be seen using it on a small image.
Adjusting Color Curves in Paint.NET
The "Curves" command is intended for visual color management in the form of curves. This menu item "Curves" is devoted to a separate page of the manual.
How to make an image black and white in Paint.NET
Menu item "Make Black and White" provides an easy way to reverse the colors in an image and make it black and white with gray tones. An example of applying this correction over the original image can be seen in the figure below.

Changing the Hue and Saturation of a Picture in Paint.NET
Command "Hue and Saturation" used to change the saturation of colors in an image or change their hue. In addition, using this command, you can also change the brightness of colors. However, it is to change the brightness that you should use the special command "Brightness and Contrast", described above, because. the result of using this function may be different.
If you apply the Hue and Saturation command to the original image? with the value of the "hue" parameter 88 and the parameter "saturation" 158, the result will be as in the figure below.

How to make a photo negative in Paint.NET
Command "Invert Colors" its action is similar to turning a photograph into a negative. This command reverses the colors. So, if you apply this command to the image twice, you will get the original image again. If we apply this command to the original image from our example, the result will be as shown in the figure below.

Gamma and color range of an image in Paint.NET
The "Levels" command is used to change the color gamut and range of colors in an image. A separate page is dedicated to the "Levels" command.
Roughening Image Colors in Paint.NET
The Roughen command lets you reduce the number of available colors used in an image. Typically, for each color channel: red, green, and blue, there are 256 possible values (from 0 to 255). Using the Roughen command in Paint.NET, you can limit this value to between 2 and 64, per color channel. Reducing the number of colors gives the image the effect of an artificially aged or retro picture. Using the Roughen command for our example will give the following result.

How to make a sepia effect in Paint.NET
The Sepia command first converts the image to black and white and then adds a sepia tone. From history, one of the meanings of the term "sepia" is paint. Natural sepia was made from the ink sac of a cuttlefish. This paint was used by artists in the middle of the eighteenth century when drawing pictures. Natural sepia was used to tone photographs to brown. The effect of sepia in photography is the conversion of silver to sulfide, which becomes more resistant to fading. Therefore, many old black and white photographs are brown, so they have a better chance of not fading and surviving to this day. The application of the "Sepia" command to our example can be seen in the following figure.

