Setting up additional user rights. Accounting info Restrictions for the user in 1s 8.3
This article will focus on setting user access rights to 1C system objects.
In 1C 8, a separate metadata object is used to manage user access, which is called Roles.
Note! This article is written to help programmers. Setting rights in user mode using the example of 1C Accounting is discussed in.
A role defines the set of user rights that it has. The mechanism of roles is very similar to the rights mechanisms of Windows Active Directory. For each of the objects (directories, documents), the developer sets his own set of rights - read / write / add / change / ...
A set of available rights − collection of all permissions in user roles.
If we open the Role metadata object, we can see the following picture:

The object has two tabs - Rights and Restriction Templates. Rights - the main tab, Templates - a tab for setting rights at the record level in 1C ( RLS). This is a very important topic, I will try to cover it in future articles.
We will consider only the tab Rights.
- Objects— list of , to which the rights will be set.
- Rights— a list of possible rights settings for setting.
- Data Access Restriction- role fields for customization
Pay attention to the checkboxes at the bottom:
- Set permissions for new objects- if the flag is set for the role, permission rights will be automatically set on new metadata objects. I recommend installing it if you often forget to set permissions for new objects.
- Set permissions for attributes and tabular parts by default- flag, when set, the details and tabular parts will inherit the rights of the owner (directory, document, etc.)
- Independent rights of subordinate objects— if the flag is set, then the system, when determining the right to the configuration object, will take into account the rights to the parent object
Permission settings for the entire configuration
If we open the Role and click on the configuration root, we will see the following settings:

More about each of rights to the entire configuration:
Get 267 1C video lessons for free:
- Administration— administration of the infobase (requires the "Data Administration" right)
- Data administration— the right to administrative actions over the data
- Updating the database configuration- right to
- Exclusive mode- use of exclusive mode
- Active Users— view the list of active users
- - registration log
- - the right to launch a thin client
- - the right to launch the web client
- fat client- the right of the role of launching a thick client
- Outer join- the right to start an external connection
- Automation- the right to use automation
- All Functions Mode- in managed application mode
- Saving user data— permission or prohibition to save user data (settings, favorites, history). This is especially true for 1C managed forms.
- Interactive opening of external processing- opening external processing
- Interactive opening of external reports- opening external reports
- Conclusion- Printing, writing and copying to the clipboard
Setting 1C 8.2 rights to other metadata objects

For the rest of the main objects (directories, constants, documents, registers ...), the set of rights for the role is quite standard:
- Reading- reading (software)
- Addendum- adding (software)
- Change- change (software)
- Removal- uninstall (software)
- View- view
- Interactive add- interactive addition
- Editing- editing
- Interactive deletion flag- interactive mark for deletion
- Interactive unmarking deletion- unmark for deletion
- Interactive deletion of flagged— deleting marked objects
- Input by line- use input mode by line
- Interactive removal- direct deletion (shift + del)
Rights only for documents:
- Interactive holding— carrying out
- Cancellation– cancellation of documents
- Interactive holding non-real-time- posting (by standard form commands) a document in off-line mode
- Interactive undo— interactive cancellation
- Interactive change of held- Editing the posted document. If the right for the role is not set, then the user cannot delete a posted document, set a deletion flag, repost, or make it unposted. The form of such a document opens in view mode.
P.S. If you still couldn’t figure out the user roles, you can order.
Video with an example of setting rights in 1C accounting 3.0:
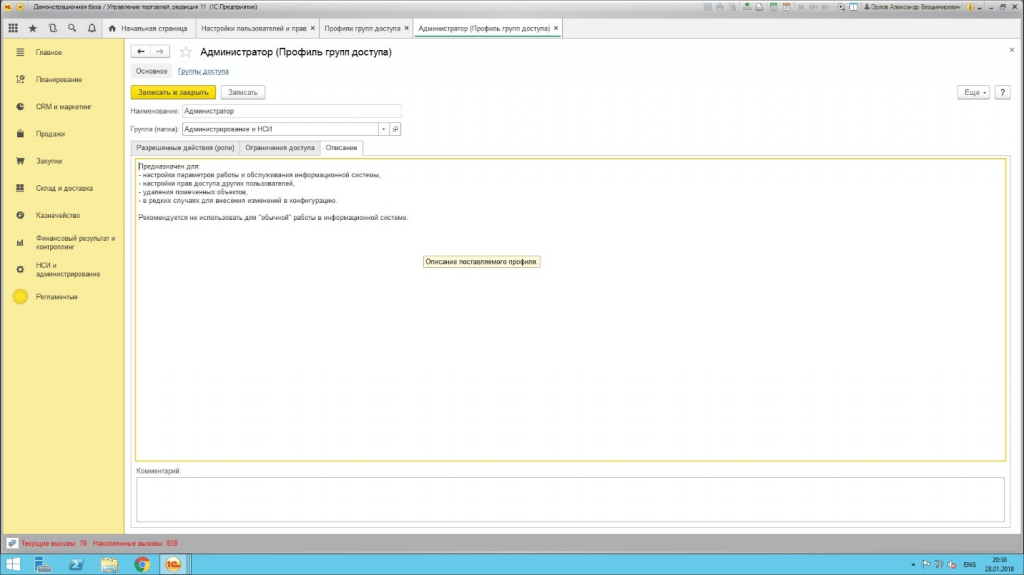
Access can be configured in several places in the program, but it is recommended to configure it for a user profile. We go to the administrators profile and what do we see?
Editing of setting values is prohibited. This is absolutely normal, do not try to install them elsewhere. The system just thinks if the user has one of the roles - "Full rights", then he is allowed everything,regardless of the settings of additional rights. Therefore, there is no point in setting them up. For other profiles, additional rights are wonderfully established.
But you can configure additional rights not only for a profile, but also for a group and for a specific user.

How will the system behave if the values of additional rights for the user and his profile do not match? One might get the impression that the system should in this case use the value of the right set to the user as more accurate. But it's not! The priority of the profile rights is higher than that of the user group and user.After reading the value of the right for the profile, the program will not even look at what is set there for the group, which is why it is necessary to configure it in the profile.
Why, then, is it possible to fill in the rights for the group and user, if they are still not used? And they will be used if the profile is not set for the user. Which of the rights will the system take in this case? Let's look in the configurator:
Function ReadUserRightValue(Right, DefaultValue, User) ReturnValues= New Array ; Request = New Request; Query.SetParameter("User", User); Request.SetParameter( "User Rights", Right); Request.Text = "SELECT ALLOWED VARIOUS | RegisterValueRightValue| FROM | RegisterInformation.ValuesAdditionalUserRights AS RegisterValueRights|WHERE | RegisterValueRight.Right = &UserRight | And RegisterValueRight.User In| (CHOOSE | UsersGroups.Link AS Link| FROM | Directory.GroupsUsers.UsersGroups AS UsersGroups| WHERE | UsersGroups.User = &User | | UNITE ALL| | CHOOSE | VALUE(Catalog.Usergroups.AllUsers) | | UNITE ALL| | CHOOSE | &User)"; Sample = Request. Execute(). Choose(); If Sample. Quantity() = 0 Then ReturnValues. Add(DefaultValue); Otherwise While the selection. Next() Loop ReturnValues. Add(Selection.Value); EndCycle; EndIf; Return ReturnValues; EndFunctionsThe function returns an array of permission values set for the user, this user's group, and the All Users group.
Function RightIsUser(Right, ValueDefault) ArrayPermissionValues = GetUserRightValue(Right, DefaultValue); Return ArrayValuesPermissions.Find(True)<>Undefined; EndFunctionsDon't forget about the "All Users" group. It includes all users of the system, but rarely does anyone look at what rights are set for it. It is also not the right decision to set a value for this group if we want it to be valid for all users. I repeat, the profile is more priority, it is in it that you should edit additional rights.
It is also worth adding that the system does not read this register every time, but places the data in the cache after the first reading and then takes data from it. Therefore, the value set by the user will only take effect in the next session.
So let's sum it up:
If the user has the "Full rights" role, then he does not need to set the values of additional rights, he is already allowed everything. If the user is given a profile, then the value of the corresponding profile is taken. If the profile is not set, then the system reads the values for the group, user, and All Users group, and selects one based on the principle that if allowed in one place, then allowed at all.
The issue with access rights arises in connection with the need to restrict user rights in 1C (or user groups), which implies a ban on performing any actions with certain objects, for example, viewing, recording, editing, etc. Or, on the contrary, due to the need to give (expand) user rights in 1C, which in reality most often follows the system's message about an access violation (for example, there are not enough rights to view) and the user's request to administrators about it.
To make adjustments to the access rules and change the rights to view a particular section or to any other action, you need to go to the "User and Rights Settings", which can be done with the user mode enabled on the "Administration" tab (provided, of course, that there are rights to it).


As already mentioned, access groups include specific users, and the groups themselves correspond to access group profiles that combine roles. In essence, a role is metadata, the variety and quantity of which depends on the configuration. As a rule, there are quite a lot of roles and it is easy to get confused in them. It is worth remembering that one extra assigned role can open access to objects to unwanted users.

A description of user rights is available on the Description tab.
 Roles are viewed through the "Users" directory element, which can be accessed by clicking on a specific user.

It also generates a report on access rights, which displays the status of access to specific system objects.

The rightmost column "Restrictions at the level of records" are additional conditions that restrict actions with database objects. In essence, this is a request that is executed at the time of work and tells whether it is possible or not to work with the object.
The screenshot shows that the document "Entering initial balances" is available to the user, but access is possible only to certain warehouses.

Thus, you can set access or change rights in 1C by adding a user to a particular group in user mode.

The group itself can also be modified, for example by adding a value to the access restriction.

Administrator rights allow you to manage rights in the configurator mode, where typical roles are already set. For example, a role with a much-explaining name "Basic rights" usually allows you to only read or only view an object.

Special roles for adding/modifying data are provided to manage the rights to modify objects.

If you know which object the user does not have enough rights to, you can:
- From the opposite: look at the "rights" tab for a specific object, while at the top we will see all the roles available in the configuration, and in the lower window - rights. The presence of certain rights to the object is marked with a “tick”. The rights for new objects are set in the same way.

- Open the role assigned to the user, and, having selected a specific object in the left window, see the list of rights in the right window, that is, the actions that a user with this role can do with this object - reading, adding, viewing, etc.

Thus, all possible rights in the system are predetermined. Reading, adding, modifying, viewing, editing and other rights can be enabled or disabled in any role for any object. It is not possible to assign rights separately without using roles. To differentiate user rights, you must assign the appropriate role. A convenient tool for analyzing rights and roles is the "All roles" table, which is formed in the configurator.

The screenshot shows that the "Full rights" role has the maximum amount of rights. And if the task of limiting users in rights is not worth it at all, you can safely assign this role to all users, forever getting rid of user questions.
In practice, as a rule, in most cases, "protection from a fool" is still necessary. All more or less large companies need to insure themselves against unwanted data changes. Here the built-in 1C roles come to the rescue. Understanding the variety of roles is not easy, it takes a lot of time. Therefore, creating your own role to solve practical problems can often be the only way out. Let's consider this point in more detail. You can add a role in the metadata tree.

In a new role, you can differentiate rights by simply checking the boxes next to the corresponding right.

The checkboxes at the bottom of the window indicate that the rights will be automatically assigned to new metadata objects/attributes and tabular parts of the object for which the rights are assigned, as well as whether the rights will be inherited relative to the parent object.
Access rights restrictions are set in the lower right window of the new role. This is a powerful tool that allows you to restrict rights at the record level, i.e. provide access to the required data. If a simple assignment of rights can only “straightforward” give or take away rights to actions with an object, then the restriction mechanism allows you to flexibly configure access rights regarding data. For example, limit reading and viewing data for only one organization.

The data access restrictions constructor allows you to create a condition that will restrict access.

Restriction of access rights is described in the form of language constructs. To facilitate their creation, the use of constraint templates is provided. It should be noted that the use of this mechanism directly affects performance, because the system, when accessing any object, needs to read and fulfill these restrictions. This process takes up computer resources and slows down the work.
In conclusion, I would like to note that 1C, as a developer, took care of the availability of wide opportunities for administrators in terms of editing rights in their software solutions. And if at first glance these tools may seem complicated and redundant, then in the future, especially when trying to build an effective access scheme in a multi-level, branched structure of personnel in an enterprise or organization, it becomes clear that the functionality of the program fully corresponds to real needs.
How to set access rights in the 1C 8.3 program?
In this article, we will consider how to work with users in 1C Accounting 8.3:
- create a new user
- configure rights - profiles, roles and access groups
- how to set up a restriction of rights at the record level (RLS) in 1C 8.3 - for example, by organization
The instruction is suitable not only for the accounting program, but also for many others built on the basis of BSP 2.x: 1C Trade Management 11, Payroll and HR 3.0, ERP 2.0, Small Business Management and others.
In the interface of the 1C program, user management is carried out in the "Administration" section, in the "Setting up users and rights" item:
How to create a new user in 1C
In order to create a new user in 1C Accounting 3.0 and assign certain access rights to him, in the "Administration" menu there is an item "User and rights settings". We go there:

The list of users is managed in the "Users" section. Here you can create a new user (or group of users), or edit an existing one. Only a user with administrative rights can manage the user list.
Let's create a user group with the name "Accounting", and in it two users: "Accountant 1" and "Accountant 2".

To create a group, press the button that is highlighted in the figure above and enter a name. If there are other users in the infobase who are suitable for the role of an accountant, you can immediately add them to the group. In our example, there are none, so we click "Save and close."
Now let's create users. Place the cursor on our group and click the "Create" button:

Enter “Accountant 1” in the full name, set the login name to “Account1” (it will be displayed when entering the program). The password will be "1".
Be sure to make sure that the checkboxes "Login to the program is allowed" and "Show in the selection list" are checked, otherwise the user will not see himself during authorization.
Leave "Startup Mode" as "Auto".
Setting access rights - roles, profiles
Now you need to specify "Permissions" for this user. But first you need to write it down, otherwise a warning window will appear, as shown in the figure above. Click "Write", then "Permissions":

Select the profile "Accountant". This profile is standard and configured for the basic rights required by an accountant. Click "Record" and close the window.
In the "User (Create)" window, click "Save and Close". We also create a second accountant. We make sure that users are logged in and can work:

It should be noted that the same user can belong to several groups.
We chose access rights for accountants from those that were included in the program by default. But there are situations when it is necessary to add or remove some right. To do this, it is possible to create your own profile with a set of necessary access rights.
Let's go to the "Access group profiles" section.
Let's say we need to allow our accountants to view the ledger.
Creating a profile from scratch is quite laborious, so let's copy the "Accountant" profile:

And we will make the necessary changes to it - we will add the role "View registration log":

Give the new profile a different name. For example, "Accountant with additions." And check the box "View registration log".
Now you need to change the profile of the users we created earlier.
Restriction of rights at the record level in 1C 8.3 (RLS)
Let's figure out what it means to restrict rights at the recording level or as they call it in 1C - RLS (Record Level Security). To get this feature, you need to check the corresponding box:

The program will require confirmation of the action and will report that such settings can greatly slow down the system. It is often necessary that some users do not see documents of certain organizations. Just for such cases, there is an access setting at the record level.
We go back to the profile management section, double-click on the “Accountant with add-ons” profile and go to the “Access restrictions” tab:

"Access Type" select "Organizations", "Access Values" select "Everyone is allowed, exceptions are assigned in access groups". Click "Save and Close".
Now we return to the "Users" section and select, for example, the user "Accountant 1". Click the "Permissions" button:
Through the "Add" button, select the organization, the data for which will be seen by "Accountant 1".
Note! Using the mechanism of rights differentiation at the record level can affect the performance of the program as a whole. Note for the programmer: the essence of RLS is that the 1C system adds an additional condition to each request, requesting information about whether the user is allowed to read this information.
Other settings
The sections “Copying settings” and “Clearing settings” do not cause questions; their names speak for themselves. These are settings for the appearance of the program and reports. For example, if you have set up a beautiful appearance of the "Nomenclature" reference book, you can replicate it to other users.
In the "User settings" section, you can change the appearance of the program and make additional settings for ease of use.
The "Allow access to external users" checkbox allows you to add and configure external users. For example, you want to organize an online store based on 1C. Store customers will just be external users. Access rights are configured in the same way as ordinary users.
Source: programmer1s.ru
How to create a user with "Administrator" rights in 1C Accounting 8.3
When you start the newly created clean, empty infobase 1C Accounting 3.0, the initial window looks like this. The 1C Accounting program very unequivocally offers us to start work by filling in the details of our organization.
We will begin the process of working with our 1C Accounting program by creating the first user.
To do this, we go to the "Administration" - "User and rights settings" section, follow the "Users" hyperlink and click the "Create" button.
We indicate the name of our user (GlavBukh). We will not make any other changes. If necessary, you can change the password of this user, but for now we will do without it. Press the "Record" button.
Program 1C Accounting 8.3 says that the first user will be automatically added to the Administrators group. We agree with this.
Our user has been created. If we click on the "Permissions" button, we will see that the user is assigned the "Administrator" profile.
These steps must be performed in order for this user with administrator rights to appear in the 1C Accounting 8.3 program.
Basically it is possible to work and without establishment of the user. But some routine procedures in our 1C Accounting 8.3 program are performed on behalf of a user with full rights. When such a user is not in the program, an ambiguous situation is possible when the system cannot perform such routine procedures. Therefore, it is recommended to start working with the 1C Accounting 8.3 program by creating a user with "Administrator" access rights.
