What can you make a pie chart about? Percentage chart in Excel instructions for creating. How to Add Data Labels to a Pie Chart in Excel
Standard Excel tools for pie charts allow you to use only one set of data. This post will show you how to create a pie chart based on two sets of values.
As an example, I took the Earth's population by continent in 1950 and 2000. (see the “Population” sheet in the Excel file; I removed Australia because its share is negligible, and the diagram becomes difficult to read :)). First, create a basic pie chart: select the range A1:C6, go to Insert → Pie → Pie.
Rice. 1. Create a regular pie chart
Download the note in format, examples in format
Right-click the chart and select Format Data Series from the context menu. Select "Along Minor Axis" and then move the slider towards "Separation" to something like 70% (Figure 2). Sectors of the same row will “spread apart”.

Rice. 2. Along the minor axis
Select individual sectors sequentially (by double-clicking slowly) and change their fill and location, connecting all sectors in the center (Fig. 3).

Rice. 3. Formatting row points (individual sectors)
Format all sectors so that the colors corresponding to the same continent in different rows are of the same range, but of different intensities. Complete the chart with data labels, a legend, and a title (Figure 4).

Rice. 4. Pie chart with two data sets
The diagram clearly shows, for example, that the share of Asia has grown from 55.8% to 60.9 over 50 years, while the share of Europe has decreased from 21.8% to 12.1% over the same time.
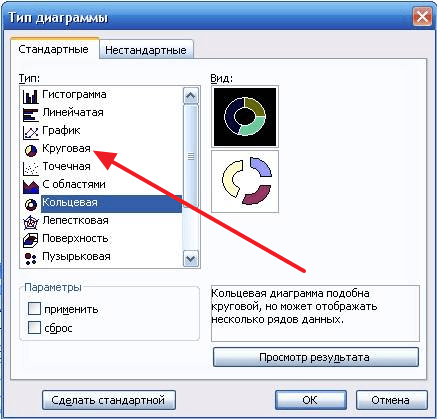
If you are not a fan of pie charts, you can use the donut chart, which in the Excel standard works with multiple data sets (Fig. 5); see also the “Ring” sheet in the Excel file. Select the data area (in our example it is A1:C6) and go to the menu Insert – Charts – Other charts – Donut:

Rice. 5. Create a donut chart
All you have to do is edit the diagram a little to make it more visual (Fig. 6)

Rice. 6. Donut chart
The idea was seen in the book by D. Kholey, R. Kholey “Excel 2007. Tricks”.
If you need to visualize difficult-to-understand data, a chart can help you with this. Using a chart, you can easily demonstrate the relationships between various indicators, as well as identify patterns and sequences in the available data.
You might think that creating a chart requires you to use difficult-to-learn programs, but that's not true. For this, a regular word text editor will be enough for you. And in this article we will demonstrate this. Here you can learn how to make a chart in Word 2003, 2007, 2010, 2013 and 2016.
How to make a chart in Word 2007, 2010, 2013 or 2016
If you are using Word 2007, 2010, 2013 or 2016, then in order to make a diagram you you need to go to the “Insert” tab and click on the “Diagram” button there.
After this, the “Insert Chart” window will appear in front of you. In this window you need to select the appearance of the diagram that you want to insert into your Word document and click on the “Ok” button. Let's take a pie chart as an example.

Once you select a chart appearance, an example of what the chart you selected might look like appears in your Word document. This will immediately open an Excel window. In Excel you will see a small table with data that is used to build a chart in Word.

To change the inserted diagram to suit your needs, you need to make changes to the table in Excel. To do this, simply enter your own column names and the required data. If you need to increase or decrease the number of rows in the table, you can do this by changing the area highlighted in blue.

After all the necessary data has been entered into the table, Excel can be closed. After closing Excel, you will receive the chart you need in Word.

If in the future there is a need to change the data used to construct the diagram, then for this you need to select the diagram, go to the “Design” tab and click on the “Edit data” button.

To customize the appearance of your chart, use the Design, Layout, and Format tabs. Using the tools on these tabs, you can change the chart color, labels, text wrapping, and many other options.
How to Make a Pie Chart in Word 2003
If you use the text editor Word 2003, then in order to make a diagram you you need to open the “Insert” menu and select “Drawing - Diagram” there.

As a result, a chart and table will appear in your Word document.

To make a pie chart right-click on the chart and select the “Chart Type” menu item.

After this, a window will appear in which you can select the appropriate chart type. Among other things, you can select a pie chart here.
After saving the settings for the appearance of the chart, you can start changing the data in the table. Double-click on the diagram with the left mouse button and a table will appear in front of you.

Using this table, you can change the data that is used to build the chart.
Udachnenskaya osh 1-3 tbsp. mathematics teacher Sychevskaya L.A.
Udachny secondary school of I-III levels
Krasnogvardeisky district
Republic of Crimea
Public lesson
in mathematics in 6th grade
on the topic of:
"Pie Charts"
![]()
Prepared and conducted:
mathematics teacher, head of the education department of the natural and mathematical cycle
Sychevskaya L.A.
Math lesson on "Pie Graphs"
Goals:
Mastering ways to visualize numerical data.
Learning to build a mathematical model using pie charts.
Application of theoretical knowledge in practical human activity.
Tasks:
Review previously studied material on the topics “Percentage” and “Proportions”.
Introduce the concepts of “Diagrams”, “Pie Charts”.
Show the practical application of knowledge and skills on the topics “Percentages” when constructing pie charts.
Learn to build pie charts.
Improving the skills of geometric constructions.
Ensure accurate and accurate execution of drawings.
Learn how to build diagrams in the XL program using computer technology.
Lesson forms: combined (generalization and systematization of knowledge, explanation of new material, consolidation of learned material, testing and correction of knowledge).
Working methods and techniques:
teachers: frontal work (explaining new things, dialogue, demonstrating a presentation, individual assistance in doing independent work);
student: frontal (dialogue; viewing a presentation) and individual (solving programmed tasks, working in a notebook, working on a computer, solving tests).
Materials and equipment: lesson script, presentation “Pie Charts”, PC, answer forms, drawings of Smeshariki on the board and route sheet
Lesson Plan
Writing on the board and computer monitor

Organizing time
Friends will gather in the clearing to find out how everyone is doing. We will help them today, let's hit the road. Checking students' readiness for the lesson. Students' mood for the lesson.
I'll ask you a few riddles. Solve the riddles and check for these items on your desktops and show them to me.
Who teaches silently? ( Textbook)
Who will build our drawing?
Well, of course… ( Pencil)
Two legs conspired
Make arcs and circles. ( Compass)
She loves directness and is direct herself.
Making a new trait helps us all.
You can draw something without it.
Guess, friends, what is this?.. ( Ruler)
If you give her a job -
The pencil was in vain. ( Eraser)
Constructing angles
Helps... ( Protractor)
To homework
We must do it, we must not forget,
We will write it down in... ( Diary)
Kopatych likes to always have everything at hand
We checked the availability of the items needed for the lesson.
2. Record the date and topic of the lesson in notebooks.
Now open your notebooks, write down the number, class work and the topic of the lesson, which you learn from the puzzle on the “Pie Charts” board.


Today in the lesson we will have to solve the following problems and build using the program
Generalization and systematization of knowledge
Before we move on to learning new material, let's review previously learned material. . Krosh likes to be lazy, let’s not let him sleep...
Task No. 1 
Words are missing from the definitions and concepts. Recover the missing words. Remember that the number of strokes corresponds to the number of letters in the missing word. Write down your answers in answer form No. 1. Think carefully before writing down your answer, since a corrected answer will be considered an error.
The answer sheet for task No. 1 looks like this.
№№ definitions
Missing words
Wrong answers
Total:


Mutual verification using a given key. In the incorrect answers section, against each question we put as many “minuses” as the number of words that were written incorrectly.


In the “Total” cell of the answer form for task No. 1, write down the total number of minuses.
Learning new material
Explanation of theoretical material
Often in practice, the results of any human activity, comparison of the cost of certain products, the composition of various mixtures or any other numerical data are more convenient to present visually, in the form of a drawing. It is easier to compare numbers if they are depicted as graphic objects of various sizes. Drawings are better perceived by humans. And, even if the parameters of the depicted object, action, phenomenon are not known in advance, you can clearly compare the results from the drawing and draw certain conclusions. Such drawings are called graphs and diagrams.
Today we will get acquainted with diagrams.
A method of conventionally depicting numerical quantities and their relationships, using geometric means, is called a diagram.
Let's write down the definition of a diagram in our notebook.
A diagram is a way of visually representing numerical data.
There are many types of diagrams known. Diagrams can be planar or three-dimensional. Among the charts there are: graphs, columnar, bar, dot, ring, pyramid, cone, cylindrical, etc. We will study pie charts. Nyusha will tell us about the types of diagrams and how she wants to get to her friends.
The diagrams are constructed using the following algorithm.
To build a pie chart you need to:
Draw a circle
Convert them to degrees
Use a protractor to construct angles
Paint the sectors with different colors
2. Solving the problem on cards
Construct a pie chart of the distribution of daily food intake.
We will act in accordance with the algorithm.


Based on the calculation results, we build a diagram. 
Who has any questions or difficulties while doing the work?
Physical education lesson “Two hands” with presentation.
Optimizing data processing using a PC
Well, Hedgehog is smarter than everyone else, he owned a computer
And built a diagram faster than everyone else
Have you noticed how much time you spent creating the chart by hand? Today, in practice, no one builds diagrams manually, or they do, but very rarely. There is a very good assistant for doing this kind of work. This is a computer. Take your seats at the PC.
You have a Microsoft Excel spreadsheet environment on your screen. The table contains the data of the problem that we are now solving. Our task is to build a chart using the MS Excel table processor Chart Wizard. Listen to me carefully, try to follow the steps clearly and you will succeed.
Select cells A2-B5. To do this, place the mouse cursor in cell A2 and, holding the left mouse button, drag the cursor to cell B5. The table will turn black.
In the menu bar, find the INSERT command and left-click on this word. A drop-down menu will open.
Select the DIAGRAM command from the drop-down menu and left-click on it. The DIAGRAM WIZARD dialog box opens.
In the chart type list, select the word PIECE. Various types of charts will open in the right window. Select 1 option. And click the NEXT button at the bottom of the dialog box.
In the next step, click NEXT again.
In the fourth step, click DONE.
When performing any work, you should look for the best option. There was such a concept as optimization of activities. Optimization means reducing the time it takes to perform an operation.
IV. Independent work
1 subgroup. Create a diagramming problem. You can get acquainted with the problems in the textbook, but the conditions of the problem should not coincide with any of them.
V. Checking the results obtained.
VI. Summing up the lesson.
Let's summarize the lesson. Answer a few questions.
What is a diagram? ( A way to visually represent numerical data)
What diagrams did you learn to make today? ( Pie charts)
What other types of diagrams do you remember? ( Columnar, graphs, ring, …)


Application


To create a pie chart in Excel, you will need to fill out a data table consisting of the values of the chart sectors. There can be an unlimited number of segments, but practice shows that pie charts consisting of three to five sectors look clearer.
The values of these sectors are entered into the column. If necessary, you can fill out a table of two columns, where the first indicates the name of the segment, and the second directly its value. In this case, it will be easier to provide the diagram with segment labels.
- circular;
- volumetric circular;
- ring.
The pie chart subtypes differ only in their visual effects. Moreover, from the point of view of visual perception, the most visually accurate are the first and third types of pie charts. A three-dimensional pie chart distorts the segments due to its inclination and height, and therefore cannot claim to be accurate in external perception.
By clicking on the type of chart you like, a chart window appears in the document, containing by default a text field for the title, the pie chart itself, and a legend.
Further work with the pie chart allows you to improve its appearance and content depending on the task. For example, for clarity, the diagram can be supplemented with data labels by right-clicking on any segment and selecting the appropriate function in the context menu. The base colors of segments can also be changed by double-clicking on the segment and in the context menu and selecting “Data Point Format” – “Fill” – “Solid Fill” – “Color”.
The Format Data Point dialog box also allows you to:
- Series parameters. In this tab you can change the rotation angle of the first sector, which is convenient if you need to move the sectors among themselves. It is important to remember that this function does not allow you to swap sectors - to do this you need to change the sequence of segments in the data table. The “Cut Point” function is also available here, which allows you to separate the selected segment from the center, which is convenient for focusing attention;
- Fill and Border Colors. In these tabs, not only a single-color fill is available, but also a gradient color fill familiar to the Microsoft Office software package, as well as a texture or image. You can also change the transparency of segments and strokes here;
- Border styles. This tab allows you to change the width of the borders and change the type of lines to dashed, solid and other subtypes;
- Shadow and Shape Format. These tabs provide additional visual effects that you can use to complement your pie chart.
Using Pie Charts
A pie chart is designed to visualize the composition of an object, process or object. With its help, it is easy to visualize the detail of financial indicators, the distribution of income or costs, and sales volume.
Thanks to its shape, a pie chart is intuitively perceived as a solid object. That is why it is not recommended to use it if incomplete data is provided. For example, to present a company's sales volume only for the months in which the largest profits were recorded, it is better to use a line graph rather than a pie chart.
In addition, a pie chart is not suitable for presenting dynamics or comparing data over time.
Pie charts are one of the types of area charts that are easy to understand. They show parts of a total and are a useful tool when analyzing surveys, statistics, complex data, income or expenses. Such diagrams are very informative - the audience can see what is happening. Use pie charts to make great presentations for school and work projects.
Steps
Building a Pie Chart
- build a pie chart 1 Calculate the pie chart (its proportions).
- build a pie chart 2 Collect numerical data and write them in a column in descending order.
- build a pie chart 3 Find the total sum of all the values (to do this, simply add them up).
- create a pie chart 4 For each value, calculate its percentage of the total; To do this, divide each value by the total.
- build a pie chart 5 Calculate the angle between the two sides of each sector of the pie chart. To do this, multiply each percentage found (as a decimal) by 360.
- The logic of the process is that there are 360 degrees in a circle. If you know that 14400 is 30% (0.3) of the total, then you calculate 30% of 360: 0.3*360=108.
- Check your calculations. Add the calculated angles (in degrees) for each value. The sum should be equal to 360. If this is not the case, then an error was made and everything must be recalculated.
- build a pie chart 6 Use a compass to draw a circle. To draw a pie chart, you need to start with a perfect circle. This can be done using a compass (and a protractor for measuring angles). If you don't have a compass, try using any round object, such as a lid or CD.
- build a pie chart 7 Draw a radius. Start at the center of the circle (the point where you placed the compass needle) and draw a straight line to any point on the circle.
- A straight line can be vertical (connects 12 and 6 o'clock on the dial) or horizontal (connects 9 and 3 o'clock on the dial). Create segments by moving sequentially clockwise or counterclockwise.
- build a pie chart 8 Place the protractor on the circle. Place it on the circle so that the center of the protractor ruler coincides with the center of the circle, and the 0 degree mark coincides with the radius drawn above.
- build a pie chart 9 Draw the segments. Draw the segments using a protractor to plot the angles calculated in the previous steps. Each time you add a segment (draw a new radius), rotate the protractor accordingly.
- When making corner marks, make sure they are clearly visible.
- build a pie chart 10 Color each segment. You can use different colors, line types, or just words depending on what best suits your purposes. Add a title and percentage for each segment.
- Color each segment of the pie chart to make it easier to see the results.
- If you are drawing a diagram with a pencil, trace the outline of the diagram with a pen or marker before coloring it.
- The names and numbers in each segment should be written horizontally and centered (at the same distance from the edge for each segment). This makes them easier to read.
- Double check that all angles are accurate.
- Remember that all good graphs have a title and captions.
- Check your calculations carefully because if they are incorrect, you will end up with an incorrect graph.
- More complex forms of the pie chart involve isolating a segment by removing it, or constructing a cut chart where each segment is drawn separately from the other. This can be done manually or using a computer program.
- If you don't have a very good compass, it's easier to draw a circle by holding the compass and rotating the paper.
- Objects such as coins or flags can be turned into pie charts (for visual appeal).
- Make sure that the sum of the percentages found is equal to 100%.
- Once you become proficient at making these charts, you can shift the perspective of the pie chart to become a 3D or layered chart. These are more advanced forms of pie chart and require more detailed work and knowledge.
Warnings
- Always check your work to make sure the calculations are correct.
What you will need
- Compass (or round object)
- Protractor
- Pencil and paper
- Eraser
- Markers or colored pencils
