dom description. Fundamentals of working with the DOM in JavaScript. Changing the DOM with Events
The reference contains a description of all the properties and methods of standard built-in JavaScript objects.
Document Object ModelThe Document Object Model (DOM) is an Application Programming Interface (API) for XML that has been extended to work with HTML as well.
In the DOM, all page content (elements and text) is represented as a hierarchy of nodes. Consider the following code:
simple page
Hello World!
This code can be represented using the DOM as a hierarchy of nodes:
By representing a document as a tree of nodes, the DOM API gives developers complete control over the content and structure of a web page.
When describing the tree structure of the DOM, terminology is used that was borrowed from family trees.
Thus, a node located directly above a given node is called the parent node of the given node. Nodes located one level below this node are called children of this node. Nodes that are at the same level and have the same parent are called siblings or siblings. Nodes located any number of levels below a given node are called its descendants. Parents, grandparents, and any other nodes located any number of levels above a given node are called its ancestors.
The DOM reference contains a description of the Document, Element, Event, and NodeList objects, including a description of their methods and properties:
BOM DirectoryBOM (Browser Object Model in translation from English - Browser Object Model) provides access to the browser window and allows you to manipulate it and its elements.
BOM objects provide access to the functionality of the browser independent of the content of the web page. The topic of BOM is interesting and complex at the same time, because due to the long absence of the specification, browser manufacturers freely extended the BOM as they saw fit. Many elements that are similar in different browsers have become de facto standards that are followed to this day for reasons of mutual compatibility. To standardize these fundamental aspects of JavaScript, the W3C defined the core BOM elements in the HTML5 specification.
Typically, developers use jQuery when they need to do something with the DOM. However, almost any DOM manipulation can be done in pure JavaScript using its DOM API.
Let's look at this API in more detail:
At the end, you will write your own simple DOM library that can be used in any project.
DOM queriesDOM queries are made using the .querySelector() method, which takes an arbitrary CSS selector as an argument.
Const myElement = document.querySelector("#foo > div.bar")
It will return the first matching element. You can do the opposite - check if an element matches a selector:
MyElement.matches("div.bar") === true
If you want to get all the elements that match a selector, use the following construct:
Const myElements = document.querySelectorAll(".bar")
If you know which parent element to refer to, you can simply search among its children, instead of searching through the entire code:
Const myChildElemet = myElement.querySelector("input") // Instead of: // document.querySelector("#foo > div.bar input")
The question arises: why then use other, less convenient methods like.getElementsByTagName() ? There is a small problem - the result of the .querySelector() output is not updated, and when we add a new element (see ), it will not change.
const elements1 = document.querySelectorAll("div") const elements2 = document.getElementsByTagName("div") const newElement = document.createElement("div") document.body.appendChild(newElement) elements1.length === elements2.length // false
Also querySelectorAll() collects everything into one list, which makes it not very efficient.
How to work with lists?On top of that, .querySelectorAll() has two little quirks. You can't just call methods on results and expect them to be applied to each of them (as you might be used to doing with jQuery). In any case, you will need to iterate over all the elements in the loop. Second, the returned object is a list of elements, not an array. Therefore, array methods won't work. Of course, there are methods for lists, something like .forEach() , but, alas, they are not suitable for all cases. So it's better to convert the list to an array:
// Using Array.from() Array.from(myElements).forEach(doSomethingWithEachElement) // Or an array prototype (pre-ES6) Array.prototype.forEach.call(myElements, doSomethingWithEachElement) // Easier: .forEach.call(myElements , doSomethingWithEachElement)
Each element has some properties that refer to a "family".
MyElement.children myElement.firstElementChild myElement.lastElementChild myElement.previousElementSibling myElement.nextElementSibling
Because the Element interface is inherited from the Node interface, the following properties are also present:
MyElement.childNodes myElement.firstChild myElement.lastChild myElement.previousSibling myElement.nextSibling myElement.parentNode myElement.parentElement
The former properties refer to the element, while the latter (with the exception of .parentElement) can be lists of elements of any type. Accordingly, you can check the type of the element:
MyElement.firstChild.nodeType === 3 // this element will be a text node
Adding Classes and AttributesAdding a new class is very easy:
myElement.classList.add("foo") myElement.classList.remove("bar") myElement.classList.toggle("baz")
Adding a property to an element is exactly the same as adding a property to any object:
// Get the value of the attribute const value = myElement.value // Set the attribute as a property of the element myElement.value = "foo" // Для установки нескольких свойств используйте.Object.assign() Object.assign(myElement, { value: "foo", id: "bar" }) // Удаление атрибута myElement.value = null !}
You can use the .getAttibute() , .setAttribute() and .removeAttribute() methods. They will immediately change the element's HTML attributes (as opposed to DOM properties), which will trigger a browser rerender (you can see any changes by inspecting the element using the developer tools in the browser). Such redraws not only require more resources than setting DOM properties, but can also lead to unexpected errors.
They are typically used on elements that don't have corresponding DOM properties, such as colspan . Or if their use is really necessary, for example for HTML properties when inheriting (see).
Adding CSS StylesThey are added in the same way as other properties:
MyElement.style.marginLeft = "2em"
Some specific properties can be set using .style , but if you want to get values after some calculations, it's better to use window.getComputedStyle() . This method takes the element and returns a CSSStyleDeclaration containing the styles of both the element itself and its parent:
Window.getComputedStyle(myElement).getPropertyValue("margin-left")
Changing the DOMYou can move elements:
// Adding element1 as the last child of element2 element1.appendChild(element2) // Inserting element2 as a child of element1 before element3 element1.insertBefore(element2, element3)
If you do not want to move, but need to paste a copy, use:
// Create a clone const myElementClone = myElement.cloneNode() myParentElement.appendChild(myElementClone)
The .cloneNode() method takes a boolean value as an argument, and if true, the child elements are also cloned.
Of course, you can create new elements:
const myNewElement = document.createElement("div") const myNewTextNode = document.createTextNode("some text")
And then insert them as shown above. You can't delete an element directly, but you can do it through the parent element:
MyParentElement.removeChild(myElement)
You can also refer indirectly:
MyElement.parentNode.removeChild(myElement)
Methods on elementsEach element has properties such as .innerHTML and .textContent , they contain the HTML code and, accordingly, the text itself. The following example changes the content of an element:
// Change the HTML myElement.innerHTML = ` New content ( el.addEventListener("change", function (event) ( console.log(event.target.value) )) ))
Preventing Default ActionsFor this, the .preventDefault() method is used, which blocks standard actions. For example, it will block form submission if client-side authorization was not successful:
MyForm.addEventListener("submit", function (event) ( const name = this.querySelector("#name") if (name.value === "Donald Duck") { alert("You gotta be kidding!") event.preventDefault() } }) !}
The .stopPropagation() method will help if you have a specific event handler attached to the child and a second handler for the same event attached to the parent.
As mentioned earlier, the .addEventListener() method takes an optional third argument as a configuration object. This object must contain any of the following boolean properties (all set to false by default):
- capture: the event will be attached to this element before any other element below in the DOM;
- once: An event can only be pinned once.
- passive: event.preventDefault() will be ignored (exception during error).
The most common property is .capture , and it's so common that there's a shorthand for it: instead of passing it in a config object, just specify its value here:
MyElement.addEventListener(type, listener, true)
Handlers are removed using the .removeEventListener() method, which takes two arguments: the event type and a reference to the handler to remove. For example, the once property can be implemented like this:
MyElement.addEventListener("change", function listener (event) ( console.log(event.type + " got triggered on " + this) this.removeEventListener("change", listener) ))
InheritanceLet's say you have an element and you want to add an event handler for all of its child elements. Then you would have to loop through them using the myForm.querySelectorAll("input") method as shown above. However, you can simply add elements to the form and check their content with event.target .
MyForm.addEventListener("change", function (event) ( const target = event.target if (target.matches("input")) ( console.log(target.value) ) ))
And one more plus of this method is that the handler will be attached automatically to new child elements.
AnimationThe easiest way to add animation is to use CSS with the transition property. But for more flexibility (for example, for a game), JavaScript is better suited.
Calling the window.setTimeout() method until the animation is over is not a good idea, as your application may freeze, especially on mobile devices. It's better to use window.requestAnimationFrame() to save all changes until the next redraw. It takes a function as an argument, which in turn receives a timestamp:
const start = window.performance.now() const duration = 2000 window.requestAnimationFrame(function fadeIn (now)) ( const progress = now - start myElement.style.opacity = progress / duration if (progress< duration) { window.requestAnimationFrame(fadeIn) } }
In this way, very smooth animation is achieved. In his article, Mark Brown discusses this topic.
Writing our own libraryThe fact that in the DOM you have to iterate over elements all the time to do something with them can seem quite tedious compared to jQuery's $(".foo").css((color: "red")) syntax. But why not write some of your own methods to make this task easier?
Const $ = function $(selector, context = document) ( const elements = Array.from(context.querySelectorAll(selector)) return ( elements, html (newHtml) ( this.elements.forEach(element => ( element.innerHTML = newHtml )) return this ), css (newCss) ( this.elements.forEach(element => ( Object.assign(element.style, newCss) )) return this ), on (event, handler, options) ( this.elements .forEach(element => ( element.addEventListener(event, handler, options) )) return this ) ) )
The main tool for working and dynamic changes on the page is the DOM (Document Object Model) - an object model used for XML/HTML documents.
According to the DOM model, a document is a hierarchy.
Each HTML tag forms a separate node element, each piece of text forms a text element, and so on.
Simply put, the DOM is a representation of a document as a tree of tags. This tree is formed by a nested structure of tags plus text fragments of the page, each of which forms a separate node.
The simplest DOMLet's build, for starters, the DOM tree for the next document.
Header Beautiful document
The outermost tag is , so the tree starts growing from it.
Inside there are two nodes: and - they become child nodes for .
Tags form element nodes(element node). Text submitted text nodes(text node). Both are peer nodes of the DOM tree.
More complicated exampleConsider now a more vital page:
About moose The truth about moose.
The root element of the hierarchy is html . He has two descendants. The first is head , the second is body . And so on, each nested tag is a child of the tag above:

In this figure, the nodes-elements are marked in blue, the text elements are marked in black.
The tree is formed by blue node elements - HTML tags.
And this is what the tree looks like if you draw it directly on the HTML page:

By the way, the tree in this figure does not take into account text consisting of only whitespace characters. For example, such a text node should come immediately after . DOM that does not contain such "empty" nodes is called "normalized".
Let's look at a slightly more complex document.
Data Document
- Carefully
- Information
The top tag is html , it has head and body children, and so on. The result is a tag tree:

Attributes
In this example, nodes have attributes: style , class , id . In general, attributes are also considered to be nodes in the DOM whose parent is the DOM element on which they are specified.
However, in web programming, these jungles are usually not climbed, and attributes are considered simply properties of the DOM node, which, as we will see later, can be set and changed at the request of the programmer.
Actually, this is a secret, but DOCTYPE is also a DOM node, and is located in the DOM tree to the left of the HTML (this fact is hidden in the figure).
P.S. As for the secret - of course, a joke, but not everyone really knows about it. It's hard to imagine where such knowledge can be useful...
Normalization in various browsersWhen parsing HTML, Internet Explorer immediately creates normalized DOM that does not create nodes from empty text.
Firefox has a different opinion, it creates a DOM element from each text fragment.
Therefore, in Firefox, the tree of this document looks like this:

In the figure, for brevity, text nodes are simply denoted by a hash. body has 7 children instead of 3.
Opera also has something to brag about. She can add an extra empty element "just from herself".
To see this, open the document. It returns the number of child nodes of document.body , including text nodes.
I get 3 for IE, 7 for Firefox and 8 (!?) for Opera.
In practice, this incompatibility does not create big problems, but you need to remember about it. For example, the difference can manifest itself in the case of enumeration of tree nodes.
The Power of the DOMWhy, besides beautiful drawings, do we need a hierarchical DOM model?
Very simple:
Each DOM element is an object and provides properties for manipulating its content, for accessing parents and children.
The document object is used for DOM manipulation.
Using document , you can get the desired element of the tree and change its content.
For example, this code takes the first element with the ol tag, removes two list elements in sequence, and then adds them in reverse order:
Var ol = document.getElementsByTagName("ol") var hiter = ol.removeChild(ol.firstChild) var kovaren = ol.removeChild(ol.firstChild) ol.appendChild(kovaren) ol.appendChild(hiter)
For an example of the work of such a script - click on the text on the moose page
In older manuals and scripts, you might see modifications to the page's HTML code by directly calling document.write .
In modern scripts, this method is almost never used, the cases of its correct use can be counted on one hand.
Avoid document.write.. Unless you really know what you're doing (and why are you reading a tutorial - you're already a guru)
Let's take a closer look at access methods and properties of DOM elements.
Access to elementsAll access and changes to the DOM originate from the document object.
Let's start at the top of the tree.
document.documentElementTop tag. In the case of a valid HTML page, this would be .
document bodyThe tag, if present in the document (must be).
The following example, when the button is clicked, will display the textual representation of the document.documentElement and document.body objects. The string itself is browser dependent, although the objects are the same everywhere.
function go() ( alert(document.documentElement) alert(document.body) )
DOM element typesEvery element in the DOM has a type. Its number is stored in the elem.nodeType attribute
In total, there are 12 types of elements in the DOM.
Usually only one is used: Node.ELEMENT_NODE , whose number is 1. HTML tags correspond to elements of this type.
Sometimes the type Node.TEXT_NODE is also useful, which is equal to 3. These are text elements.
Other types are not used in javascript programming.
The following example, when the button is clicked, will print the types of document.documentElement , and then the type of the last child of the document.body node. It is a text node.
function go() ( alert(document.documentElement.nodeType) alert(document.body.lastChild.nodeType) ) Text
ExampleFor example, this is how the document from the example above would look like in a browser if each visible element was framed with a nodeType number in the upper right corner.
... Data
- Carefully
- Information
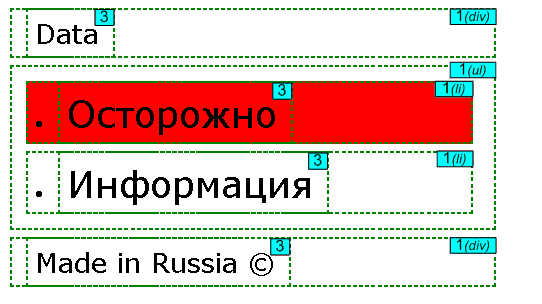
Only the elements inside the body are shown here, as they are the only ones displayed on the page. For elements of type 1 (tags), the corresponding tag is indicated in parentheses, for text elements (type 3) it is just a number.
Child elementsThe following example loops through all the children of document.body .
For(var i=0; i BODY
styleThis property controls the style. It is similar to setting a style in CSS.
For example, you can set element.style.width :
Source code for this button:
There is a general replacement rule - if a CSS attribute has hyphens, then to set style, you need to replace them with uppercase letters.
For example, to set the z-index property to 1000, you would set:
element.style.zIndex = 1000
innerHTMLThis property was once only supported in IE. It is now supported by all modern browsers.
It contains all the HTML inside the node and can be changed.
The innerHTML property is mainly used to dynamically change the content of a page, for example:
Document.getElementById("footer").innerHTML = "Bye!"
Perhaps innerHTML is one of the most commonly used DOM element properties.
classNameThis property specifies the class of the element. It is completely analogous to the html "class" attribute.
Elem.className = "newclass"
onclick , onkeypress, onfocus ...And other properties that start with "on..." store the corresponding event handler functions. For example, you can assign an onclick event handler.
For more information about these properties and event handlers, see
Document structure
You can think of HTML as a set of nested boxes. Tags like and include other tags, which in turn include tags, or text. Here is an example document from the previous chapter:
My home page My home page
Hello, I'm Mariin and this is my homepage.
And I also wrote a book! Read it here.
This page has the following structure:
The data structure used by the browser to represent a document reflects its shape. For each box, there is an object with which we can interact and learn different data about it - what tag it represents, what boxes and text it contains. This representation is called the Document Object Model, or DOM for short.
We can access these objects through the document global variable. Its documentElement property refers to the object that represents the tag. It also provides the head and body properties, which contain objects for the respective elements.
Trees Recall syntax trees from Chapter 11. Their structure is remarkably similar to that of a browser document. Each node can link to other nodes, each branch can have its own branch. This structure is a typical example of nested structures, where elements contain subelements similar to themselves.We call a data structure a tree when it branches, has no cycles (a node cannot contain itself), and has a single distinct "root". In the case of the DOM, document.documentElement is the root.
Trees are often found in computational science. In addition to representing recursive structures like an HTML document or programs, they are often used to work with sorted datasets because elements are usually easier to find or insert into a sorted tree than into a sorted one-dimensional array.
A typical tree has different nodes. The syntax tree of the Egg language had variables, values, and applications. Applications always had child branches, and variables and values were "leaves", that is, nodes with no child branches.
The same goes for the DOM. Nodes for normal elements representing HTML tags define the structure of a document. They can have child nodes. An example of such a node is document.body. Some of these child nodes may be leaves, such as text or comments (in HTML, comments are written between characters).
Each DOM node object has a nodeType property that contains a numeric code that specifies the type of the node. For normal elements, it is 1, which is also defined as the document.ELEMENT_NODE constant property. For text nodes representing passages of text, it is 3 (document.TEXT_NODE). Comments have 8 (document.COMMENT_NODE).
That is, here is another way to graphically represent the document tree:

The leaves are the text nodes, and the arrows show the father-child relationship between the nodes.
Standard Using cryptic numbers to represent a node type is not a JavaScript style approach. Later we will meet other parts of the DOM interface that also seem alien and awkward. The reason is that the DOM was designed for more than just JavaScript. It tries to define a language-independent interface that can be used in other systems - not only in HTML, but also in XML, which is a general purpose data format with a syntax similar to HTML.It turns out uncomfortable. Although standards are a very useful thing, in our case, the advantage of language independence is not so useful. It is better to have an interface that is well adapted to the language you are using than an interface that will be familiar across languages.
To show awkward language integration, consider the childNodes property that DOM nodes have. It contains an array-like object with a length property, and numbered properties for accessing child nodes. But it's an instance of type NodeList, not a true array, so it doesn't have methods like forEach.
There are also problems associated with the poor design of the system. For example, you cannot create a new node and immediately add properties or child nodes to it. First you need to create it, then add the children one by one, and finally assign the properties one by one, using side effects. Code that works tightly with the DOM is long, ugly, and repetitive.
But these problems are not fatal. JavaScript allows you to create abstractions. It is easy to write helper functions that allow you to express operations more clearly and concisely. In general, such tools provide many libraries aimed at programming for the browser.
Tree traversal DOM nodes contain many references to their neighbors. This is shown in the diagram:
Although only one link of each type is shown here, each node has a parentNode property that points to its parent node. Also, each element node (type 1) has a childNodes property that points to an array-like object containing its child nodes.
In theory, you can go to any part of the tree using only these links. But JavaScript provides us with many additional helper links. The firstChild and lastChild properties point to the first and last children, or are null for nodes that have no children. previousSibling and nextSibling point to neighboring nodes - nodes with the same parent as the current node, but located immediately before or after the current one in the list. The first node will have a previousSibling property of null, and the last node will have a nextSibling of null.
When dealing with such nested structures, recursive functions come in handy. The following searches the document for text nodes containing the given string and returns true when found:
Function talksAbout(node, string) ( if (node.nodeType == document.ELEMENT_NODE) ( for (var i = 0; i< node.childNodes.length; i++) { if (talksAbout(node.childNodes[i], string)) return true; } return false; } else if (node.nodeType == document.TEXT_NODE) { return node.nodeValue.indexOf(string) >-1; ) ) console.log(talksAbout(document.body, "books")); // → true
Text Node Properties nodeValue contains a string of text.
Finding Elements It's often useful to navigate these links between parents, children, and siblings and traverse through the entire document. However, if we need a specific node in the document, it is very inconvenient to go through it, starting from document.body and stupidly going through the path hard-coded in the code. In doing so, we make assumptions about the exact structure of the document in the program - which we may later want to change. Another complicating factor is that text nodes are created even for spaces between nodes. In the example document, the body tag does not have three children (h1 and two p), but as many as seven: these three plus spaces before, after and between them.var link = document.body.getElementsByTagName("a"); console.log(link.href);
All element nodes have a getElementsByTagName method that collects all elements with the given tag that are descendants (direct or non-direct descendants) of this node and returns it as an array-like object.
To find a specific node, you can give it an id attribute and use the document.getElementById method.
My ostrich Gertrude:

The third method is getElementsByClassName , which, like getElementsByTagName , searches the contents of the element node and returns all elements that contain the given string in their class.
Changing the document Almost everything in the DOM structure can be changed. Element nodes have a set of methods that are used to modify them. The removeChild method removes the specified child node. To add a node, you can use appendChild, which adds the node to the end of the list, or insertBefore, which adds the node passed in the first argument before the node passed in the second argument.var paragraphs = document.body.getElementsByTagName("p"); document.body.insertBefore(paragraphs, paragraphs);
A node can only exist in one place in a document. So by inserting paragraph "Three" before paragraph "One" we are actually removing it from the end of the list and inserting it at the beginning, and we get "Three/One/Two". All operations to insert a node will cause it to disappear from its current position (if it had one).
The replaceChild method is used to replace one child node with another. It accepts two nodes: a new one, and one that needs to be replaced. The node to be replaced must be a child node of the element whose method we are calling. Both replaceChild and insertBefore expect to receive a new node as the first argument.
Creating Nodes In the following example, we need to make a script that replaces all the pictures (tag) in the document with the text contained in their "alt" attribute, which specifies an alternative textual representation of the picture.To do this, it is necessary not only to delete pictures, but also to add new text nodes to replace them. For this we use the document.createTextNode method.
This  V
V  .
.
Replace
function replaceImages() ( var images = document.body.getElementsByTagName("img"); for (var i = images.length - 1; i >= 0; i--) ( var image = images[i]; if ( image.alt) ( var text = document.createTextNode(image.alt); image.parentNode.replaceChild(text, image); ) ) )Given a string, createTextNode gives us a DOM node type 3 (text) that we can insert into the document to be shown on the screen.
The image loop starts at the end of the list of nodes. This is because the list of nodes returned by the getElementsByTagName method (or the childNodes property) is constantly updated as the document changes. If we started at the beginning, removing the first picture would cause the list to lose its first element, and on the second pass of the loop, when i is equal to 1, it would stop because the length of the list would also become 1.
If you need to work with a fixed list of nodes instead of a "live" one, you can convert it to a real array using the slice method.
var arrayish = (0: "one", 1: "two", length: 2); var real = Array.prototype.slice.call(arrayish, 0); real.forEach(function(elt) ( console.log(elt); )); // → one // two
You can use document.createElement to create element nodes (type 1). The method takes a tag name and returns a new empty node of the given type. The following example defines an elt tool that creates an element node and uses the remaining arguments as its children. This function is then used to add additional information to the quote.
No book can be finished. While working on it, we learn enough to find it immature as soon as we take our minds off it. function elt(type) ( var node = document.createElement(type); for (var i = 1; i< arguments.length; i++) { var child = arguments[i]; if (typeof child == "string") child = document.createTextNode(child); node.appendChild(child); } return node; } document.getElementById("quote").appendChild(elt("footer", "-", elt("strong", "Карл Поппер"), ", предисловие ко второму изданию ", elt("em", "Открытое общество и его враги "), ", 1950"));
Attributes Some attribute elements, such as href for links, can be accessed through the object property of the same name. This is possible for a limited number of commonly used standard attributes.But HTML allows you to assign any attributes to nodes. This is useful because allows you to store additional information in a document. If you come up with your own attribute names, they will not be among the properties of the element node. Instead, you will need to use the getAttribute and setAttribute methods to work with them.
Start code 00000000.
The cat has four legs.
var paras = document.body.getElementsByTagName("p"); Array.prototype.forEach.call(paras, function(para) ( if (para.getAttribute("data-classified") == "secret") para.parentNode.removeChild(para); ));I recommend putting "data-" in front of the names of invented attributes to make sure that they do not conflict with any others. As a simple example, we'll write a syntax highlighter that looks for tags ("preformatted" - used for code and plain text) with a data-language attribute and attempts to highlight the keywords in the language rather crudely.
Function highlightCode(node, keywords) ( var text = node.textContent; node.textContent = ""; // Clear the node var match, pos = 0; while (match = keywords.exec(text)) ( var before = text. slice(pos, match.index); node.appendChild(document.createTextNode(before)); var strong = document.createElement("strong"); strong.appendChild(document.createTextNode(match)); node.appendChild(strong ); pos = keywords.lastIndex; ) var after = text.slice(pos); node.appendChild(document.createTextNode(after)); )
The highlightCode function accepts a node AND a regular expression (with the global setting enabled) that matches the programming language keyword that contains the element.
The textContent property is used to get the entire text of the node and then set to the empty string, which clears the node. We loop through all occurrences of the keyword expression, add text between them in the form of simple text nodes, and add the matched text (keywords) by enclosing them in elements (bold).
We can automatically highlight the entire code of the page by looping through all the elements that have the data-language attribute, and calling highlightCode on each with the correct regular expression.
Var languages = ( javascript: /\b(function|return|var)\b/g /* … etc */ ); function highlightAllCode() ( var pres = document.body.getElementsByTagName("pre"); for (var i = 0; i< pres.length; i++) { var pre = pres[i]; var lang = pre.getAttribute("data-language"); if (languages.hasOwnProperty(lang)) highlightCode(pre, languages); } }
Here is an example:
And here it is, the identification function:
Function id(x) ( return x; ) highlightAllCode();There is one commonly used attribute, class, whose name is a keyword in JavaScript. For historical reasons, where older implementations of JavaScript couldn't handle property names that matched keywords, this attribute is available through a property called className. You can also access it by its real name "class" through the getAttribute and setAttribute methods.
Layout of elements (layout) You may have noticed that different types of elements are arranged in different ways. Some like paragraphsAnd headings stretch to the full width of the document and appear on separate lines. Such elements are called block elements. Others as links or bold text appear on the same line as the surrounding text. They are called built-in (inline). For any document, browsers can build an arrangement of elements, a layout in which each will have a size and position based on its type and content. This spread is then used to create the appearance of the document. The size and position of an element can be found via JavaScript. The offsetWidth and offsetHeight properties give the size, in pixels, of the element. A pixel is the basic unit of measurement in browsers, and usually corresponds to the size of the smallest screen pixel. Similarly, clientWidth and clientHeight give the size of the inside of the element, not counting the border (or, as some say, the curb). I'm in a box
The most efficient way to find out the exact location of an element on the screen is with the getBoundingClientRect method. It returns an object with top, bottom, left, and right properties that contain the position of the element relative to the top left corner of the screen in pixels. If you want to get this data for the entire document, you need to add the current scroll position, which is contained in the pageXOffset and pageYOffset global variables.
Parsing a document is a difficult task. For speed reasons, browser engines don't rebuild the document every time it changes, but rather wait that long. how is that possible. When the JavaScript program that modified the document exits, the browser will need to calculate the new page layout in order to display the modified document on the screen. When a program asks for the position or size of something by reading properties like offsetHeight or by calling getBoundingClientRect, the layout must also be calculated to provide the correct information.
A program that periodically reads the DOM layout and changes the DOM causes the browser to recalculate the layout many times and will therefore be slow. In the following example, there are two different programs that draw a line of X characters 2000 pixels wide and measure the running time.
function time(name, action) ( var start = Date.now(); // Current time in milliseconds action(); console.log(name, "took", Date.now() - start, "ms"); ) time("stupid", function() ( var target = document.getElementById("one"); while (target.offsetWidth< 2000) target.appendChild(document.createTextNode("X")); }); // → тупо заняло 32 ms time("умно", function() { var target = document.getElementById("two"); target.appendChild(document.createTextNode("XXXXX")); var total = Math.ceil(2000 / (target.offsetWidth / 5)); for (var i = 5; i < total; i++) target.appendChild(document.createTextNode("X")); }); // → умно заняло 1 ms Styles We have seen that different HTML elements behave differently. Some are shown as blocks, others are inline. Some add visual styling, such as making the text bold and making the text underlined and blue.
The appearance of an image in a tag or the fact that a link in a tag opens a new page when clicked is related to the element type. But the basic styles associated with an element, such as text color or underline, can be changed by us. Here is an example of using the style property:
Green link
The style attribute can contain one or more property declarations (color) followed by a colon and a value. In case of multiple declarations, they are separated by a semicolon: “color: red; border: none".
A lot of things can be changed with styles. For example, the display property controls whether an element is shown in block or inline form.
The text is shown inline, as a block, and is not visible at all.
The block element is displayed in a separate block, and the latter is not visible at all - display: none disables the display of elements. This way you can hide elements. It is usually preferable to completely remove them from the document, because they are easier to show again later if necessary.
JavaScript code can directly affect the style of an element through the node's style property. It contains an object that has properties for all style properties. Their values are strings that we can write to to change some aspect of the element's style.
Beauty
var para = document.getElementById("para"); console.log(para.style.color); para.style.color = "magenta";Some style property names contain hyphens, such as font-family. Since they would be inconvenient to work with in JavaScript (you would have to write style["font-family"]), the names of the properties in the styles object are written without a hyphen, and instead capital letters appear in them: style.fontFamily
Cascading Styles The style system in HTML is called CSS (Cascading Style Sheets, Cascading Style Sheets). A style sheet is a set of styles in a document. It can be written inside the tag:strong ( font-style: italic; color: gray; )
The text of the strong tag is now italic and gray.
"Cascading" means that multiple rules are combined to produce the final document style. In the example, the default style for, which makes the text bold, is overlaid with the rule from the tag, which adds font-style and color.
When the value of a property is determined by more than one rule, the later rules take precedence. If the text style in included a font-weight: normal rule that conflicted with the default style, then the text would be normal instead of bold. Styles that are applied to a node through the style attribute have the highest precedence.
In CSS, it is possible to set not only the name of the tags. The rule for .abc applies to all elements that have the class “abc” specified. The rule for #xyz applies to an element with an id attribute equal to "xyz" (id attributes must be made unique within the document).
Subtle ( color: gray; font-size: 80%; ) #header ( background: blue; color: white; ) /* p elements with classes a and b and id set to main */ p.a.b#main ( margin-bottom: 20px; )
Latest rule priority works when the rules have the same granularity. It is a measure of how accurately it describes suitable elements, as determined by the number and kind of element aspects required. For example, a rule for p.a is more detailed than a rule for p or just.a and will take precedence.
The notation p > a (…) applies to all tags that are inside the tag and are its direct descendants.
p a (…) also applies to all tags within, whether it is a direct child or not.
The querySelectorAll method, which exists on both the document object and node elements, takes a selector string and returns an array-like object containing all elements that match it.
I love the storm in early May
When the first spring thunder
As if frolicking and playing
Rumbles in the blue sky.
function count(selector) ( return document.querySelectorAll(selector).length; ) console.log(count("p")); // All elements// → 4 console.log(count(".animal")); // Animal class // → 2 console.log(count("p .animal")); // Animal class inside
// → 2 console.log(count("p > .animal")); // Direct child
// → 1
Unlike methods like getElementsByTagName , the object returned by querySelectorAll is not interactive. It won't change if you change the document.
The querySelector method (without All) works in a similar way. It is needed if you need one specific element. It will only return the first match, or null if there are no matches.
Positioning and Animation The position style property greatly affects the positioning of elements. By default, it is static, which means that the element is in its normal place in the document. When it's relative, the element still takes up space, but the top and left properties can now be used to shift from its normal position. When it is absolute, the element is removed from the normal "flow" of the document - that is, it does not take up space and can overlap others. In addition, its left and top properties can be used to absolute position relative to the top-left corner of the nearest enclosing element whose position is not static. And if there is no such element, then it is positioned relative to the document.We can use this to create animation. The following document shows a picture of a cat moving in an ellipse.

The image is centered on the page and set to position: relative. We are constantly updating the top and left properties of the image to make it move.
The script uses requestAnimationFrame to call the animate function every time the browser is ready to redraw the screen. The animate function itself calls requestAnimationFrame again to schedule the next update. When the browser window (or tab) is active, this will result in updates at a rate of about 60 times per second, allowing for nice looking animations.
If we just updated the DOM in a loop, the page would freeze and nothing would be visible. Browsers don't refresh the page while JavaScript is running, and they don't allow the page to be manipulated while it's running. That's why we need a requestAnimationFrame - it tells the browser that we're done so far, and it can do its own browser stuff, like refreshing the screen and responding to user requests.
Our animation function is passed the current time as arguments, which it compares with the previous time (the lastTime variable) so that the cat's movement is uniform and the animation runs smoothly. If we just moved it a given amount of time at each step, the movement would stutter if, for example, another task loaded the computer.
The movement in a circle is carried out using the trigonometric functions Math.cos and Math.sin. I will briefly describe them for those who are unfamiliar with them, as we will need them in the future.
Math.cos and Math.sin are useful when you need to find points on a circle centered at (0, 0) with a radius of one. Both functions interpret their argument as a position on the circle, where 0 denotes the point on the right edge of the circle, then counterclockwise until a path of 2π (about 6.28) takes us around the circle. Math.cos calculates the x-coordinate of the point that is our current position on the circle, and Math.sin returns the y-coordinate. Positions (or angles) greater than 2π or less than 0 are also allowed - rotations are repeated so that a+2π means the same angle as a.

Styles usually require units of measure. In our case, we have to add px to the number to explain to the browser that we are counting in pixels (and not in centimeters, ems, or other units). It's easy to forget. Using numbers without units will cause the style to be ignored - unless the number is 0, which is unit independent.
Summary JavaScript programs can inspect and modify the current browser-rendered document through a structure called the DOM. This data structure represents the browser's document model, and a JavaScript program can modify it to change the visible document. The DOM is organized as a tree in which elements are arranged hierarchically according to the structure of the document. Element objects have properties of type parentNode and childNodes that are used to navigate the tree.The appearance of a document can be changed through styles, either by adding styles to nodes directly or by defining rules for any nodes. Styles have a lot of properties, such as color or display. JavaScript can influence the style of an element directly through its style property.
ExercisesBuilding a Table We built tables from plain text in Chapter 6. HTML makes it easy to build tables. A table in HTML is built using the following tags:
| Kilimanjaro | 5895 | Tanzania |
For each line, a tag contains a tag. Inside it, we can place cells: either header cells or regular cells.
The same data that we used in Chapter 6 is again available in the MOUNTAINS variable.
Write a buildTable function that, given an array of objects with the same properties, builds a DOM structure representing a table. The table must have a header row where property names are wrapped in elements, and there must be one row per array object where its properties are wrapped in elements. This is where the Object.keys function comes in handy, returning an array containing the names of the object's properties.
Once you've got the basics down, right-align the number cells by changing their style.textAlign property to "right".
/* Defines styles for pretty tables */ table ( border-collapse: collapse; ) td, th ( border: 1px solid black; padding: 3px 8px; ) th ( text-align: left; ) function buildTable(data) ( / / Your code ) document.body.appendChild(buildTable(MOUNTAINS));
Elements by Tag Name The getElementsByTagName method returns all child elements with the given tag name. Make your version of this method into a normal function that takes a node and a string (tag name) and returns an array containing all descending nodes with the given tag name.To find out the tag name of an element, use the tagName property. Note that it will return the tag name in uppercase. Use the toLowerCase or toUpperCase string methods.
A title with a span element inside.
A paragraph with one, two spans.
function byTagName(node, tagName) ( // Your code ) console.log(byTagName(document.body, "h1").length); // → 1 console.log(byTagName(document.body, "span").length); // → 3 var para = document.querySelector("p"); console.log(byTagName(para, "span").length); // → 2 Cat's Hat Extend the cat's animation so that both the cat and his hat fly on opposite sides of the ellipse.Or let the hat fly around the cat. Or think of something else interesting.
To make it easier to position many objects, it's a good idea to switch to absolute positioning. Then top and left will be relative to the top left corner of the document. To avoid using negative coordinates, you can add a given number of pixels to the position values.
varcat = document.querySelector("#cat"); var hat = document.querySelector("#hat"); // Your code here.
innerHTML
vartext = element.innerHTML;
element.innerHTML = "";
Assigning a new innerHTML overwrites the code, even if the new value is added to the current one (+=). Scripts added this way are not executed.
outerHTML
Contains the entire element and cannot be modified. Technically, writing to this property creates a new element that replaces the old one. References to the old element in variables do not change.
data
textNode.data - content of text nodes and comments
textContent
element.textContent - text inside the element without tags.
There is also a non-standard innerText property that has a lot in common with textContent .
hidden
element.hidden = true
The hidden attribute is not supported in IE11.
Most standard attributes in the DOM become properties of the object:
element.id = "id"
For non-standard attributes, no property is created (undefined)
You can create your own DOM properties:
element.myData = (name:"John", lastName:"Smith");
and methods:
element.myFunc = function()(alert this.nodeName);
This works because DOM nodes are regular JavaScript objects. These non-standard properties and methods do not affect the display of the tag and are only visible in JavaScript.
Accessing tag attributes:
element.hasAttribute(name)
element.getAttribute(name)
element.setAttribute(name, value)
element.removeAttribute(name)
element.attributes is a pseudo array of attributes.
Attributes are case insensitive (html) and properties are case sensitive (javaScript).
The attribute value is always a string.
Attribute: a.getAttribute("href") - displays exactly what is in the HTML
Property: a.href - may differ from attribute value
Most often, a property depends on an attribute, but not vice versa. Changing the property does not affect the attribute.
The class attribute has two properties:
className - string
classList - object
classList object methods:
element.classList.contains("class") - check if an object contains a given class
element.classList.add("class")
element.classList.remove("class")
element.classList.toggle("class")
classList is a pseudo-array, it can be iterated through a for loop.
data attributesCustom data attributes are available not only as attributes, but also through the dataset property
data-about = "some value"
element.dataset.about
parent.contains(child) - true or false
checks if child node is nested in parent
nodeA.compareDocumentPosition(nodeB) - Provides information about the content and relative order of elements. The return value is a bit mask:
Adding and Removing Nodesvardiv = document.createElement("div")
document.createTextNode("text")
parent.appendChild(element) - the element is added to the end of the parent
parent.insertBefore(element, nextSibling) - element is added before nextSibling
parent.insertBefore(element, parent.firstChild) - added to the beginning
parent.insertBefore(element, null) - works like appendChild
All insert methods return the inserted node.
When moving an element, you do not need to first remove it from the old place, the insertion methods do this automatically.
element.insertAdjacentHTML(where, html) - insert arbitrary HTML code anywhere in the document. Where specifies where to insert html in relation to element - beforeBegin, afterBegin, beforeEnd, afterEnd.
element.insertAdjacentElement(where, newElement)
element.insertAdjacentText(where, text)
the last two methods are not supported in Firefox
node.append(...nodes) - inserts nodes at the end of node ,
node.prepend(...nodes) - inserts nodes at the beginning of node ,
node.after(...nodes) - inserts nodes after the node ,
node.before(...nodes) - inserts nodes before node ,
node.replaceWith(...nodes) - Inserts nodes instead of node .
here nodes are nodes or strings, in any number and combination, separated by commas.
var fragment = document.createDocumentFragment() - simulates a DOM node that disappears when inserted into a document, leaving only its children. Not recommended in modern browsers.
element.cloneNode(true) - deep copy of the element
element.cloneNode(false) - copy without children
parent.removeChild(element)
parent.replaceChild(newElement, element)
element.remove() - removes the element directly, without reference to the parent.
Methods return the remote host
