Bootable USB flash drive for ubuntu. Instructions for creating a bootable USB flash drive with Ubuntu
Many users of computers running Windows or Linux are accustomed to installing their OS from disk drives. This is a fairly convenient and reliable option. But now, updated versions of distributions are increasingly being released, the recording of which will require the purchase of DVD blanks. In turn, finding blank discs becomes quite difficult, since, unfortunately, you won’t be able to find them in the supermarket opposite your house.
A bootable Ubuntu flash drive has a number of advantages over the disk edition of the system. The most significant is the ability to install Linux on computers that do not have hardware for reading DVDs, for example, in the case of a compact netbook. Another plus is faster data reading with USB 3.0 ports, which will reduce system installation time.
Where to get the Ubuntu image
Before you make a bootable Ubuntu flash drive, you need to arm yourself with the system distribution itself. In addition to the torrent trackers familiar to many Internet users, where various images of Microsoft Windows and UNIX-like systems are distributed, Ubuntu can also be downloaded for free on the official website. The manufacturer’s website contains both Russian and international English image download pages, separated by ru and com domain zones. After selecting the desired version of the system, the user is given the option of downloading using a torrent client or directly from the Ubuntu server. Residents of the CIS countries are recommended to find mirrors with the distribution in Yandex repositories for faster downloading.
There is also an option for fans of boxed editions. You can order this version on the official website or on local resources representing Linux. But in this case, not only the cost of delivery and the disk with the free system itself will be required, but also a fairly long waiting time. Unlike the disk edition, the Ununtu bootable USB flash drive will be a faster option both in creation and during the installation itself.
Recording an image using Ubuntu
Creating a bootable Ubuntu USB flash drive in a native operating system is done in several ways. Some of them may seem very difficult, others, on the contrary, will be intuitive. But here, to a greater extent, everything depends on a person’s habits. Many users of Unix and similar systems are accustomed to using the command line. This is explained by one of the first versions of Linux, where all the necessary driver settings were performed only using the terminal. For this category of users, it will be convenient to create a bootable Ubuntu flash drive using system commands.

Creating a bootable Ubuntu USB flash drive using a standard utility
Nevertheless, in order not to deprive newcomers who have recently encountered the use of UNIX systems, we first need to talk about the simplest visualized version of recording an image. Any modern version of Ubuntu has a specialized utility for this purpose in its standard installation package. In order to launch it and start recording, you need to go to the “System” tab, select the “Administration” section, where the “Create a boot disk” option will be available. The disadvantage of this method is the likelihood of error. If this happens, you will need to use another method.
Terminal application
When telling how to make a bootable Ubuntu flash drive using the terminal, it is immediately necessary to clarify that in this method you will definitely need to use the keyboard and the symbols located on it. If this does not suit the user, then it is recommended to pay attention to the method described above.
A bootable Linux Ubuntu flash drive will require the destruction of all data to create it, so it is recommended that you remember to save it. The process itself is quite concise and simple. Having launched the terminal, in its cat you need to type dmesg | tail, after which information about the connected devices with their identifiers like sdb or sdc will appear on the screen. Having remembered the designation of the flash drive prepared for recording, proceed to entering the following command: dd if=/path_to_downloaded_image/image.iso of=/dev/device_identifier. After checking the completed data, you must confirm their entry, after which the recording process will begin. Unfortunately, you won't be able to see it yet. To monitor data copying in a separate terminal window, you will need to enter watch -n 10 killall -USR1 dd.

Creating a USB flash drive in Windows using Unetbootin
A bootable Ubuntu USB flash drive from Windows is created only with the help of specialized programs. One of them is Unetbootin. After downloading the utility on the Internet, you must run it with administrator rights. After this, a window will open in front of the user with an available choice of Ubuntu version, where there is the ability to directly download the desired operating system. The option to select a distribution from a local disk is also available.
Having decided on the system image, you need to mark the type - “USB device” and the media - /dev/identifier_of_required_media. If difficulties arise with its selection, it is recommended to disconnect unnecessary drives. A bootable Ubuntu USB flash drive may contain disk space that is used to store files after the computer is rebooted. It will need to be determined at the user’s discretion, based on the activity of using the live version of the operating system. After clicking the "OK" button, the recording process will begin.

Recording using Linux Live USB Creator
Working with Linux Live USB Creator is very similar to the previous program. The main differences are related only to the interface. It is worth mentioning that on many forums the utility can also be simply called LiLi. The advantage of the program is that it automatically checks the recorded distribution for errors, which will save time due to the absence of the need for personal testing during the installation process. If any malfunctions are detected, the distribution kit will offer to rewrite the program itself. A bootable Ubuntu flash drive can be created here either by automatically downloading the system or an image on a local disk, or from a DVD, if available. To start recording the distribution, the user will need to click on a button made in the form of a lightning bolt.

Creating a flash drive in Universal USB Installer
There are quite a lot of options for how to make a bootable Ubuntu flash drive on the Windows operating system thanks to various manufacturers of specialized software for computers running products from Microsoft. This is justified by the fact that many people use Linux in parallel with another system that has design and office applications that are not supported in Ubuntu. One of the many utilities for creating distribution media is the Universal USB Installer. The program has identical functionality and a similar design to the options discussed above.

Setting BIOS Settings
Before booting from a flash drive, you need to make adjustments to the BIOS settings of your computer's motherboard. By default, booting occurs from the hard drive where the boot sector of the previous operating system is stored. To go to basic settings, each manufacturer uses its own hotkey located on the panel - F1-12 or Delete. It is worth mentioning that many motherboards are equipped with additional options that allow you to bypass the trip to the BIOS menu, switching the device to boot one time.
Live version of Ubuntu
Created using any of the methods described above, a bootable Ubuntu flash drive allows you to take advantage of its live functionality. Usually, if you have not too old equipment, this system selects all drivers automatically. This allows you to boot into the so-called live mode and work on any computer. Both professionals providing service for personal computers and ordinary users who need to copy files on equipment without an operating system or when it fails will be very pleased with this functionality.
A bootable USB flash drive with Linux Mint may be needed to install the system on your computer or to get acquainted with it in Live mode. To begin with, you need to visit our website and then follow a simple sequence of actions that is described in this article.
Creating a bootable USB flash drive from Windows
If you have Windows 7, 8 or 10 installed on your computer, then you need to download a special program. Here you need to start from your final goals and where you will install the system. If you have new computers with UEFI, then you need to download the Rufus program. If you have older hardware, then the UNetbootin program will suffice. Let's look at the nuances of working with each program.
Creating a bootable USB flash drive with Linux Mint using Rufus
Connect the flash drive to your computer, delete all information from it and run the Rufus program. The following window will appear in front of you:

First, specify the path to the iso image on your hard drive, and then select the “GPT for computers with UEFI” partition scheme. You can leave the rest of the program settings as default and click on the “start” button. Wait until the image is written to the USB flash drive and close the program window.
Creating a bootable USB flash drive with Linux Mint using UNetbootin
UNetbootin is available for both Windows and Linux Mint. Connect the flash drive to the computer, delete all information from it and run the program. The following window will appear in front of you:

Specify the path to the Linux Mint image on your computer and select the media on which this image will be written. Click on the "ok" button and wait until the recording finishes.
As you can see, it’s very easy to write Linux Mint onto a flash drive, and in order to boot from it, you need to set the boot priority from removable media in the BIOS. The resulting installation flash drive will be able to run not only on your computer, but also on the computers of your friends, and you will be able to introduce them to our wonderful operating system. If you have any questions, ask them on our website.
Ubuntu is an operating system based on the Linux kernel. It is used on desktop computers, laptops and servers. Contains programs for viewing text documents and tables, as well as for accessing the Internet and others. The set of applications is similar to the usual Windows. A distinctive feature of this software is its non-commercial distribution, incl. and for corporate use. Creating a bootable Ubuntu USB flash drive will be required if you are installing the OS on your computer.
ISO image
Making a bootable Ubuntu USB flash drive is no more difficult than choosing another operating system. You will need an ISO disk image. You can download it on the official Russian website of the OS. To do this you should do the following:
- Go to Ubuntu.ru;
- On the first page, at the top, find the “Download” button and click it;
- Choose the version that suits you;
- Download the system directly or through a torrent tracker.
Please note that versions are provided for 64-bit and 32-bit systems, as well as for servers and computers. Advanced users can download the mini.iso operating system image. Based on it, you can create a system yourself.
On the same page there are other operating systems made on this template. They differ in the set of pre-installed software and graphic design. You can learn about the features of each by following the “Family” link at the bottom of the page. If you are going to create a bootable Ubuntu flash drive while in one of the CIS countries, then it is better to download the distribution from a mirror from the Yandex repositories. This will make loading faster.
For those who need to install Ubuntu from Windows from physical media, there is a service for ordering a “boxed” version on the official website or through local resources that provide Linux. The disadvantage of this method is delivery costs, which can sometimes be significant. In addition, you will have to wait quite a long time to receive the disk. A bootable USB flash drive will also provide a faster installation than a disk.
Creating a bootable USB flash drive on Windows
Creating a bootable one is impossible without downloading additional utilities for working with disk images. This method is suitable for recording Ubuntu to a USB flash drive under Windows 7 and 8.
Instructions

Insert the flash drive into the USB port. Launch the Unetbootin program from the menu. Please note that the program will require administrative privileges. If you have not yet downloaded the Linux distribution, you can do this directly in the Unetbootin program. At the top of the window, select the distribution and then the version. Then at the bottom of the window, select the USB drive and indicate which media you want to install on. I recommend disconnecting all unnecessary flash drives during the installation procedure so as not to destroy important data. Click the "OK" button, after which the image will begin downloading and its subsequent installation on the flash drive. The procedure may take a long time if you have a slow Internet connection.

If the Unetbootin menu does not contain the distribution you need or you have already downloaded the image yourself, then select the “Disk image” option at the bottom of the window. Then click on the button with three dots and find the distribution image. Specify the USB flash drive as in the previous step and click the "OK" button. The image will begin immediately unpacking onto the flash drive. This way you can install almost any image on a flash drive. For example Live CD Drweb or Hirens Boot CD.

When the procedure for installing the image on a USB flash drive is completed, you can boot from it and begin installing Linux on your PC or carry out diagnostics using Live CD distributions.

Video on the topic
note
Before you begin any manipulations with the flash drive, save all important data that may be on it. In the process of creating a bootable USB flash drive with Linux, this data will be destroyed forever!
Helpful advice
Use a flash drive with the highest read and write speeds.
Bootable system disks have proven their worth many years ago, but time passes and progress does not stand still. Disks have been replaced by more compact and durable devices - flash media. By burning the installation disk image to flash drive, you can not only install the system on the hard drive of your computer, but also check whether the purchased computer can work with the Linux system.

You will need
- - operating system image;
- - USB drive (volume of at least 1 Gb).
Instructions
The operating system image must be in ISO format, a standard image file. You can install the system with text or graphical mode (GUI). The first option is used for weaker ones (by configuration).
First of all, you need to download the GParted program. This can be done using a package manager. This program will be located in the following directory SystemAdministrationPartition Editor. Flash media needs to be formatted, so all important data should be moved to the hard drive. After inserting into the usb connector, select the GParted menu, then update "Update Devices". The flash drive will appear in the list as a device with the properties Partition “/dev/sdd”.
To format the flash drive, it must be disconnected. Call the context menu of the flash drive and select the “Unmount” command. In the device context menu, select “Format to” and select the FAT 32 file system.
Now all that remains is to apply all the changes made, click “Apply All Operations”.
It is advisable to download the Unetbootin program (writes an image to) from the Firefox browser, but not necessary. When downloading files with the deb extension, this browser offers to open them through the program that is most convenient for this operation (Gdebi).
After installing this application, its location will be as follows: “Applications - System”. Open it, in the main program window you need to specify the Diskimage option and the path to the ISO image. Click "OK" to start copying the image to flash drive.
Video on the topic
You can use a flash drive not only to transfer information between computers, but also to install an operating system. Creating a bootable Linux flash drive is not difficult, and in this article I will tell you step by step how to make one for almost any distribution.

You will need
- -usb flash with a capacity of at least 2 GB;
- -computer with Windows or Linux OS;
- -iso image of the required Linux distribution.
Instructions
The first step is to prepare a flash drive to install the installation image of the Linux distribution on it. To do this, you need to download the USB Disk Storage Format Tool. You can easily find it on the Internet. With this utility you need to format the flash drive into the FAT file system (note not FAT32, but FAT) for better compatibility. The same can be done in Linux using built-in tools. On Ubuntu this is disks or gparted (needs to be installed separately).
Download and install the Unetbootin program. In Linux distributions, for example in Ubuntu and its derivatives, this utility is already in the repositories, so just install it through a package management program (Application Center, Synaptic, etc.). For Windows, the program can be downloaded from the official website http://unetbootin.github.io/
Bootable flash drives are always useful. The computer is broken, the OS is running slowly, you need to install Linux... There are thousands of such situations, but there is only one solution. In this article we will look at how to make a bootable Linux USB flash drive.
Rufus is the most common and secure recording option. The second one behind it is UltraISO - if any problems arise, you should use it. Well, if he didn’t help, then UNetBootIn will come to the rescue.
Making a bootable USB flash drive using Rufus
Rufus is a program for Windows that allows you to create a boot disk, including Linux. In order to create a bootable USB flash drive, first download Rufus. Now you need to download the desired Linux distribution as an ISO image. After the download is complete, launch the program.
We leave all the parameters as default, just select the disk we need and instead of FreeDOS, select the ISO image and indicate the path to it with the button to the right of the list. For example, an Ubuntu 16.04 installation would look like this:

Click “Start”. All! Now you have your own bootable USB flash drive. Read below for information on how to launch it.
Making a bootable USB flash drive via UNetBootIn
UNetBootIn is a cross-platform application designed to create boot disks for Linux distributions. You can download it.
In order to create a bootable USB flash drive, there are two ways. The first is to select a distribution from the list above:

The second way is to download the image and select it in the field below:

After selection, click “OK”. The bootable flash drive will be installed.
Important! It’s better to download the ISO image of the system yourself, otherwise the program does not guarantee its newness and relevance!
Creating a bootable USB flash drive using UltraISO
UltraISO is a paid program for working with ISO images. To create a bootable USB flash drive, you can use the trial version of the program.
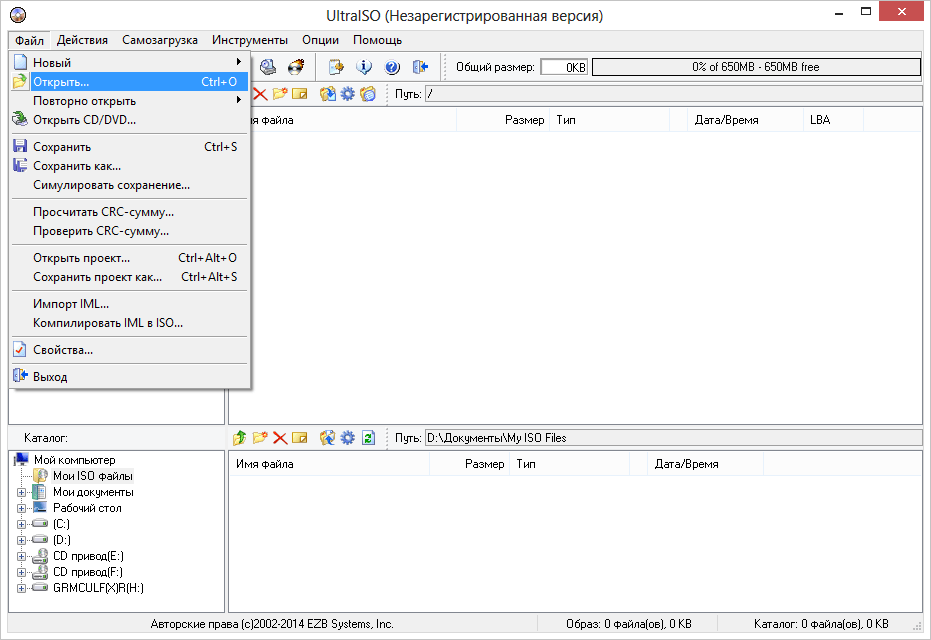
Download the program from the official website. After installation, we will choose to use the 30-day trial period.

Now let’s open the pre-downloaded ISO image:
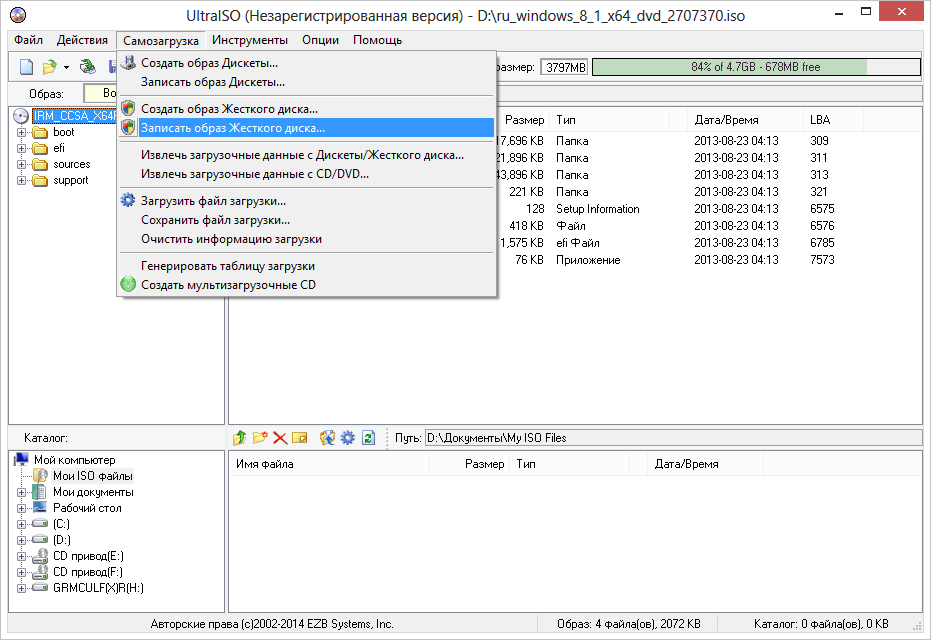
To create a bootable USB flash drive, you need to find the “Boot” menu and select “Burn hard disk image” in it:
Here we select the desired disk, and also select the USB-HDD+ v2 recording method - it guarantees the flash drive will work in almost any BIOS:
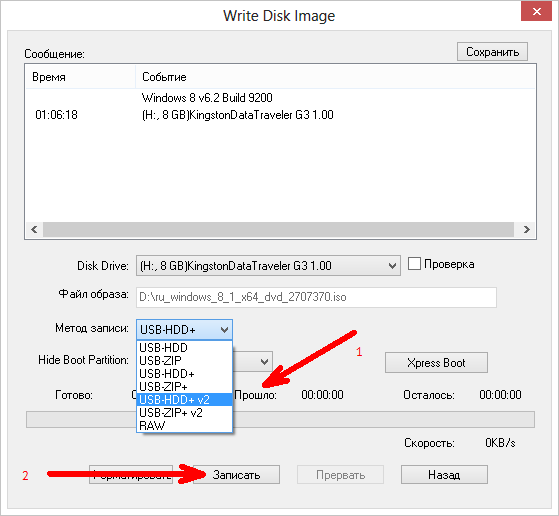
Click “Record”. A warning about formatting the flash drive will appear. Click "OK".

That's it, the process has begun. We are waiting for the recording to finish.
How to boot from a flash drive via BIOS
To launch the BIOS, use one of the following keys (listed in order of decreasing probability of operation).
- DELETE
Important! If you have a Lenovo laptop, then try using the Fn + F12 combination!
