The HDMI cable does not fit into the computer. We connect the monitor (TV) via HDMI. You may also like
Many people who have a large plasma or LCD TV at some point think about connecting it to their computer or laptop. The opportunity to watch a movie on a big screen is of great interest to many users.
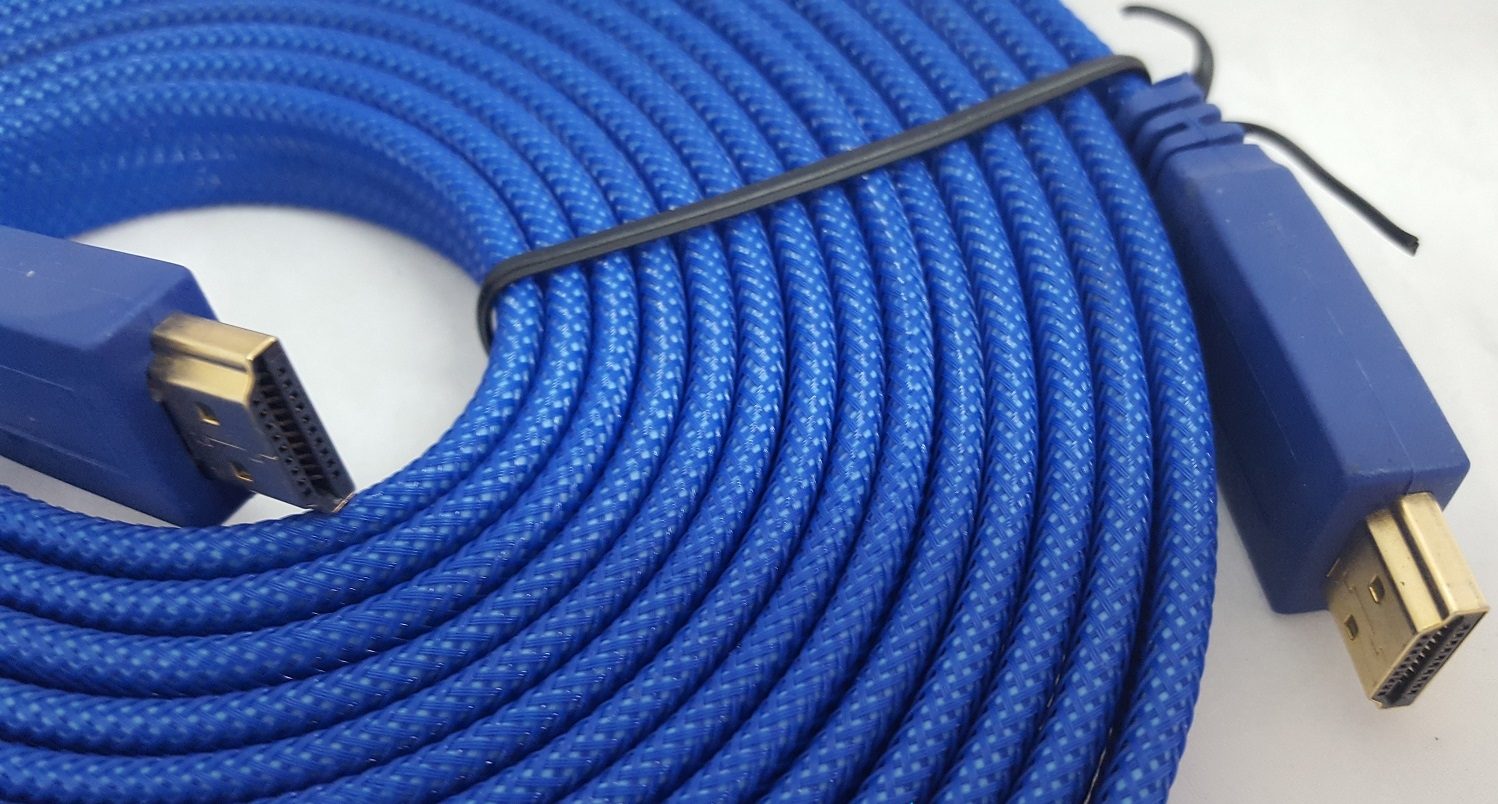
First, let's look at the possible ways to connect these devices, then we'll look at the video card settings, and at the end we'll look at how you can output sound via HDMI. For the simplest connection of the above-mentioned devices, you only need to have an HDMI cable, the ends of which have the same connectors.

Any cable, even the most inexpensive one, is suitable, but keep in mind if you are going to use 3D mode, the cable version must be HDMI 1.4 or higher.
Locate the HDMI jack on your computer as well as on the back of your TV. This is what the socket on the back of the TV looks like:

And this is an image of a nest on the side wall:

But you should look for such a socket on the back surface of the computer system unit:

This socket is located directly on the video card, next to the connector for connecting a DVI or VGA monitor. If a discrete video card is not installed in your system unit, the socket will be located on the motherboard, near the USB ports.
It’s easier with laptops; the HDMI socket in them always looks the same, it’s just that in different models it can be located on different sides:

Portable computer devices (tablets, netbooks, cameras, etc.) are equipped with mini-HDMI connectors, which are three times smaller than a regular connector, and therefore require a mini-HDMI cable.
Many modern users have their LCD TV hanging on the wall, which makes it difficult to connect a massive cable to its back surface. For such cases, cables are provided in which the plug is located at a right angle. You can also purchase a special HDMI corner if you wish:

Using this corner, you can connect to the TV from the back or the side. Some adapters even support the ability to adjust the angle and bend in them not straight, but in any direction. Before purchasing, decide in which direction the cable will come out after connecting it through the corner. Keep in mind that different cable models face different directions.
You won't be able to connect without HDMI connectors (however, if you have a DVI monitor connector, you can use an adapter DVI-HDMI).
So, to connect the computer to the TV via the HDMI connector, insert the cable all the way into both of these connectors. Before connecting, do not forget to disconnect both devices from the power supply if you do not want your HDMI port to accidentally burn out! Moreover, the coincidence of a number of negative factors can even lead to damage to your TV, computer or laptop!
If there are no free ports on your TV, you can purchase a “switcher” (a special HDMI switch). It connects to one of the inputs on the TV and supports connecting several sources at once, which you can switch between using a button or a separate remote control:

You don’t have to buy an expensive switch from an online store for $50-100 or more; regular Chinese models that don’t even need an external power supply also work great. More expensive models are needed only for those users who plan to watch movies in high definition 1080p.
HDMI setup
If you only connected one TV, the picture should appear immediately. Please note: in order for the picture to be displayed on the TV screen, the monitor must be disconnected from the system unit, and not just turned off!After Windows loads, select the appropriate screen resolution. To do this, right-click on an empty space on your desktop and then select the one that suits you " Screen resolution».

Here you can select the appropriate resolution. A higher resolution will provide a clearer picture, but everything on the screen will appear smaller. The system defaults to the maximum resolution supported by the device. If everything suits you, don't change anything. If you are not comfortable working with such a resolution: the font is too small and difficult to read, you can reduce the resolution, taking into account some nuances.
Some monitors and TVs are designed to display a strictly defined number of pixels vertically as well as horizontally. If you set a non-standard resolution, your TV will have to scale it in order to display it on its matrix, which can lead to blurring of the picture and deterioration in image quality.
If your TV supports Full HD resolution (1920x1080), it will reproduce 1280x720 no less well, but all fonts and details will be larger in size. Real TV resolution HD Ready is 1366x768, there is no point in setting the resolution to 1920x1080.
On the Monitor tab, located in " Additional options", you can set the required screen refresh rate. You can set it to 60 Hz or more (if your TV supports it):

If the video is not smooth enough or shakes when viewing, you can experiment with this parameter by changing its value. Set the color rendering quality to “True Color (32 bits)”.
Whenever you change the resolution, color depth or frequency, a window appears in which you need to confirm the changes. If your device does not work with the new parameters, you will not be able to see this window and confirm your actions. Don't worry, in fifteen seconds your computer device's system settings will be restored to their previous settings.
Features of setting up multiple displays
If you connect a TV and monitor at the same time, Windows 7/8 will consider that there are multiple displays connected to the computer. There are 2 modes of simultaneous operation of several displays: cloning (duplication), as well as desktop extension. This option is selected in the same tab where you set the resolution.Duplicating screen
The cloning mode provides for displaying the same desktop image on both playback devices. To use this mode, it is desirable that the monitor and TV have the same resolutions, otherwise one of the devices will have to work with inappropriate settings. At least the devices must belong to the same format (for example, both are widescreen). If the monitor is square (5:4 or 4:3) and the TV is widescreen (16:9, etc.), to the right and left of The pictures on the screen will have black bars.Desktop extension
This mode makes it possible to have 2 desktops or more. That is, if both used displays are installed side by side, when moving, the mouse cursor will move from the TV to the monitor and back.The system assigns each of the connected devices its own number, displayed in front of its name. If you cannot figure out which device is under which number, press the “Detect” button, after which a digit with its number will be displayed on each display:

At the top you can see pictures of devices with numbers printed on them, indicating the location of these displays in space. By dragging these images with the mouse, you can change their order. Using the appropriate checkbox, you can make any of the connected devices the main monitor.
For a computer and a TV connected to it via HDMI, you can separately configure the frequency and screen resolution. The settings of AMD (ATI), NVidia, etc. video cards have their own options related to installing multiple displays. For example, when using an NVidia GeForce video card, right-click on an empty space on the desktop, and then select the line “ NVidia Control Panel" You can configure your monitors in the “Display” section:

How to output sound to TV via HDMI?
 After this, the problem with audio output via HDMI to the TV should be resolved. All you have to do is restart the programs you are using or completely restart your computer.
 Before connecting your TV to your computer via HDMI, it is important to buy a high-quality cable that matches the interface of both systems, and also learn about the software settings. Most modern TVs are equipped with this connector, and it is also present in many PCs. Laptops starting from 2010-2011 are almost always equipped with the necessary port.
Using an HDMI connection has several advantages: excellent Full HD resolution at 60Hz without the need for heavy setup, and excellent sound quality. You can also connect a TV for games - a large screen is perfect for this, inferior in response and picture quality to good monitors.
Preparing to connect
The first step in preparing for connection is purchasing a good cable. The quality of sound and picture will depend on it. Sometimes a mediocre HDMI cable can lead to a loss of brightness of up to 50%, so you should not skimp on its choice.
It must be remembered that the HDMI protocol is updated and improved every year. This means that the new version is better than the old one in 90% of cases. During production, backward compatibility technology is used - all the functions of the old accessory are retained, but new models add improved capabilities.
Important! Each HDMI cable has its own protocol number. The most popular versions are 1.4 and 2.0. The second option is considered optimal.
There are also additional methods for classifying cables:
- Deep Color– a wire with this mark will give a maximum of displayed colors; it is best used to connect high-quality TVs, which cover at least 1 trillion shades.
- Standard– a classic cable for working with a resolution of 1080 pixels, suitable for use at a distance of up to 15 meters.
- V.Color– Designed for the latest high-definition TV models.
- High Speed– This wire is designed for 1080 resolution, but uses a 7.5m length, improving the monitor's response time.
After selecting the cord, you need to find the HDMI jacks on your computer and TV.
Finding a port on devices
In most cases, the HDMI port is labeled on the PC board, on the side wall of the laptop, and on the TV itself. Outwardly, it is similar to the usual USB, but has beveled corners, like a trapezoid. Nearby there are pressed or raised HDMI letters.
The ports are identical for all devices, so the cord will have the same ends. If you need to connect your TV to a computer with integrated graphics, the port will be located in the area of the connector on the external bracket of the motherboard. It's usually right next to the USB.
Important! If the TV is mounted to the wall, then a regular wire will not work. You should choose an adapter in the form of an angle that connects to the TV panel, and then a standard cord is inserted into it.
It happens that you need to connect several PCs (2-3) to one TV. In this case, you can use a switch - a device that redirects the signal to several ports.

TV as a second monitor for a PC
Most PCs and laptops have 1 HDMI input, but this does not limit the number of connected monitors. A regular screen can be connected with other cables - VGA or DP, but these methods provide a slightly different quality. In any case, the TV can be connected to the PC as a 2nd monitor via HDMI.
Select HDMI input as signal source in TV settings
When you connect the TV to a laptop or computer, most often there is no image, or a blue screen appears and a “No Signal” sign appears. This indicates that the factory settings do not automatically change the signal source.
In this case, you need to determine the port through which the TV receives the signal:
- take the remote control for the equipment;
- find the Input or Sources button;
- click and select the signal source in the menu that opens.
Most TVs allow you to select the active signal source in this menu. Otherwise, you will need to indicate the numbers - sometimes they are written on the panel under the port, but more often you need to look at the instructions.
If everything is done correctly, the screen will display a picture that works on a laptop or PC monitor. Next you need to make fine adjustments to the image.
Setting up an HDMI-connected TV in Windows
Correctly setting up your TV when connected to a PC is the key to pleasant work, games and watching movies. Only competent determination of resolution and color calibration will help you enjoy the process. The current operating system is Windows 10, but its configuration is not much different from version 8 and is very similar to manipulations with the “seven”.
After the signal has been established on the TV, we begin to determine the parameters on the PC:
- You need to press Win+P on your keyboard (all letters are shown in the English layout). A side panel will appear on the monitor, through which you can control the operating mode of the monitors.
- Most often, you need to set the video transmission mode to one of the selected displays. The “Recurring” option is required to solve professional problems. The “Computer screen only” mode will automatically turn off the external display, this is important when using a laptop.
- The features of the "Expand" mode are suitable for working with some applications. For example, when you open Photoshop, the finished image will be displayed on the second screen without toolbars.
- Next, you should set comfortable screen mode settings. To do this, right-click on a free area of the desktop and the “Display Settings” item will appear.
- When setting up version 7 or 8 of the system, the name of the item changes to “Screen Resolution”, allowing direct access to the required parameters.
- Numbers are displayed in the corners of the screens, where 1 is the main monitor and 2 is the auxiliary monitor. TVs almost always serve as an additional display. If you check the “Set as primary” checkbox under it, they will switch roles with the PC monitor.
- The remaining settings are less interesting. The orientation, for example, changes only when connecting monitors placed in a vertical position. This is convenient for reading large articles or programming.

In the “Advanced screen settings” item you can find resolution settings. You can experiment with them, choosing a smaller or larger value. Whatever is more comfortable for the eyes and the tasks being performed, that’s what you put in.
When setting the resolution, you need to take into account the parameters of the GPU or discrete video card. For example, if you have a separate modern-generation video card, you can set the maximum resolution, play games and watch movies. If the graphics processor is built-in or “ancient”, it is better to choose in the ratio of performance/system care. Overheating and wear and tear will lead to rapid breakdown of a weak discrete card and can damage the built-in chipset.
What to do if the sound from the computer does not go to the TV?
It happens that after all the manipulations and in the absence of external speakers, the TV does not reproduce sound. In this case, the settings must be made in Windows:
- Click on the system tray (lower right corner with the time line).
- From the menu that appears, select the speaker icon and click Playback Devices.
- Select the TV displayed in the list as the default playback device.
- Click "Configure" to make sure it works.
A “Test” button will appear in the menu that appears; by clicking on it, you will hear the sound of bells that will test the left and right speakers of the TV.
Connecting a 4k TV to a computer. Ultra HD over HDMI
You can connect a 4K TV to a computer only if you have a modern video card that supports this resolution. In this case, the image will be clear and beautiful. If you connect a less powerful card, the performance will drop and there will also be a risk of overheating the PC system.
Important! When displaying a screen at 4k resolution, the frame refresh rate will be 30 Hz, whereas a minimum of 60 Hz is required.

The situation can be corrected only if the video card has an HDMI 2.0 standard, no lower. The cable should be similar. If you connect to other standards, the colors will be incorrect.
If you are satisfied with the 1080 pixel image, you can disable the Ultra HD option in the TV settings. If you need to maintain 4k, then do things differently. To do this, in the display properties through Windows, select the maximum resolution - 3840x2160.
Using a TV like this for games is a dangerous task if the card is not the latest generation, and the screen refresh rate may seem too low.
Connecting a TV to a laptop or PC using HDMI is a simple and easy task. The main thing is to choose the right cable, set a convenient resolution and use any standard TV with this port and 1080 resolution, then no problems will arise.
Hello everyone! The “seven” has many of its own “proprietary” problems, which ordinary users are not always able to deal with. But we will help you with this! So, the topic of today's lesson is setting up an HDMI cable.
We will look at how to connect the cable;
What settings in Windows need to be activated;
At the end of the article there is a detailed Video instruction.
After you have connected the HDMI cable to your laptop/computer and TV, right-click on the “Desktop” and select “Screen Resolution” from the drop-down menu. By the way: the moment you connect the cable, you will see a window in which the “Screen Settings” field and a circle, divided into two parts, with digital designations 1 and 2. Set the settings in the required fields, such as: “Screen ", "Permission", etc. Next, in the “Multiple Screens” field, set the “Duplicate these screens” function. Now click on the “Apply” and “Ok” button. This way you activate all the necessary settings for an adequate image.

Let's move on to the sound settings on the TV: these settings are made on the computer! Click on “Start” - “Control Panel”. In the system settings window that opens, select “Hardware and Sound”. Click on it and select the options “Sound” - “Manage sound devices”. By clicking on it, you get a separate “Sound” window. In this window you should see an icon for the TV connected to your computer, for example “Samsung”. A little lower in the same window you will see the “Speakers” option. We move the cursor over the TV icon (namely the TV, not the speaker) and right-click. A menu will appear in which we select the line “Use as default”. Attention: if everything was done correctly, a green “bird” should appear in the window near the TV. If you want to turn off the sound, you can turn it off in the “Speakers” window: right-click, select the “Set as default” line and click on it. This is such a strange pattern. However, this is how things work. Click “Apply” and “Ok”. By the way, it’s probably no longer a secret to you that you don’t have to buy a GPS navigator if you have an Android phone, all you need is
Many owners of both devices try to connect a computer to a TV via HDMI. Some people succeed right away; others have problems. Let’s say right away that at first glance, this seemingly not a difficult task can develop into many problems.
Connection problems
What are the common problems that arise?:
- There is a picture on both devices, but the sound is on the TV;
- There is an image on the monitor, but there is none on the TV or there is an inscription, “Cable not connected”;
- With a high resolution TV screen, for example, Full HD 1920x1080, the computer monitor distorts the image.
Terms and requirements
Conditions under which you can connect your computer to your TV:
- Availability of an HDMI cable, preferably version 1.4 and higher if you need support for 3D mode;
- Availability of an HDMI output on a computer video card or laptop;
- If possible, two devices support the same screen resolution;
- Installed OS Windows 7, 8, 10.


An HDMI cable needs to be selected of the correct length; there is a wide choice here; you can find cables up to 20 meters long.
Often an LCD TV is mounted to the wall. For many, when connecting an HDMI cable to it, this causes difficulties, although everything is simple here, everything has already been invented before us.
Use, invented just for such a case.

The 90° bend can be in different directions, so before buying such a corner, think about where the cable will go.
You may also encounter the problem of lack of HDMI output from the video card. Look, it can be built in somewhere else, for example, integrated into the motherboard.
If it’s not there either, then you won’t be able to connect the computer to the TV, unless you have a second DVI output on the video card.

For this case, you can use a DVI-HDMI adapter as a solution to the problem.

If you want to connect other devices to the TV, for example, a camera, then it must have a mini-HDMI output. This also applies to tablets, netbooks, etc.

Accordingly, the cable must be appropriate.
If, for example, the TV has only one HDMI input, but there are many sources, for example, a computer, laptop, camera, tablet, etc., then you can additionally acquire an HDMI switch, the so-called “switcher”.
Using the special remote control included in the kit, you can quickly switch between data sources.

You can save on switchers by buying a cheap Chinese version from 5 to 10 dollars. You can order directly from China, although you will have to wait a couple of weeks.
They work no worse than those sold in our stores. And expensive models will be justified only if you often watch videos in Full HD quality.
What does the user get?
By connecting the TV to a computer and other devices, it becomes possible to:
- Watch videos of any format, from AVI, MP4, MOV to Full HD and Blu-ray, from the TV screen;
- View slide show;
- Play computer games;
- Communicate on social networks and Skype;
- Work with documents and programs;
- View large format photographs;
- Conduct online conferences and much more.
It is convenient, practical, modern.
When we have dealt with all these points, we proceed to connecting the computer to the TV.
Connection process
Let's take TV as an example. It’s an expensive model, but that doesn’t matter, in most cases the algorithm of actions is the same for both expensive and cheap models.

Operating system Wimdows 7, how to install it, read.
We connect our HDMI cable to the appropriate sockets on the computer or laptop. In this case, the monitor on the computer is connected via a DVI output.
ATTENTION– all devices must be de-energized, otherwise the HDMI ports may fail and then you will not be able to connect anything anywhere.
The TV has four HDMI inputs, which is good news. One of them is visible in the photo.

We connect our cable to it. We carefully check that the connectors fit tightly into the sockets.
We turn on both devices and watch the monitor and TV.
As a rule, such information appears on the TV screen:
- The cable is not connected;
- Check the source setting and cable connections.

This situation needs to be corrected.
We pick up the TV remote control and press the “Source” button, it is located at the top right.

In the menu that appears, select “External”, and then click HDMI and confirm by pressing the button on the remote control located in the middle.

If everything is connected and configured correctly, then you should see the computer desktop screensaver on the TV screen.
If this is not the case, then the screen extension settings are not configured.
Here we use the method − duplicating screen.
To change parameters anywhere on the computer desktop, right-click and the following menu window will appear.

Click " Screen resolution" and configure the parameters as follows:
- Screen – ½ multiple monitors;
- Resolution – 1920 x 1080 (TV screen resolution, yours may be different);
- Orientation – landscape;
- Multiple screens – duplicate these screens.

For TV screens that support a resolution of 1920 x 1080, you can set the resolution to 1280x720, and the stash of folders and files on the TV will be displayed in large sizes.
Click "OK".
Such actions should correct the situation.
Screen resolution problem
The problem may arise from a mismatch between the resolution of the TV screen and the monitor or laptop screen.
For example, there is an LG 19M35A-B monitor that supports HD resolution 1366 x 768, and we have a TV that supports screen resolution 1920 x 1080 in Full HD video format.
In this situation, it will not be possible to achieve an ideal picture on both screens at the same time. Here you need to choose what is most important now and set this resolution in the settings (see above).
Or get a monitor, for example, LG 22MP55D-P, which already supports Full HD 1920x1080 resolution and then you will have an ideal image on both devices.
Desktop Extensions Method
This method is not suitable for everyone. It is necessary that your computer's video card settings allow you to adjust the resolution of multiple displays.
Most NVidia video cards have such capabilities.
Again, right-click anywhere on the screen and go to “Screen Resolution” (see above).
- Set the main screen to, for example, the BeenQ monitor;
- Resolution 1280 x 1024;
- Orientation – landscape;
- Multiple screens – expand these screens.


No sound
Reason 1
Situations where there is no sound after connecting the computer to the TV are common.
It must be remembered that both video and audio signals are transmitted via an HDMI cable, and if the TV supports 3D, you need a cable version 1.4 or higher.
But, as a rule, this is not a hardware problem, but a software one. All settings are in Windows 7 OS.

At the top, click on the “Sound” menu item.
When you go to the next section, you may not see the device we need there.

To make it appear, right-click anywhere in the window and click “” in the additional window that appears.

We now have Samsung - 1. We activate it by right-clicking and the “Enable” menu item. Don't forget to click “OK.


Sound should now appear on the TV.
Reason 2
The next reason for the lack of sound is the lack of support for high-definition audio output.
To find out if your computer currently supports this feature, go to Device Manager.
To do this, right-click on the “Computer” icon – “Properties” – “Device Manager”. Or press the hot keys “Win+Pause”.
Pay attention to the “” item, it should be as shown below.

If there is no such device, then reinstall the drivers for the video card or update them.
Reason 3
If your TV has several HDMI inputs, then, as a rule, the first one by default is guaranteed to support the reception of a digital audio signal, while the other inputs need to be configured (depending on what model of TV).
To do this, you need to delve into the TV settings and set the necessary parameters.
Some moments
If you want the boot process to be displayed on the TV screen when you boot the computer, and not on the monitor screen, then disconnecting the latter from the network will not be enough; it must be disconnected from the DVI output.
Bottom line
To summarize, we can say that connecting a computer to a TV is not difficult; you just need to get an HDMI cable of the required length and have the necessary inputs and outputs on both devices.
At the same time, hardware problems, as a rule, are quite rare; basically you need to know how to correctly set certain settings in Windows 7 in the TV settings interface.
Video on connecting a laptop to a TV.
Under ideal conditions, all work will take you up to 10 minutes.
I would be grateful if you share this article on social networks:Modern TVs can easily replace a computer display. But how does a computer connect to a TV?
We have collected various ways to solve this common problem.
Connection selection

First, attention will be paid to the optimal options regarding image quality, with which you can easily make a connection. After this, several additional methods will be given.
There is a possibility that the user will need to buy a cable from the store. Usually it is not very expensive, and you can purchase various devices at a specialized radio store or a retail chain that sells consumer electronics.
Please note that the presence of gold plating on expensive cables does not in any way affect the quality of the displayed image.
So, here are a few options for how to connect your computer to your TV:
- HDMI- an ideal option, because to work with it you just need to connect the connectors. As a result, not only sound, but also image will be transmitted well. The only possible problem is that sometimes it may not work from a laptop.
- VGA- one of the easiest ways to connect television. To do this, you only need a cable, which is sold complete with monitors. There is a possibility that the user has an unused device at home. If necessary, you can buy it at a specialty store.
- With cable from DVI the situation is the same - to work with it you only need to buy an adapter and cable.
- Alternatively, you can use a composite cable S-Video. You can work with it either through a cable or through an adapter. But it is not considered the best connection method, because the image may not be very clear. So such a connection is not used if modern technology is available. The connection occurs in the same way as when working with household players.
Connecting using HDMI
Surely many users have heard about this connector. It is on all modern TVs.
The HDMI cable has the same connectors on both ends.
You can buy a cheap cable. But if the user plans to work in 3D mode, it is better to use the latest version of the HDMI cable.
Look carefully, a similar socket is located on the video card near the monitor connection.
If there is no discrete video card, the socket will be located on the motherboard, that is, near the USB port. However, it will look similar.
With a laptop everything is much simpler - it has the same HDMI socket. But it’s located on different sides depending on the model the user is working with.
Sometimes the TV is hanging on the wall and it can be very difficult to insert the cables from the back. It is for this situation that a cable with plugs at right angles is sold.
Alternatively, buy a special HDMI corner.
VIDEO: How to connect a computer to a TV via HDMI
How to connect a computer to a TV via HDMI
Connecting a TV to a computer via a VGA connector
Video Graphics Array is an interface designed to receive and transmit analog video signals. There is no sound transmission in this option for connecting the TV to the computer.
Before connecting, make sure that both devices - the computer and the TV - are equipped with VGA connectors and have a special cable.
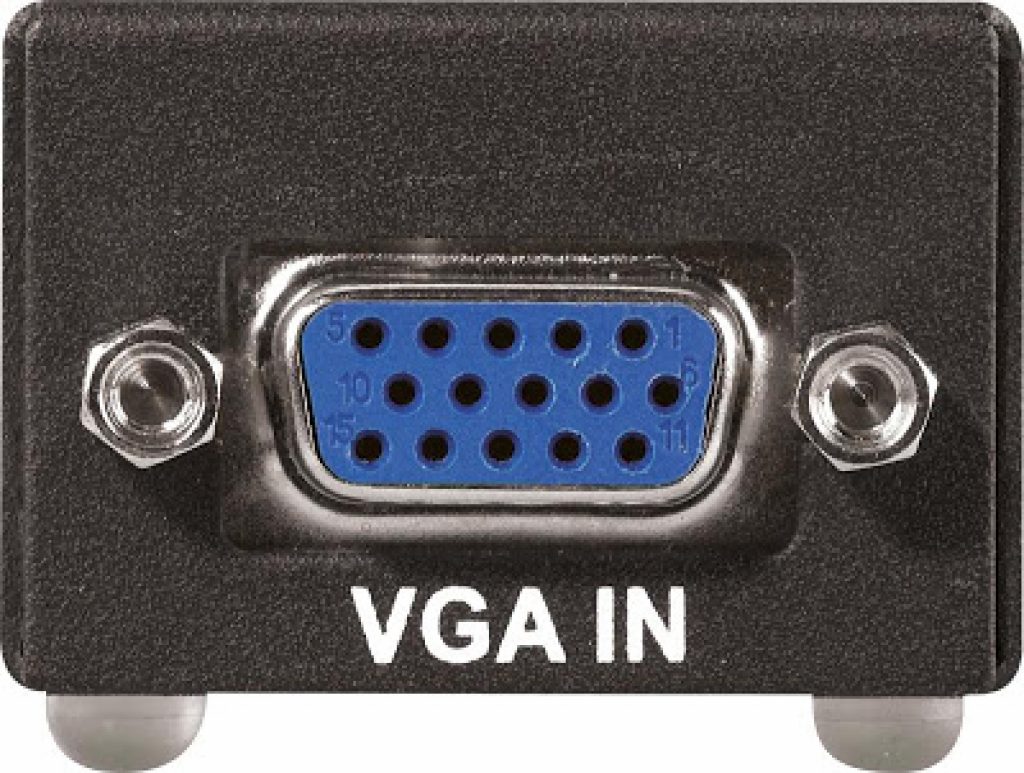
To make such a connection, your computer must be equipped with an operating system no lower than .
Connect the PC and TV with a VGA cable when turned off, then press the SOURCE button on the TV remote control (in some models this may be INPUT) and in the menu that appears on the screen, specify as an external signal VGA(in some models - PC or RGB).
After this, confirm the selected changes by clicking OK.

Right-click on an empty space on the desktop and go to menu in the list that opens.
In this menu, you are given the choice of using both a TV and a computer monitor, as well as setting the required resolution.
Additionally, you can choose to use multiple screens, which gives you the following options:
- Duplicate screens- a function that allows you to get the same image both on the monitor and on the TV screen;
- Expand screens- will allow you to simultaneously watch a video on the TV screen and, for example, type text on a computer;
- Show desktop 1 or 2- this function operates only one of the available screens - either a monitor or a TV.
In general, the process of such connection is not difficult, however, it creates some inconveniences associated with the transmission of sound in this embodiment.
It will have to be connected with a separate cable or use an external speaker system for these purposes.
S-Video
Another option for connecting a TV to a computer is to connect using S-Video connectors.
This option is convenient because all televisions and computers (except very old ones) are equipped with an S-Video connector.
All you need to do is connect these devices with an “S-Video to S-Video” cable.

Before connecting, both the TV and the computer must be de-energized, after which you insert one end of the cable into the connector on the computer’s video card, which is a round black socket, and the other into the S-Video socket on the TV.
As the operating system loads on the computer, the TV screen will blink, indicating that an external signal source has been detected.
The next step is to configure the video card. To do this, click on an empty space on the desktop and in the menu “ Properties» go to the tab « Options» .
Then select the item « Additionally» and in the window that opens, opposite the name of the video card, activate the item « Clone» .
After applying this parameter, click on the item « Display" and select the name of the TV from the available list.
Then, on the TV, search for the signal source and adjust the image.
Miracast

Miracast technology differs from DLNA in that this option for outputting multimedia information from a TV to a PC simplifies the task of viewing not only recorded files stored on the gadget’s hard drive, but also played online on one of the built-in ones.
But Miracast technology has the only drawback - it is very demanding on computer resources.
So it is supported only by certain computers, as well as tablets and laptops that have powerful hardware.
It is important to implement such modern technologies in the TV itself.
If the TV only optionally supports Miracast, then you will have to spend extra money on an adapter that easily connects to the HDMI port.
The technology of a wireless monitor is very simple - the displayed image is compressed using a special algorithm.
After this, it is mirrored via Wi-Fi to a large TV display.
In this case, there is no need to connect the TV to one of the local networks using a router.
Thanks to the receivers, a separate mini-network is organized, simplifying communication with a PC.
To successfully transfer images, install the Wireless Display add-on on your computer and start broadcasting.
Make sure that the Miracast function is activated in the TV menu. This can be done in the settings if you go to the tab "Networks" and go to the Intel WiDi sub-item.
VIDEO: Connecting your smartphone to your TV via Miracast
Connecting your smartphone to your TV via Miracast
Connecting PC and Smart TV

As many probably know, a home network can be created without using a router. In this case, the role of the access point will be performed.
This is done in several ways:
- You can create a connection in one of the special management consoles;
- Alternatively, use ;
- Use third-party programs, for example, Virtual Router Plus.
Please note that a distinctive feature of most built-in Windows tools is greater reliability and stability.
In addition, users will no longer have to waste time searching for programs and installing them on their personal computer. So the registry won't be too clogged.
This method is considered one of the simplest.
Once logged in as an administrator, proceed to launch the command line. To cope with this Windows 8 task, use the key combination Win+X.
When the menu appears, you must select “Command Prompt”. In the seventh version of the operating system, you need to press the Windows + R key combination in the window that opens, and also write CMD and press Enter.
Be sure to write the following command netsh wlan set
and after that press Enter.
The creation of a new network will then be completed and you can begin to launch it. For this purpose, write on the command line
Hostednetwork
It is important to say that you can create a virtual network only once.
However, after the module is rebooted, the user must enter a command to successfully launch the Internet.
As a result, the user will only have to connect to the computer by performing the necessary steps that have already been done when working with the router.
You can control TV from a PC via a wireless Wi-Fi network using the same programs.
There are various add-ons that make it much easier to control your TV using a smartphone.
In this case, the telephone is used as control.
So, this article provides the basic ways to connect a computer to a TV.
It is very easy to cope with this task if you choose the appropriate option and follow the instructions given. Then the user will not have any difficulties connecting.
VIDEO: Connecting a Smart TV to a computer (Wi.Fi - Lan) - using WINDOWS
We connect the TV with Smart TV to the computer (Wi.Fi - Lan) - using WINDOWS
Image Settings
If the image is blurry, you should open system settings and find the section that is responsible for.
Here the user can set the required resolution to match the TV. If necessary, you can change the mode in which the video is displayed.
Most modern smart TVs can be connected to a PC wirelessly using a local Wi-Fi network.
This helps broadcast a variety of content - music, videos, and so on.
If necessary, you can easily duplicate images downloaded from your computer to your TV.
As a result, the latter will turn into a high-quality analogue of a wireless monitor. In addition, when working with wi-fi you won’t need it.
As for the LG device, to activate this function you can use the service Smart Share
AllShare program
There are big differences in wireless connection settings between TV models from different manufacturers.
Most devices are capable of establishing a connection automatically. To work with others, you need to install additional software on the connected one.
So it may be difficult to formulate universal instructions that are suitable for all users.
If you need to connect the TV to a PC via, you can find the necessary information by reading the instructions, or by going to the manufacturer’s official website.
There you can also find the answer to the question of what software is needed for this.
Combination of different outputs

Sometimes it happens that the equipment does not have the necessary connectors. It often happens that there is one port on the TV and another on the computer.
What to do in this case? It’s very simple – you just need to decide which connectors will be used and purchase the right cable.
Alternatively, use special converters that simplify the connection of different ports.
You can use a VGA converter that receives signals from the VGA output of the gadget.
After this, the signals are converted to the most common S-Video for TVs.
When turning off, follow this order:
- The TV and computer should be unplugged;
- Remember to disconnect the antenna and peripheral devices;
- You should connect the cables if you plan to use adapters;
- It is important to connect your computer as well as your TV to the network.
- Next, you need to turn off the computer and wait for the system to fully boot;
- Only after this can you start turning on the TV.
By clicking the right mouse button, the user will see a context menu in which to find the item "Screen resolution" . For the system to connect the TV, you must press "Find" .
By selecting the item "Multiple Screens" , the user must configure the output of images:
- Screen duplication - in this case, the same information will appear on the TV as on the computer screen;
- When screens expand, the computer display and TV will form a common work area;
- Half desktop display means that the image will be displayed on either the TV or the computer.
| Connection method | How to do |
|---|---|
| Connecting a TV using a VGA connector | This connection option will require a separate audio signal output. |
| Connecting using the S-Video connector | Quite a simple and inexpensive way to connect. Due to the fact that most devices have an S-Video connector, it can be used as the main connection option. |
| Connecting a PC using HDMI | You can buy a cheap cable. But if the user plans to work in 3D mode, it is better to use the latest version of the HDMI cable. Next, you should find the HDMI socket, which is located behind the computer or TV. |
| Miracast technology | Miracast technology differs from DLNA in that this option for outputting multimedia information from a TV to a PC simplifies the task of viewing not only recorded files stored on the gadget’s hard drive, but also played online on one of the built-in web browsers. |
| Connecting a PC and Smart TV without a special router | Please note that a distinctive feature of most built-in Windows tools is greater reliability and stability. In addition, users will no longer have to waste time searching for programs and installing them on their personal computer. So the registry won't be too clogged. This method is considered one of the simplest. Further, this issue will be considered in more detail. |
