How to make text over a photo readable. Skinny fonts make the Internet unreadable. Now let’s adjust the clarity of the fonts
A quote or headline over a photo. Today this is a trend that we see everywhere: on Instagram, on magazine covers, on the first windows of landing pages. But when trying to design a picture in this way, you could encounter a problem with the readability of the text. Below are 7 very simple ways to make photo text easy to read. Their Although this article is about typography, it useless for designers (they know all this without us), but useful for content managers and SMM specialists.
1. Use the photo space
Select a photo with sufficiently large fragments of a uniform background. In a landscape, you can place the text against the sky. The photo is from an urban fashion photo shoot - against the backdrop of a brick wall.


2. Place the text on the background
This technique not only solves the problem of text readability, but also controls the viewer’s attention. Use a contrasting font to improve readability. The backing most often comes in the form of a geometric figure, plain or translucent. You can use a line-by-line background, for example, simulating text highlighted with a marker.
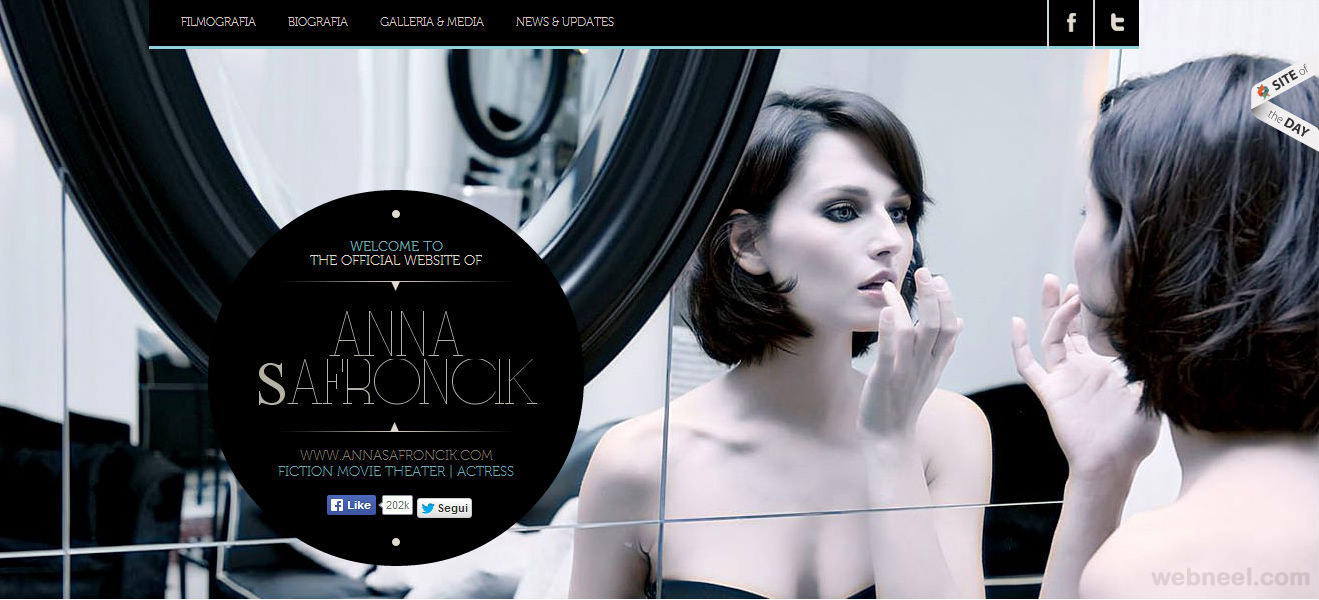

3. Try a blurry image
A charming way in its simplicity. By blurring the background image (or part of it), you immediately bring the title into focus. This, of course, does not free you from the need to find a contrasting color for the font, but it makes the task of readability much easier.


4. Choose contrasting colors
You may not need any special effects if the color of your font and the palette of the image have enough contrast.


5. Darkened background
You can increase the contrast, and with it the readability of the text, by lowering the saturation of the image. A black layer with 30-40% transparency superimposed on top of the photo will give the desired effect.

6.Color filter
By the same principle, you can use color filters


7. Make the font giant
Large elements have great visual weight, so if we were unable to achieve the contrast of color and depth, we will “play with fonts”.
Friends, let's talk about an equally important topic - the ease of using a computer, namely the clarity of the fonts displayed on the monitor.
Many of us work at the computer all day long. And of course they know how tired the eyes are. But do many of us do special exercises every day to relax our eyes? I think not.
Let's help our health at least a little and determine the necessary clarity of fonts.
Microsoft has already thought about our eyes and is offering us its technology ClearType. This technology is designed specifically for LCD monitors and provides font smoothing, thereby improving readability. ClearType displays words on your monitor screen as crisp and clear as if they were printed on a piece of paper.
Now let's adjust the clarity of the fonts
- 1. Go to the menu “ Start”, then to the section “ Control Panel”, then select “ Design and personalization” (you can use windows search for other operating systems, see below)

- 2. In the window that opens, find the section “ Fonts” and click on the link below “ Setting ClearType Text" A new window will open.

On Windows 10 it will be located in the same section.

- 3. Check the box “ Enable ClearType”, click on the button below “ Further" A new window will ask you to set the optimal screen resolution. After making the appropriate settings, press “ Further”.
- 4. You will be asked to select the best option for displaying text in 4 examples. After making the appropriate settings, click the “Finish” button.

Setting the font size
If you feel that the font displayed in applications is too small, and you are constantly straining to read something on the screen, then you simply need to increase the default font size.
To do this, go again to “ Control Panel” –> “Design and personalization” –> click on the item “ Fonts” –> then on the right side of the control window select “ Changing the font size” and select the most convenient option.
And now we are happy with the result. Our eyes will definitely thank us now.
One of the latest trends in web design is the use of high-resolution images as backgrounds. It is very important here that the text placed on top of such a background looks sufficiently contrasting. Clarity and ease of understanding is a very critical aspect of information conveyed through a website.
This Photoshop tutorial will teach you five ways to optimize contrast when placing text over images.
1. Color overlay
The text in the image below is very difficult to make out, and this is due to the complex, heterogeneous background. The background contains a significant amount of detail, especially in the menu area. Also, due to the specifics of the background, the interesting texture of the “Buffalo Wings” font used is almost completely lost. It's clear that the contrast in this image needs some work.
First of all, we need to create a new layer and call it “Color Overlay”. Next, take a color sample from the surface of the shirt shown below (press and hold the I key to do this), and using the keyboard shortcut Shift + F5, fill the created layer with the selected color.

Finally, reduce the Opacity of the filled color layer to 50%, and move it below the text layer.

As you can see, the contrast has become noticeably better. In addition, the details and texture of the “Buffalo Wings” font have become clearer.

2. Shadow
Imagine a situation where a client wants you to place thin, elegant text on top of a highly detailed area of a photo. This also happens sometimes, and you have to look for ways to achieve an acceptable contrast between the background and the text.
In such cases, first of all, you need to choose the right text color.

Obviously, a light color will look best. For example, white.

The next step is to apply a layer style Shadow (Drop shadow). Reduce Opacity to 52%. Then set the Spread: 16% and Size: 10 pixels. The angle should be approximately -144 degrees.

As you can see, applying a simple layer style has noticeably improved the contrast.

3. Line
This is one of the easiest ways to improve contrast. Simply add two white lines below and above the inscription, thus visually separating the text and background.

Added two lines...

...provide an improved perception of two design elements.
4.Shading
Another way to improve the perception of text by increasing contrast is to add a shaded figure under the text. To make it easier for you to understand what I’m talking about, I’ll show you with an example.
In the example below, the inscription is almost impossible to read because it blends into the background. The separator between lines of text gets lost among the details of the building in the background.

To improve the readability of text, select the Custom Shapes Tool, or simply press the U key. Select any shape you like. There are no rules or recommendations here.
Fill the shape with black and give it a 3 px white stroke.

Move the layer with the shape under the layers with the text and its separator, then reduce the Opacity of this layer to 57%.

The result looks more professional and is perceived much better

5. Blur the background
The fifth and final way to improve contrast is to apply a subtle blur effect to the background.
In the original image, the text is quite difficult to discern.
To fully work with images in Microsoft Word 2010, you need to learn how to work with image color settings. It will be useful to know how to apply artistic effects to a drawing, which can significantly improve the appearance of the image. This is outlined in this article with illustrative examples.
Adjusting the brightness and contrast of the image
Adjusting the brightness of an image involves making the image lighter or darker. When you use these adjustment tools, Word 2010 automatically makes changes to the color range. That is, brightness adjustment for shadows, highlights and midtones is not available. Simply put, the adjustment is done using special patterns that have different degrees of exposure. Exposure, in turn, determines the degree of lightening/darkening.
Contrast is the ratio of the lightest areas of the image to the darkest. In color contrast, it is the difference in color shades. In Word 2010, brightness and contrast are adjusted using the same patterns. In turn, templates can have zero brightness or contrast values, which allows you to separately adjust the level of their values. In the case of fine tuning (the “Picture Format” window), the situation is similar.
To adjust the brightness and contrast of the image, do the following:
1st method.
- Select the image in your Word 2010 document and go to the Format tab.
- In the “Change” group, click the “Correction” button and in the window that opens, select the desired brightness value from the collection of samples. If you need more fine-tuning, click on the “Picture Correction Options” button. The Format window will open on the Picture Settings tab.
- In the Brightness area, set the percentage you want and click Close.
2nd method.
- Click on the image in the Word 2010 window and select Format Picture from the context menu.
- Go to the “Picture Adjustments” tab and set the desired brightness values.
The sharpness is changed in the same way. Decreasing the sharpness leads to blurring of the image, and increasing, on the contrary, increases the clarity of the image. However, this results in the loss of smooth transitions in the image and increases its graininess.
Figure 1. Correcting sharpness, brightness and contrast
Image color adjustment
Image color adjustment allows Word 2010 to adjust color in terms of brightness, contrast, sharpness and saturation. By simple manipulations, you can give the image a look that corresponds to the assigned tasks.
Changing color saturation
Color saturation is the strength, intensity of the sensation of color tone. In other words, it is how strongly a certain color is represented in the palette, and how “pure” it is. “Pure” color means the minimal presence of pixels of other colors, their shades, as well as shades of the primary color. Saturation shows how a certain color looks under different levels of light. Saturation, or the intensity of a color, changes depending on the strength of the light. That is, the brighter the picture, the brighter and more saturated the colors in it - and this rule even applies to black and its shades. Without going into the details of color theory, we note that by changing the color saturation you can radically change the appearance of the entire image. Because with a change in color saturation, the composition of the image’s color palette completely changes.
To adjust the color of an image, follow these steps:
- Select the picture you want in your Word 2010 document.
- Click the Format tab, and in the Edit group, click the Color button
- In the window that opens, in the “Color Saturation” group, select the appropriate sample.
For more fine-tuning, follow these steps:
1st method.
- Right-click on the desired picture and select “Format Picture” from the context menu.
- Click on the “Picture Settings” tab in the “Picture Format” window that opens and go to the “Color Saturation” group.
2nd method.
- Click the "Color" button and in the window that opens, click "Picture Color Options."
- Use the Presets and Saturation panes in the Color Saturation group to set the options you want.
Figure 2. Image color settings
Color shade
Changing the hue of a color allows you to lower or increase the “temperature” of the image. Simply put, reduce or increase the saturation of warm or cool shades of color. An example of warm colors are shades of red, yellow, orange, and cool colors are shades of blue, turquoise and gray.
To change the color tone of a picture, follow these steps:
- Click the Format tab, and in the Modify group, click the Color button.
- In the window that opens, go to the “Color Tint” group and select one of the swatches.
For more fine-tuning, go to the “Picture Format” window and in the “Color Tint” group, set the desired values.
Recoloring an image
If you want to completely recolor an image, that is, give it a specific color (color scheme), follow these steps:
1st method.
- On the Format tab, in the Edit group, click the Color button.
- In the window that opens, go to the “Recolor” group and select one of the samples.
2nd method.
- In the Format Picture window, click the Picture Color tab.
- In the “Recolor” group, click the “Recolor” button in the “Blanks” area, and in the window that opens, select the appropriate sample.
Artistic drawing effects
Using artistic effects, you can significantly improve the appearance of an image without resorting to the help of special graphic editors. There are a total of 23 effect samples available. Unfortunately, working with layers is not available.
To give your drawing an artistic effect, do the following:
1st method.
- In the open document window, click on the desired image.
- Go to the "Format" tab in the "Edit" group and click on the "Artistic Effects" button.
- In the window that opens, select the appropriate sample.
2nd method.
- Right-click on the picture and select Format Picture from the context menu.
- In the window that opens, open the “Artistic Effects” tab, then click on the “Artistic Effects” button and select the appropriate sample.
Figure 3. Artistic effects
For more fine-tuning, use the Transparency and Size artistic effect options.
- “Transparency” - allows you to adjust the transparency level of the applied effect. The greater the transparency, the less changes made to the drawing when applying the effect will be reflected and vice versa.
- “Size” - determines the “density” of the applied effect. So for the “Watercolor” effect this is the brush size, for the “Light Screen” effect this is the grid size, etc. The lower the value, the more accurate the changes made and vice versa - it all depends on what type you want to set for the drawing.
Please note that setting parameters is only available after applying the effect to the drawing.
Transparency of individual color pixels
To give an image a special effect, you can “bleach” pixels of a certain color. A similar approach can be used, for example, if you want part of the text to be visible through the drawing.
To set the transparency of pixels of a certain color:
- Click “Set transparent color” in the window for changing the color of the picture - the cursor will take the form of a pencil with an arrow.
- Select an area of the image with the required color and left-click - the pixels of the specified color will become completely transparent.
Figure 4. Final version of the drawing after settings
Conclusion
At this stage of development of Word 2010, it is necessary to be able to change the image in terms of color saturation, brightness, contrast, etc. This will allow you to quickly and efficiently adjust the image without resorting to the help of specialized graphic editors. Fortunately, there are now more than enough opportunities for working with images in Word 2010, which in scale can be compared with individual graphic editors. But, even if you are not faced with the task of becoming a graphics processing specialist, you need to know the basic concepts. Actually, the main ways to adjust images were outlined in this article.
For some people, the font sizes on iPad, iPhone, iPod Touch are too small. Sometimes these small fonts can cause you to refuse to use or purchase iOS devices. Fortunately, there are several ways to solve this potential problem. In this tip we will tell you how to fix everything on iOS 7.
1. Pinch to enlarge.
This is probably the most familiar and common function for increasing content. It works in Mail, Photos, Safari, PDFs in iBooks, Apple Maps and Google Maps. To enlarge an image or text on the screen, you only need to touch the screen with two fingers (usually the thumb and index finger), keeping your fingers close to each other, and then spreading them apart.

Thanks to this action, you will see that the content becomes more and more. You can do this gesture multiple times to get the content as enlarged and easy to read as possible.
This is perhaps the second most popular way to make content larger. It works in Mail, Photos, Safari, Apple Maps and Google Maps. If you want more content, double-click on the screen with one finger. The content will automatically increase evenly on the display.
3. Large font/text size.
This feature changed with the release of iOS 7.
First you should go to Settings, then to General:

Click the Text Size button:

When you click "Text Size" you will see a slider that you can use to adjust the font size. Move the slider to the right to make the font larger, or move the slider to the left to make the font smaller
If you go to the "Accessibility" section, you will see a button that says "Larger font." Now, thanks to this function, in programs that support Dynamic Font, it will be possible to adjust the font size.

4. Magnification.
This form of zooming is called 24/7 zooming because it allows you to zoom in any time you want. Be it on the home screen, in app settings, in the App Store, in Safari, Messages, etc. It works quite simply. To configure, you should go to the “Settings” section, then to “General” and “Universal Access”. Find the "Zoom" button and activate it. To get started with this feature, tap twice on the screen with three fingers. To zoom out, also double-tap on the screen with three fingers. In order to move around the perimeter, you should use three fingers. You can zoom in up to 500x.

iOS 7 introduces a new option to turn on Bold and Increase Contrast. For comparison, below are screenshots with and without the Bold feature enabled.


By applying this option, your iPhone will automatically reboot.
Increasing contrast improves contrast on some backgrounds to make text more readable. To do this, you need to go to “Universal Access” in General Settings and activate the “Increase Contrast” function.

⚡️❗️We are giving away a fitness bracelet Xiaomi Mi Band 4❗️⚡️
The conditions for participation are simple:
- Like ❤️ and write any but adequate comment under the video https://youtu.be/OTVwxwcMKIQ.
- Subscribe to the channel “iLenta - all about gadgets”: https://goo.gl/thxBdB.
- The results of the competition will be published on August 6 in our Facebook group
