Applications for samsung a3. Installing official firmware on Samsung Galaxy A3 (2017). How to set up TWRP for new phones
Instructions for installing the official single-file firmware on samsung galaxy A3 2017 (SM-A320x).
Drivers and programs
Attention!
To install official stock firmware on Galaxy A3 (2017) and return the phone status (Settings > About device > Properties > Device status) to "Official" after switching from custom firmware and thereby restore the ability to receive updates by air, it is enough to follow the instructions provided.
Installation instructions
Do backups all the necessary data and files and save them to a computer, removable media or the cloud. When resetting the device inner memory will be formatted.
Unzip the downloaded archive to a folder with Odin PC for convenience. The file in ".tar" or ".tar.md5" format must be left, but "SS_DL.dll" can be deleted.
Perform a data reset on the device.
To do this, go to the settings in the section " Backup and factory reset", select "Reset data" > "Reset device", enter the PIN code (if one is set) and click on the "Delete everything" button. The phone will reboot.
Run Odin PC as administrator.
Put your device into Download Mode.
To do this, simultaneously hold down the Volume Down key, the Home button and the Power button. Then wait until the phone reboots and agree to the warning by pressing the Volume Up key.
In this state, connect the smartphone to the computer. In Odin, the inscription "COM" should light up.
Press the "AP" button and select the TAR archive of the firmware.
The items "Auto Reboot" and "F.Reset Time" must be activated, and "Re-Partition", if active, must be disabled.
Press the "Start" button. The firmware installation process will begin.
At the end of the operation, if everything went well, the message “All threads completed. (succeed 1 / failed 0)". The phone must be rebooted manually by holding down the power button until the screen turns off. The initial boot of the device may take up to 5 minutes.
ATTENTION!
If the device does not boot for a long time or a data reset has not been done, it must be performed from the recovery.
To do this, simultaneously hold down the Volume Up key, the Home button and the Power button. After downloading, select the item "Wipe data / Factory reset", and after - "Reboot system now". If after these steps the device also freezes at boot, you need to reflash it again.
When the device boots up (it is advisable to skip the initial setup), perform the data deletion from step 6 again.
That's all. After booting up the phone, it will be completely ready for use and its status should change to "Official". If this did not happen and the status is still "Special", it is necessary to repeat the 6th paragraph of this instruction.
It is clear that the Samsung Galaxy A3 (2017) will receive an update to Android 7.0. I would even bet that Android 8.0 for the Galaxy A3 (2017) will be released. So a guide to flashing a smartphone will not be superfluous.
So, to flash the Galaxy A3 (2017), you need to do the following:
- download the Odin program on the PC and make sure that the smartphone has enough charge;
- enter the smartphone into Download Mode (simultaneously pressing the "off" + "volume down" + "home button" keys), then press "Volume up";
- connect the USB cable to the device;
- in the Odin application on your computer, select files from the archive with the firmware:
- for the PIT column - a file with *.pit extension;
- for PDA - a file whose name contains the word CODE, if there is none, then you should know that this is the heaviest file in the archive;
- for CSC - a file with the word CSC in its name;
- for Phone - a file containing MODEM in the name;
- Note. If the files for the CSC, Phone and PIT graphs are not in the archive with the firmware, then we sew using the single file method only, i.e. indicate the location of the firmware in the PDA column, and leave the rest of the lines empty.
The firmware update process traditionally takes several minutes (from 5 to 15) and if successful, you will be prompted to configure the smartphone according to your preferences. After that, you can get to work.
If suddenly something did not work out, you can ask about it in the comments under the article.
Samsung was the main culprit in smartphone screen growth, but back in 2014 the company was trying to offer something different with the Galaxy Alpha. The series was designed to present high-end phones in small cases. We believe that the Galaxy A3 is the spiritual successor of Alfa, and how it turned out already in its third version, we will tell below.
The Samsung Galaxy A3 (2017) is the baby of the lineup in terms of screen size: just 4.7 inches. With the Super AMOLED panel type, it kind of immediately stands in opposition to the screen of the iPhone 7 with its eternal IPS screen.
Another hallmark of the A-series is waterproofing: the IP68 rating again puts the device on par with the latest smartphones. Samsung has also brought its mobile payment solution, offering the user to use Samsung Pay via a fingerprint reader. Again, this is done as if in opposition to Apple pay.
Key features:
– housing: waterproof housing (IP68) with metal frame and coating Gorilla glass on the front and back;
- Screen: 4.7-inch Super AMOLED with a resolution of 720 × 1280 pixels (density 312 units per inch); always-on display function;
– 13 MP camera, f / 1.9, with LED flash; 1080p video recording at 30 frames per second;
- 8 MP selfie camera with 1080p video recording at 30 frames per second;
– operating system: Android 6.0.1 with proprietary TouchWiz shell + upcoming Android Nougat update;
– Chipset: Exynos 7870 octa-core processor with Cortex-A53 cores (1.6 GHz); graphics chip Mali-T830;
– memory: 2 GB random access memory+ 16GB storage + microSD slot (dedicated or hybrid, region dependent);
– battery: 2350 mAh lithium-polymer (sealed) + fast charging;
– connectivity: two SIM cards; communication LTE-A of the 6th category; USB-C WiFi A/B/G/N/ac; FM radio;
– miscellaneous: fingerprint reader; Samsung Pay.
Main disadvantages:
- the second slot for memory cards allows you to use either a second SIM card, or only a memory card;
– only 16 GB of memory available (of which you will only get 10 GB free);
– the main camera is mediocre;
- Weak processor.

Updates compared to last year's model:
– waterproofing properties (IP68);
– always-on display technology displays key information without having to wake up the entire screen;
– Samsung Pay-enabled fingerprint reader;
- 8MP selfie camera
– octa-core processor (compared to quad-core processor), slightly more RAM (2 GB vs. 1.5 GB);
– USB-C port;
– the price went up (from ~ 200 € to ~ 300 €).
preliminary conclusion
The Galaxy Alfa has always been a premium device, positioned for a target audience that looked at iPhones but preferred to spend half the money. So the Galaxy A3 (2017) is struggling with Apple's new flagship. True, for a complete victory, he lacks a normal main camera that would be able to shoot 4k content and have optical image stabilization. And the processor is not as good in terms of processing power as that of the "apple" opponent. But if you really want a small phone that can be operated with one hand, then the 4.7-inch format saves Samsung here. In addition, there is a clear advantage in the display. It's brighter, crisper, and an order of magnitude richer than the iPhone (although the iPhone7 is now offering a quarter-brighter display).
The Samsung Galaxy A3 (2017) is interesting because it fills a sparsely populated niche. Compact phones are now in short supply in the market. Everything is occupied by phablets ranging in size from 5 to 6 inches.
Externally, the smartphone has remained the same, so there is no reason to consider its design again. But the addition of waterproofing properties turned out to be long-awaited, and now the phone has become much more practical. It can be dropped into a puddle or sink without consequences, you can safely take a bath with it and get caught in the pouring rain.

In general, the general update of the characteristics Samsung smartphone The Galaxy A3 (2017) is definitely on point.
Received by owners of Samsung Galaxy A5 (2017). Now it's the turn of the Galaxy A3 (2017). At the same time, it is worth noting that the update was distributed on April 21, and only today it began to be widely discussed. At the same time, Samsung decided to update the A3 so far only in the CIS countries, which, you see, is nice.
The update size is 1.27 GB. For information about innovations, we visited the popular thematic forum w3bsit3-dns.com, where already updated owners shared their impressions. The main disappointment may be the lack of a background blur effect on selfies. At least this was stated by the user under the nickname mr.alex249.
User GordonFreemanBY from Belarus shared a list of innovations. So, the company has updated the main settings menu. Now it is similar to that in the flagship models:

There are several options for a contrasting keyboard:


There was a function "Display notifications". With it, a long press on the app icons on the home screen activates the notification quick view feature. Probably, we are talking about some analogue of 3D Touch.

Samsung Cloud is now represented by a separate section with various information.
Instructions on how to install firmware on Samsung Galaxy A3 (2017) SM-A320 F/FL/Y, official or custom firmware, TWRP recovery custom recovery firmware, getting superuser root rights.
How to install new official firmware (stock) on Samsung Galaxy A3 (2017) SM-A320 F/FL/Y
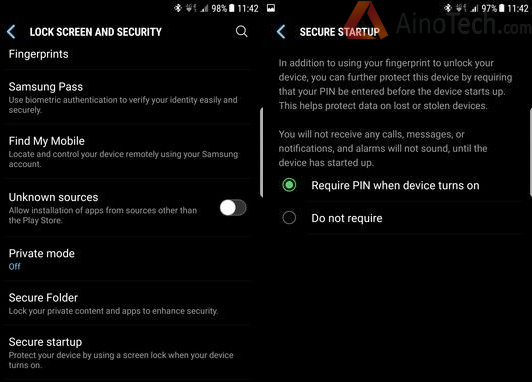
Before flashing samsung phone Galaxy A3 (2017) SM-A320 F/FL/Y, Activate PIN under "Safe Start"
And so the first thing to do is download and install the phone-to-PC communication driver on your PC - Odin3 drivers v3.09
Then download the official firmware you need for Samsung Galaxy A3 (2017) SM-A320
Unzip the firmware and copy it to any folder, such as the desktop. Then run the program for flashing Odin v3 as an administrator.
The smartphone must be loaded in Download Mode, to do this, turn off the phone and then hold down the central button (where the fingerprint scanner is) + power button + volume down button and hold until a yellow triangle appears on the screen.
Connect the translated Samsung Galaxy A3 (2017) into bootloader mode to your PC using the bundled USB cable, in the Odin program, a blue indicator with the name of the port on which the device is connected should light up.
We press the PDA (or “AP”) button and select the TAR file from the folder where we placed the downloaded firmware. In addition to the firmware, the archive may contain the SS_DL.dll file - we do not consider it - this is the remainder of the KIES (garbage).

In the Options tab, uncheck the box next to re-partition. After that, boldly press the start button, and wait a couple of minutes until the smartphone is reflashed. If everything goes well, you will see the inscription “RES OK”, in case of failure, there will be an inscription - “False”, in this case, restart the Odin program and smartphone, repeat the process.
That's all, your SGA 3 smartphone has the official, updated firmware installed without the Knox protection triggering.
Installing custom TWRP recovery on Samsung Galaxy A3 (2017) SM-A320 F/FL/Y
Team Win Recovery Project 3.1.0 custom recovery can currently be installed on SM-A320F and SM-A320FL, SM-A320Y

Before any actions with the firmware of the smartphone, do not forget to enable the “OEM UNLOCK” option in the settings (“for developers” item). To do this, settings -> about the device, click 7 times on the build number, after which a menu should appear - for the developer.
Also, do not forget that if you change the recovery, the KNOX counter will tick by one and you will lose the warranty. After flashing custom recovery on a Samsung Galaxy A3 phone, OTA (System Updates) will stop working, you will need to flash the ROM with custom firmware to receive updates.
How to install TWRP recovery on Samsung Galaxy A3 (2017) SM-A320 F/FL/Y
download and install on your PC the phone communication driver from the PC - Drivers, then download the firmware program itself - Odin3 v3.09
Next, we get a file with the .tar extension from the archive and flash it using ODIN according to the first paragraph of this instruction (firmware firmware), the difference is that in the AP field we insert not the firmware, but ours custom recovery.
It is also important that when flashing custom recovery without getting Root, when the smartphone is rebooted, the stock recovery is restored, so you need to flash custom recovery with unchecking Auto reboot in Odin 3, after flashing custom recovery, turn off your Samsung Galaxy A3 (2017) SM-A320F manually (directly from the Download mode, disconnecting from the computer), then from the off state go to the Recovery mode (with three buttons)). After CF-Auto-Root, this is no longer relevant, the procedure for restoring the stock recovery is beaten.
How to set up TWRP for new phones
1. If you installed TWRP and everything went well for you, now you need to initially configure custom recovery on Samsung A3
2. Boot into TWRP recovery, select “Keep / system RO”. (Don't swipe right or not sure if you can boot into TWRP recovery next)
3. Go to the item “Wipe”, there you need to select “Format Data”. and then confirm the desire to reset "yes".
4. Then go to the “Reboot” item and select “Recovery” there in order to restart the smartphone in TWRP again.
Download custom firmware for Odin for example - A320 17 Nougat Stock Fast and unzip to a convenient place.
We launch the Odin program, and in the AP field select the firmware file
put the smartphone into bootloader mode, to do this, turn off the phone and then hold down the “Home” button + power button + volume down button and hold until a yellow triangle appears on the screen.
Connect the converted Samsung A3 into bootloader mode to your PC using the supplied USB cable, the blue indicator should light up in the Odin program with the name of the port on which the device is connected.
After the PC recognizes the smartphone, press the start button, wait until the end of the smartphone firmware process. At the end, it should automatically reboot.
