Sm a500f service firmware. Installing official firmware on Samsung Galaxy A5. What do we need
So, you have searched and searched just to read up a content that will show you how to flash firmware update on your Samsung Galaxy? Here is precisely what you're searching for; an intuitive, comprehensive, simplified article that deals with the steps/process involved in flashing an updated firmware to any Samsung Galaxy.
You know, most people see this as a hectic action to do, well; it is hectic indeed if you have never done it before. But, this article from us will simply explain the due processes. Well, what else could you expect from a tech of advanced/expert Android users?
What is a firmware update
This refers to the process of upgrading/flashing the default firmware on your Android device. For example, you install marshmallow update firmware; installing this to your mobile will upgrade its Android version from lollipop 5.0.1 to Marshmallow 6.0.1.
It is great to upgrade your OS version to the latest version so that you’ll enjoy quite a lot of customization features. In some situations, you can also unbrick your mobile when flashing the firmware.
Before running this firmware update, ensure you check out the below information;
Check your device mobile no.
Please ensure your battery percentage is above 50 (if possible, wait until the device is fully charged)
Backup everything you currently saved on the smartphone.
- Don’t try with locked bootloader devices like Verizon, T-Mobile, US Cellular carriers, You have to deal with a specific process that you can find in https://forum.xda-developers.com/
This update is for Samsung Galaxy models only; *don't try to use this update on other Manufacturer models.
- Before proceeding this, if you want to update automatically to a newer version, try settings>>About>>Software Update.
steps
Getting started…
Download Samsung USB driver
Also, download the Odin desktop computer software –
- Updato / Android File Host / Android Infotech Host (Our Profile, We frequently added some firmware, which is rare to find in other servers)
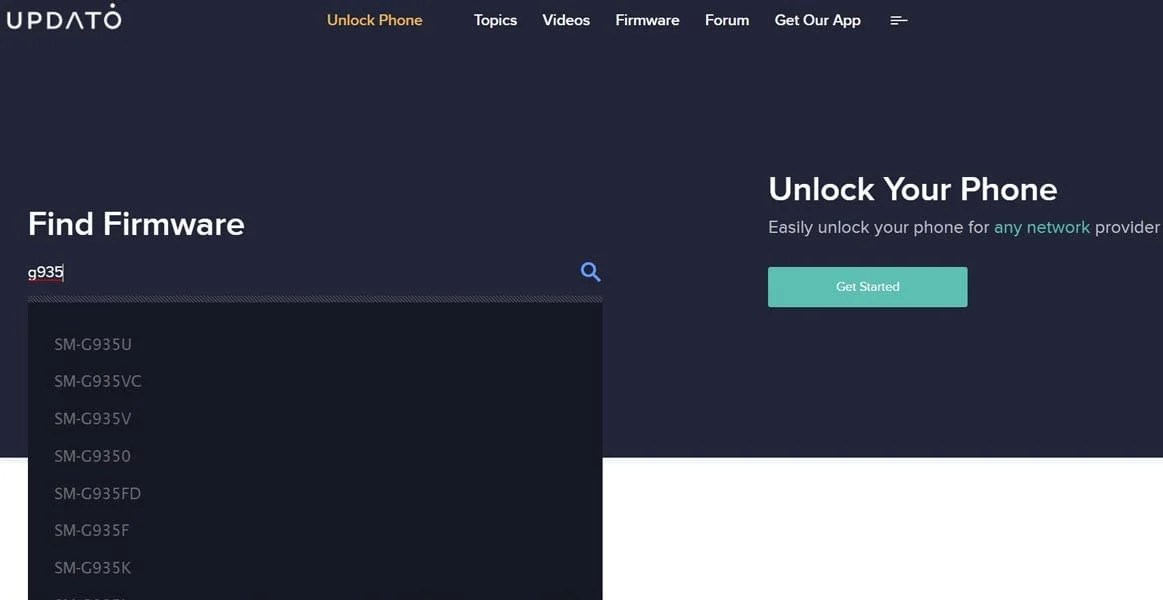
Download the unique firmware for your Samsung Galaxy from a verified source. Here I suggest two sites that provide firmware without download limits and infinite redirects.
- Enter your device model no, and get the recent firmware from the firmware table. If you get confused when selecting firmware, Refer to this post-
note: again, ensure you downloaded all the tool/apps mentioned above. They are what you need for this action to be successful and effective.
Below are the intuitive, straight-to-the-point clues on how to install Samsung Galaxy firmware.
Install the Samsung USB Driver on your PC
Extract the Odin Files and install it on your PC
Copy the Firmware files to your PC
Now, switch off the device.

Switch to Samsung download” mode by holding down the following buttons at the same time >>> Volume Down + Home + Power Button, If you have a Bixby key >>>Volume Down + Bixby + Power Button
When you're in the " Download” mode, you'll receive a warning message. However, neglect the message and press the “ volume up” button to continue.
Connect the device mobile to the PC via USB cable
Launch the Odin application on PC. You should receive a message that shows if your device is successfully connected. However, if you do not see/receive such a message, then, repeat the steps above again

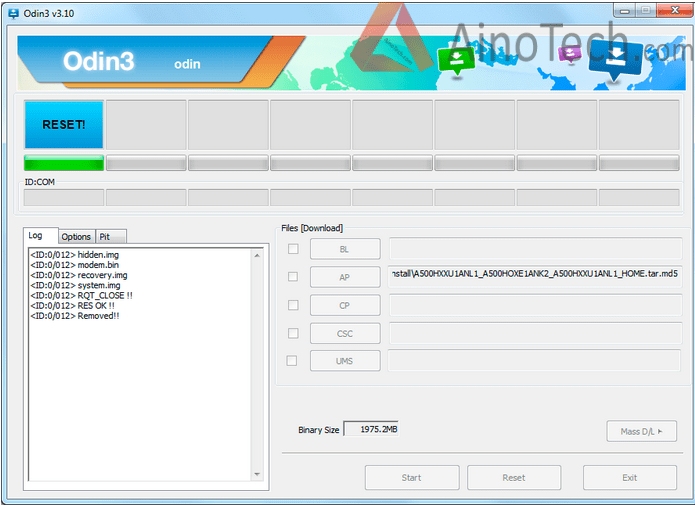
If you received the message that your device is successfully connected, then continue with the steps below. The message shows “ADDED!” on the first command line.

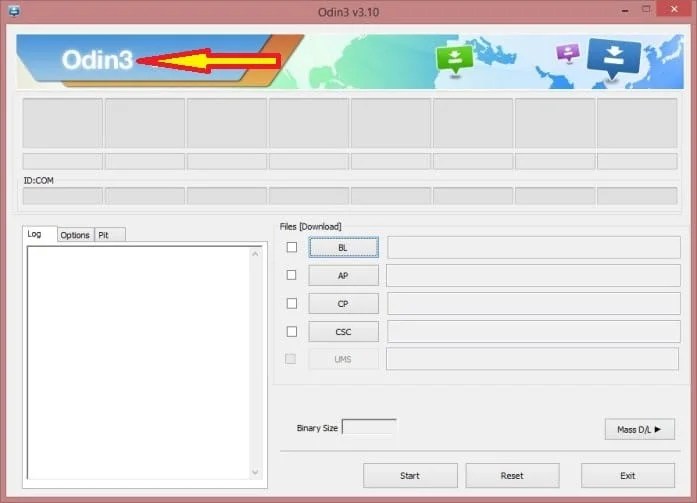
Select the PDA or AP Button then" browse/search” for the Firmware file. When you see it, select and tick the Auto Reboot checkbox; (the auto reboot option is available on the “options” module.
Now click the Start button and wait for the task(s) to complete. It may enter into Recovery mode to add the SuperSu permissions after which you should Reboot again.
How to check out for the current firmware
You can Check the Firmware Details here ->Settings -> About -> Version
What more?
This update is most relevant for advanced Android users as it allows them to gain absolute control over all aspects of their device. Running a firmware update can be more technical than it seems. Hence, you may have to engage an expert to help you out.
Most importantly, you must have an Uninterrupted Power supply PC/ Laptop before you can install a ROM or firmware to any device.
Hey, If you can't find your firmware, Comment below, We will try our best to provide the firmware in our Host… :)
Instructions for installing the official single-file firmware on the Samsung Galaxy A5 (SM-A500x).
Drivers and programs
Attention!
To install the official stock firmware on the Galaxy A5 and return the phone state ("Settings" > "About device" > "Properties" > "Device status") to "Official" after switching from custom firmware and thereby return the ability to receive updates over the air is enough follow the instructions provided.
Installation instructions
Download and install for your phone.
ATTENTION!
If Samsung Kies is already installed, there is no need to install drivers. You just need to completely unload Kies from memory, through the task manager, and then continue.
Disable option " Activation Lock» in the security settings of the device.
If the smartphone data has been encrypted, it must be decrypted.
Download and unzip the archive with the program to an arbitrary folder.
It is important that there is no Cyrillic in the path to the folder. For example, "C:\A5FW\".
Unzip the downloaded archive to a folder with Odin PC for convenience. The file in ".tar" or ".tar.md5" format must be left, but "SS_DL.dll" can be deleted.
Perform a data reset on the device.
To do this, go to the settings on the tab " Accounts» to the section « Archive and reset”, select the item “ Reset device” and press the button “ Delete everything". The phone will reboot.
Run Odin PC as administrator.
Put the device into download mode ( Download Mode).
To do this, simultaneously hold down the Volume Down, Home and Power keys. Then wait until the phone reboots and agree to the warning by pressing the Volume Up key.
In this state, connect the smartphone to the computer. In Odin, the inscription " COM».
Click on the button " AP» and select the TAR archive of the firmware.
Items « Auto Reboot" And " F.Reset Time" must be activated, A " Re-Partition", if active - must be disabled.
Click on the button " Start". The firmware installation process will begin.
At the end of the operation, if everything went well, the message “All threads completed. (succeed 1 / failed 0)". The phone must be rebooted manually by holding down the power button until the screen turns off. The initial boot of the device may take up to 5 minutes.
ATTENTION!
If the device does not boot for a long time or a data reset has not been done, it must be performed from the recovery.
To do this, simultaneously hold down the Volume Up key, the Home button and the Power button. After downloading select " Wipe data/Factory reset", then - " Reboot system now". If after these steps the device also freezes at boot, you need to reflash it again.
For those who have just become a beginner or are not an expert in the vast world of Android and are not particularly familiar with the concept of how - root android, and also why it is needed, what can be done after obtaining Root rights or how to get rid of them later if they are no longer needed, all this can be found in the detailed article -!
First of all!
There are no "left" links or unnecessary actions in this article! If you really need Root Rights, then read carefully and follow step by step, this is a guarantee that you will do everything right! This article on obtaining Root rights is divided into two parts: The first part is Prerequisites and conditions, the second part is Instruction how to get root rights using the received files and programs. If, in the process of obtaining root rights, Android constantly reboots or in the process of eternal loading (it happens extremely rarely, but still), then it's worth it. Now let's start getting Root rights!
Android manufacturers sometimes release new firmware on which it is not possible to get Root using one of the suggested methods, if there are other alternative methods in the article, try them. Doesn't work anyway? Specify the Android version and firmware version in the comments (do not write malicious shitty comments, you will not put this on yourself or others). Android freezes (does not load), read and re-read from the very FIRST PARAGRAPH, all the necessary links are present in the article!
Do you have any questions?
Still have questions or can't get root access to your Android? Leave comments about what worked for you, what didn't work, or what you did differently.Step-by-step instructions for flashing a Samsung SM-A500 Galaxy phone with the Odin program for a new version of android, as well as step-by-step instructions for obtaining superuser root rights (rooting) of a Samsung SM-A500 Galaxy A5 smartphone on android 4.4.4 or 5.0.2 firmware
Before starting the firmware of the smartphone, it is necessary to prepare it in order to protect yourself from a non-standard situation.
- It is necessary to charge the smartphone by more than 60% (ideally 100%).
- Your computer is working fine (no blue screens of death, restarting or shutting down spontaneously), USB cable is not broken.
- Kies3 and its services are closed.
- Made a backup of all important files on the phone.
1. Download everything you need to your computer and install
If necessary, unpack and put the firmware in any folder (check that there are no folders with Cyrillic characters in the path to the firmware).
Drivers for communication Samsung SM-A500 Galaxy A5 with your CP – Samsung USB Driver
The program through which we will actually flash -
2. Resetting the device to factory settings
Turn off your phone, go into recovery mode. Press and hold the Volume Up (Sound Up), Home (Center) and Power buttons at the same time until the phone turns on. On the screen of the smartphone should appear:

Using the volume down / volume up keys, go to the menu item wipe data / factory reset. Press the power button to confirm your selection. Select Yes - delete all user data and press the power button to confirm. Go to the menu item wipe cache partition. Press the power button to confirm your selection.
3. Next, we need to put the smartphone into download mode (Download Mode)
Press and hold the Volume Down (Sound Down), Home (Central button), and Power button at the same time until a warning screen appears. Then press the volume up key (Sound Up) to confirm the transition to download mode. A green robot should appear with the words “DownLoading… Do not turn off target!!”

4. The process of flashing a smartphone Samsung SM-A500 Galaxy A5
Run the Odin program as an administrator

Click on the "AP" button and select the unpacked firmware file
Connect the phone in Download Mode with the original cable to a computer running Odin and the selected firmware file. The ID:COM field will turn blue and the COM port number will appear in it.
Make sure that in the Odin settings (Options) only 2 items "Auto Reboot" and "F. Reset Time"
If everything went well, press the "Start" button, during the firmware the smartphone will reboot, do not panic, it should be so.
After the phone boots up, you will see a welcome screen, and Odin will display PASS! on a green background. The log will show “All threads completed. (succeed 1 / failed 0)”
Disconnect the phone from the computer and reset the device to factory settings. Repeat point 2.
Well, that's all the Samsung SM-A500 Galaxy A5 phone is flashed on the new version of Android OS.
Obtaining Root (superuser rights) on Samsung SM-A500 Galaxy A5 Android 4.4.4
The process of obtaining Root is similar to the process of installing the original firmware using ODIN.
This manual describes the method of obtaining root only on the Galaxy A5. Please make sure you have downloaded the root package for your specific model. This rooting method works with Android 4.4.4 software and all later Android versions.
Your Galaxy A5 must be running official software from Samsung, not a custom ROM or mod.
1
– download the CF-Auto-Root package depending on your phone model to your computer and unzip the zip file.
2.
- Download the program through which we will flash -
3.
– Turn off your phone. Now press and hold the Volume Down (Sound Down), Home (Central button) and Power button at the same time until you see a warning screen.
Press the volume up key (Sound Up) to confirm the transition to download mode.
4.
– Make sure that the USB driver for Samsung Galaxy A5 is installed on your computer (if not, download above and install).
5.
- Run the Odin 3.09 program as an administrator. Connect your phone to your computer while your phone is in download mode.
6.
– If your phone was connected successfully, one of the ID:COM cells will turn blue and the COM port number will appear in it. This step may take some time.
7.
- Now you need to select the file you want to install on your phone, that is, the one you received in Step 1.
Click on "AP" and select the unpacked file.
8.
- In the Odin window, check the items "Auto Reboot" and "F. Reset Time" if they are not checked.
9.
– Press the "START" button in the ODIN window. The installation process will begin and take a few minutes. Once the installation is complete, your phone will reboot, automatically enter Recovery mode and the root package/files will be installed. The ID:COM cell will turn green.
11.
– As soon as the home screen appears on the Samsung A5 smartphone, disconnect the phone from the computer. Attention: Sometimes the device does not enter Recovery mode automatically (as mentioned in Step 10) and does not root your device. If this happens, do the whole procedure again.
Optional:
- Still no root? Do everything described in the instructions again, making sure that the “Auto Reboot” item is NOT checked in the ODIN window. After installation (Step 10), do the following:
- forcefully turn off the phone.
- – Turn on your phone by pressing Volume Up + Home + Power to enter Recovery Mode. The installation process of rooting your phone will begin.
For the current generation of people, a smartphone has become an indispensable assistant and an extremely useful device that combines hundreds of different functions. Take a photo, count the number of ingredients, set reminders, check the weather, read the news, chat with friends - this is not a complete list of everything that modern smartphones are capable of. Sometimes we just forget that they are not eternal and are subject to gradual wear and tear.
Smartphones running the Android operating system have long filled the whole world with their diversity. Their program code is open and ready for editing or improvement. In the process of using such devices, there are times when the software component fails and the smartphone stops working properly. To solve the problem, a simple factory reset may not be enough - you need to flash the Samsung Galaxy A5 SM-A500.
Fortunately, manufacturers of mobile equipment and just enthusiasts have found dozens of ways to change the firmware for all Android devices without exception. The process will take a few minutes and the smartphone will come to life, starting its daily work with renewed vigor. The AndroGoo website has prepared detailed instructions on how to flash the Samsung Galaxy A5 SM-A500.
What will we need?
- Charged at least 50% device (if possible).
- Original USB cable.
- latest version.
- Latest Firmware:
Android 4.4.4: Download for SM-A500F | Download for SM-A500H
Android 5.0.2: Download for SM-A500F | Download for SM-A500H
Android 6.0.1: Download for SM-A500F | Download for SM-A500H
If a new OS version has been released for your smartphone or links to current firmware do not work, please let us know in the comments below the post.
Samsung Galaxy A5 SM-A500 firmware process
- If Kies was installed on the computer, delete it.
- Download and install for Samsung smartphones and tablets.
- Download and install the latest version.
- We restart the computer.
- Unpacking Odin on the desktop. In the same folder, extract the firmware files from the previously downloaded archive.
- We go to Settings -> About device -> Software Details, And click on build number until a message appears stating that You have become a developer.

- Next, we go to Settings -> Developer Options and activate two items USB Debugging And Unlock, foreseen prod.


- We transfer the smartphone to Download Mode. To do this, turn it off completely, hold down the buttons at the same time Home + Power + Volume down.
- After the screen that says Warning, confirm the choice by pressing the button Volume up.

- The phone has entered download mode.

- We launch Odin on behalf of the administrator.
- In this state, we connect the device to the computer using a USB cable (only USB 2.0 and higher) in order to flash Samsung Galaxy A5 SM-A500. If in the ODIN window the field ID:COM turned blue, as in the screenshot below, everything is fine - you can continue. If not, install the drivers again and restart the computer.

Files that can be found in the archive with the firmware
The picture shows the names of the files that may be in the archive with the firmware and indicates where to insert them in the Odin window.

If there is only one file and it takes up a lot of space, paste it into the field PDA/AP. This is the firmware. Other files according to field names.
In the appropriate fields on the right, select the firmware files, based on the example above. IMPORTANT! Only checkboxes should be checked Auto Reboot And F. Reset Time.

- Click on START and wait for the end of the firmware process. At the same time, it is strictly forbidden to disconnect the smartphone from the computer and touch the USB cable. The whole procedure will take several minutes - the specific time depends on the power of the PC.

- After the end, the device will reboot itself. We disconnect it from the PC and start using fresh firmware.

