Compass 3D version 14 panel global bindings. Accurate drawing in Compass-Graph. Bindings. Cursor and its control
Lecture 1. Working with the COMPASS system. Setting up the environment. Image management. Work plane and coordinate systems.
You start working with the system after launch. Next you can:
After this, you can start creating 3D models and drawings. Before finishing your work, you should save the file so that you can continue working on the project next time.
To launch COMPASS:
Click the button Start and select the item in the main menu Programs.
In Group ASCON select COMPASS.
Team Open allows you to open documents stored on your computer's hard drive or on a network drive that you have access to. If the checkbox is checked View, dialog window Open file displays a slide that allows you to preview the contents of the file before opening it.
To open a document:
To end a session with the system:
On the menu File select team Exit.
Click the button OK.
System interface
The KOMPAS system imposes restrictions on simultaneous work with several documents. Thus, only one document can be opened in the main window of the system: drawing, fragment, part, assembly, specification.

When working with a document of any type, the Main menu and several toolbars are displayed on the screen: Standard, View, Current Status, Compact.
The composition of menus and panels depends on the type of active document. Commands that control the display of toolbars are located in the menu View - Toolbars

The Message Bar displays hints on the current action or a description of the selected command.

Help for the current action or active interface element is called by pressing the key
Customizing the Main Menu and Toolbars
You can change the composition of the Main Menu and toolbars by adding or removing command buttons and customizing their display.
To do this, call the command Service - Interface Settings. Activate the Commands tab.

To add a command to a menu or toolbar, select a category and command name. "Drag" the command to the desired panel. Release the mouse button. The command will appear at the specified location.
Compact dashboard

The composition of the Compact panel depends on the type of active document.
Toolbars are activated using toggle buttons.
You can change the composition of the Compact Panel. Next to the toggle buttons are movement markers.
Types of KOMPAS documents
The type of document created in the KOMPAS system depends on the type of information stored in this document. Each document type has a file name extension and its own icon.
Detail- a model of a product made from a homogeneous material, without the use of assembly operations.
Assembly- a product consisting of several parts, manufactured using assembly operations.
Drawing- the main type of graphic document in KOMPAS. The drawing contains a graphic image of the product, a main inscription, a frame, and sometimes additional design objects (a sign of unspecified roughness, technical requirements, etc.). The KOMPAS drawing always contains one sheet of a user-specified format. The KOMPAS drawing file may contain not only drawings (in the sense of the ESKD), but also diagrams, posters and other graphic documents.
Fragment- an auxiliary type of graphic document in KOMPAS. The fragment differs from the drawing in the absence of a frame, main inscription and other design objects of the design document. It is used to store images that do not need to be formatted as a separate sheet (sketch drawings, developments, etc.).
Text and Specification.
units of measurement
KOMPAS uses the metric system of measures.
Distances between points on a plane in graphic documents and between points in space are calculated and displayed in millimeters. When calculating the mass-moment characteristics of parts, the user can control the presentation of the results by assigning the desired units of measurement (kilograms or grams for mass; millimeters, centimeters, decimeters or meters for length).
Numerical parameters of texts (font height, line pitch, tab value, etc.) are set and displayed in millimeters.
Coordinate systems.
When working in KOMPAS, Cartesian right coordinate systems are used.
The coordinate system image appears in the middle of the model window.
The origin of the absolute coordinate system of the drawing is always at the lower left point of the format's overall frame.
The origin of the fragment's coordinate system does not have such a clear reference as in the case of a drawing. Therefore, when a new fragment is opened, the origin of its coordinate system is automatically displayed in the center of the window.
For ease of use, the user can create an arbitrary number of local coordinate systems (LCS) in graphic documents and quickly switch between them.
Cursor and its control.
The cursor is the main tool when working with KOMPAS. Using the cursor, the user invokes commands, draws and edits various objects, points to points, and performs many other actions.
The main way to control the cursor is to move it with the mouse.
You can also move the cursor using the arrow keys on the main or extended keyboard. In this case, the movement will not be arbitrary, as in the case of using a mouse, but discrete.
In graphic documents, the minimum cursor movement when pressing an arrow button depends on the cursor step setting. To change the cursor step, use the special field in the Current State panel.

Controlling the document image in the window.
Image control commands are located in the View - Scale command group. Depending on the type of active document, the set of these commands may vary. The main ones can be called up using the buttons on the View panel.
Zoom in, Zoom out, Current zoom.
The following commands are also available when working with documents:
Zoom in with frame, Zoom in on selected objects,
Zoom in/out, Show all.
Bindings.
In the process of working on documents (usually graphic), there is often a need to accurately position the cursor at various characteristic points of elements, in other words, to snap to points or objects.
COMPASS provides a wide variety of options for snapping to characteristic points (intersection, boundary points, center, etc.) and objects (normally, along the directions of the coordinate axes). All binding options are combined into a menu that can be called up when creating, editing or selecting graphic objects by clicking the right mouse button.

Global bindings.
When you use the snap menu or keyboard shortcuts to precisely position the cursor at the desired point while creating or editing objects, you are using what is called a local snap. However, once the local binding option has been selected from the menu, the system does not remember which option it was.
Unlike local binding, global binding (if set) is always the default when performing input and editing operations. For example, if you select the global snap to intersections option, when you enter a point, the system will automatically search for the nearest intersection within the cursor trap. If an intersection is found, the point will be fixed at that exact location.
You can enable several different global object snaps, and they will all work simultaneously.
On the Current Status Panel there is a button called Set Global Bindings, which allows you to open the Global Bindings settings dialog. To set the desired combination of global bindings, turn on or off the desired options in the dialog.

You can also disable all global bindings and then enable them again as before, using the Disable/Enable global bindings button on the Current Status Panel.

A local binding has a higher priority than a global one, that is, when any local binding command is called, it suppresses the set global one for the duration of its action (until a period is entered or a failure is entered).
Selecting objects and deselecting them.
While working with KOMPAS documents, the user performs various operations on objects - edits them, copies them, moves them, rotates them, and so on.
Almost all commands for constructing three-dimensional objects allow you to specify the objects participating in the operation, both before and after calling the command.
Some geometric and three-dimensional construction commands operate in such a way that after they are launched, you first need to specify objects, and then the actual operation on these objects begins. For example, this is how warps and area deletions work.
Most geometric construction commands require selecting the desired objects before running them. For example, copy and rotate operations affect exactly those objects that were selected before calling the command.
Selecting graphic objects.
To select objects with the mouse, do the following.
1. Move the cursor to the desired object. The cursor "trap" must capture the object.
2. Left click. The color of the object will change - it will be drawn in the color that is set for selected objects in the system settings.
If you need to select multiple objects, press
You can select several objects in another way - using a rectangular frame. Place the cursor on an empty space (so that it does not grab any objects), press the left mouse button and move the cursor while holding the button down. A frame will appear on the screen following the cursor.
Grab several objects with this frame and release the mouse button. All objects entirely within the frame will be selected.
Once the desired objects are selected, you can perform various operations with them - delete, move, copy, save to the clipboard, etc.
To deselect an object, left-click anywhere outside the object. The selection will be removed and the object will appear in its normal color.
COMPASS - allows you to select a wide variety of objects and their combinations using commands collected on the Select menu page. On the same page there are commands for deselecting objects.

Select the necessary commands from the menu and use them to select the corresponding set of objects or deselect them.
After calling any of the commands, the Abort Command button appears on the Special Control Panel, which can be used to terminate the current selection command.
Using a grid.
When you are working with a graphic document or an operation sketch, it is often convenient to include an image of the grid on the screen and assign snaps to its nodes. In this case, the cursor moved by the mouse will begin to move not smoothly, but discretely along the grid nodes, that is, with a certain step.
The grid is not part of the document and is intended only for ease of use. Grid points are never printed on paper when a document is printed.
COMPASS provides a variety of grid display and customization options. It is possible to set different grid steps along its axes, draw a grid with nodes, as well as assign a rotated relative to the current coordinate system and a non-rectangular (distorted) grid. In addition, the image of the grid on the screen is not strictly connected to the setting of snapping on this grid.
To enable a grid image in a window, click the Grid button in the Current State panel. The button will remain pressed.
You can set the global grid snap mode in the window. In this case, the mouse cursor is moved discretely along the grid points.
Global grid snapping (like any other global snapping) only affects the window in which it was set. The image of the grid itself on the screen can be turned off.
COMPASS allows you to configure grid settings that will be the default for all new documents.
To configure the grid, follow these steps:
1. Call the command Service - Options... - System - Graphic Editor - Grid.
2. Set the necessary grid parameters for windows of new documents and click the OK button in the dialog.

System accelerator keys.
The system provides accelerator keys for frequently performed actions. These keyboard shortcuts cannot be changed.
System-wide actions
Cursor position control and snapping. NumLock mode must be enabled (NumLock indicator is on)
It is possible to position the pipe and pipe fittings in the model by precisely selecting the location of the segment and fitting or by adjusting the parameters for calculating the type and location of the fitting in the program.
The program provides a range of tools and placement options, including pipe handles and a compass, to help you position the pipe and pipe fittings.
Using Pipe Handles
You can route a pipe from the open branch of a selected pipe using the continuation handle. You can also use the transfer handle to position and stretch the pipe.
Use the transfer handle at the end of the pipe segment to change the length of the selected pipe.
In addition to pipe routing, you can also use the continuation handle on the open pipe to add an elbow. If you use the continuation handle, which is not located on the open pipe, a branch will be formed.
In pipe segments, the branch continuation handle is located in the middle. The pipe fittings also have branch extension handles. For example, an elbow has a branch continuation handle that can be used to convert the elbow into a tee.
For more information about pens, see Plant 3D Pens.
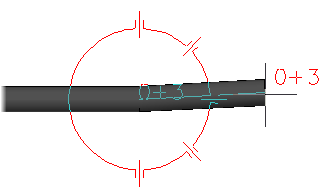
Routing pipes using a compass
The compass is used to trace the pipe at precise angles.
Note:
Points set using a compass are limited to the tracing plane. You can disable the compass to set a point outside the routing plane.
The compass displays tick marks in a circle. You can set the angle between ticks, change the compass size, or turn off the compass.
Note:
The compass snap increment is also used when responding to the "Specify rotation angle" prompt (for example, when applying a rotation handle). You can turn off the compass reference increment to set a precise rotation value.

When you add a fitting, the compass notches are set to match the available fitting angles specified in the pipe spec.

You can set a tolerance angle to allow slight angle deviations when joining pipe end-to-end or adding a fitting. For example, you can specify an angle of 91 degrees when applying a 90-degree elbow.
If you apply a tolerance angle, the compass will display the tolerance angle ticks. By default, angle tolerance is disabled.
Offset Pipe Placement
When routing a pipe, you can specify eight offset directions in addition to the centerline. If you specify an offset to the bottom of the pipe, you can then directly specify the location of the supports.
The offset is relative to the routing direction; it is not absolute. When routing a pipe in the vertical direction, the bottom of the pipe is aligned with the wall. The following actions are possible.
- Adjust alignment and offset on the ribbon before routing the pipe.
- Set or change alignment from the command line while routing a pipe.
When routing with an offset, if you need to use an object snap to define a point on the pipe but don't need to attach to the pipe, you can turn off plantoffsetconnect.
Accurate placement
It is possible to specify precise object snap points if continuation handles are not available or are not in the desired location.
Typically, if you need to attach a pipe while routing, an object snap is used to specify the exact location.
You can use node or end object snaps to connect to the end of another pipe. If you need to attach a pipe at a right angle, use a perpendicular object snap. Use the closest object snap to define a point on the centerline of the pipe.
Note:
Use the Node object snap to connect to the fittings.
For more information about object snapping, see .

Using tracking, you can specify a point that is aligned with another point. For more information, see .
It is possible to set a distance (pipe length) to indicate the next point. For more information, see .
Using tracing solutions
If you specify a connection whose end points are not linear, AutoCAD Plant 3D can route the pipe and add fittings to complete the connection. If there are several trajectories, a choice of several is available solutions.
Let's consider such a useful tool as snapping to a grid in Compass. It is often used in situations when you need to draw something without a model, without sketches, but it is required that the automatic dimensions be smooth and beautiful, say, multiples of 5 mm.
Fig.1 Compass. Snap to grid. Shown is a grid with dots at 1 mm intervals and nodes every 5 mm.
Snap to Grid in Compass - Display
To snap to a grid in Compass, you first need to turn on the grid, otherwise you won’t be able to see where you’re snapping to. Secondly, you need to enable bindings.
 Fig.2 Snap to grid in Compass. Snap to grid settings on the Quick Access Toolbar.
 The arrow shows the toggle button for enabling the grid in the graphic area of the document. It's on now. The button for calling the snap menu and the checkbox for snapping to the grid are framed.
Snap to grid in Compass - Settings
So, to configure the grid in Compass, you should go to the Options tool:
Main menu: Settings - Options... - System tab - Graphics editor node - Grid node
If you change the grid parameters, the document will have to open again for the changes to take effect. Save the document if necessary. There is no need to restart the compass.
 Fig.3 Compass. Grid settings - Options tab. On this tab
 As can be seen from the figure (Fig. 3), the grid settings are divided into two tabs. On the first left “Parameters”, the grid type and grid step are configured. On the second tab “Rendering”, you can configure what relates to the visualization of the grid - the size of the point in pixels, the type of display of the node, the pitch of the nodes. See Fig.4.
 Fig.4 Compass. Grid settings - Rendering tab.
 Snapping to a grid allows you not only to draw lines of multiple sizes - when drawing on a grid, it is easy to maintain the perpendicularity of the lines and build lines at an angle of 45°.
In order to temporarily disable bindings, you can hold down Alt on keyboard.
When you use the snap menu or keyboard shortcuts to precisely position the cursor at the desired point while creating or editing objects, you are using what is called a local snap. However, once a local binding option has been selected from the menu, the system does not remember which option it was. When you need to make exactly the same binding to another point, you will have to call up the menu and select the desired command again. This is inconvenient if you need to perform several bindings of the same type in a row.
Unlike local binding, global binding (if set) is always the default when performing input and editing operations. For example, if you select the global snap to intersections option, when you enter a point, the system will automatically search for the nearest intersection within the cursor trap. If an intersection is found, the point will be fixed at that exact location.
You can enable several different global object snaps, and they will all work simultaneously. In this case, the point is calculated on the fly; a phantom corresponding to this point and text with the name of the currently active binding are displayed on the screen. The phantom and text display color matches the color set for the enlarged cursor.
The button for calling the dialog for setting up global bindings is located in the Current Status Bar.
In order to set the desired combination of global bindings, turn on or off the required items in the dialog.
You can also disable all global bindings and then enable them again as before, using the Disable/Enable global bindings button in the Current Status Bar.
Button Deny/allow action global bindings
This button serves as an indicator of the action of global bindings: a pressed button means that global bindings are disabled, a pressed button means that global bindings are disabled.
To enable previously disabled global bindings, press the Disable/enable global bindings button.
To switch a button using the keyboard, use the keyboard shortcut
To enable/disable global bindings, you can also use the Disable bindings option in the global bindings settings dialog.
Local binding is a higher priority than the global one, that is, when any local binding command is called, it suppresses the installed global one for the duration of its action (until entering a dot or failure).
9.5. Coordinate systems
9.5.1. Absolute coordinate system
When working in KOMPAS-GRAFIC LT, Cartesian right coordinate systems are used.
The origin of the absolute coordinate system of the drawing is always at the lower left point of the format's overall frame.
When creating a new view, the user can specify the position of the coordinate system of this view.
The origin of the fragment's coordinate system does not have such a clear reference as in the case of a drawing. Therefore, when a new fragment is opened, the origin of its coordinate system is automatically displayed in the center of the window.
For ease of use, the user can create an arbitrary number of local coordinate systems (LCS) in the document and quickly switch between them.
9.5.2. Local coordinate systems
When working with a drawing or fragment, you always use a coordinate system in which the position of objects is specified. To display and enter coordinates, special fields are provided in the Current Status Line.
KOMPAS-GRAPHIC LT uses right-handed Cartesian coordinate systems.
The origin of the absolute coordinate system of the drawing is always in the lower left corner of the format. For a fragment, the concept of an absolute coordinate system does not make sense (there are no obvious dimensions, as in the case of a drawing), so the origin of the coordinate system when creating a new fragment is displayed in the center of the window.
However, using default coordinate systems is not always convenient. When designing, situations constantly arise when you need to measure distances or angles from some point or object in the drawing field. When working on a drawing board, the designer moves the rulers to the desired point and constructs from it, turning the rulers if necessary.
In a similar way, you can work in KOMPAS-GRAFIC LT using local coordinate systems (LCS). By assigning a LCS at the required points of the designed part or assembly, you can quickly select any of them and make it current. In this case, all coordinates will be calculated and displayed in this current system. For example, you can set the local coordinate system to the center of the end of the designed body of revolution.
For ease of search and selection, each LCS can be assigned a unique name. Once the LCS is no longer needed for work, you can quickly remove it from the document.
Management of LSCs created in the document is carried out using a special dialog. To call it, select the Local CS command in the Tools menu or click the Local CS button in the Current Status Bar.
Button Local IC
You can change the parameters of any existing LCS. To do this, select its name in the list, and then set the desired values for the coordinates of the starting point, the angle of inclination of the axes, and the name.
To proceed to creating a new LCS, click the button New.
If you need to set any LCS as the current one, select its name from the list and click the button Current. To perform the reverse operation - canceling the action of the LCS as the current one - click the button Cancel.
If you need to delete a LCS that has become unnecessary, use the button Delete.
To remove a local coordinate system that has become unnecessary from a document, do the following.
1. Select the command from the Tools menu Local IC or click the button Local IC V Current status bar.
2. In the dialog that appears, select the name of the LCS that you want to delete from the list. You can specify multiple coordinate systems for simultaneous deletion.
3. Press the button Delete. The name of the destroyed LSC will disappear from the list.
4. To exit the dialog, click the button OK.
Questions for self-control
1. Name all the elements of the main program window.
2. Specify the order in which text parameters should be configured.
3. Name all the methods of binding.
4. Set up dynamic tracking of bindings.
5. Indicate the sequence of constructing a tangent to a circle, to two circles.
6. Delete part of the circular arcs in the drawing.
